
Hello, and welcome to another (new) article! Today I am trying something new. As you may have heard, the latest batch of releases came out a week or 2 ago. I started working on my traditional reviews but only got through halfway of the Headsman’s Curse before things got in the way. By the time I finish writing about everything, the articles will no longer be relevant!
Therefore I have decided to try something new: Dexamples. Basically, I will give you some example decks you can use (for Championship, sorry, Nemesis!) and do a quick review of them. Alright, let’s see how this goes!
For the Headsman’s Curse, I will provide 2 Dexamples: one deck focused on the Wielder, on one deck focused on invading enemy territory.
DECK 1 – LEADER-CENTRIC

This first example is a really leader-centric deck. Here is the link to underworlds.db, where I made the deck. For this one, I am using Tooth and Claw. You may notice that the power cards are 11/11 instead of 10/10 as usual. This is just personal preference, I believe all the cards here have a big impact, but if you like 10/10 more, I would recommend dropping Mighty Swing and Swift Judgement.


Leader Surges – Embraced Savagery, Quick to Judge, Carve a Path, and Off With Their Head! all require your leader to be alive. Embraced Savagery just needs your leader to get his second kill while savage, which should be easy.
Quick to Judge needs your leader to be alive simultaneously as 2 enemies with Condemned counters, another relatively easy surge.
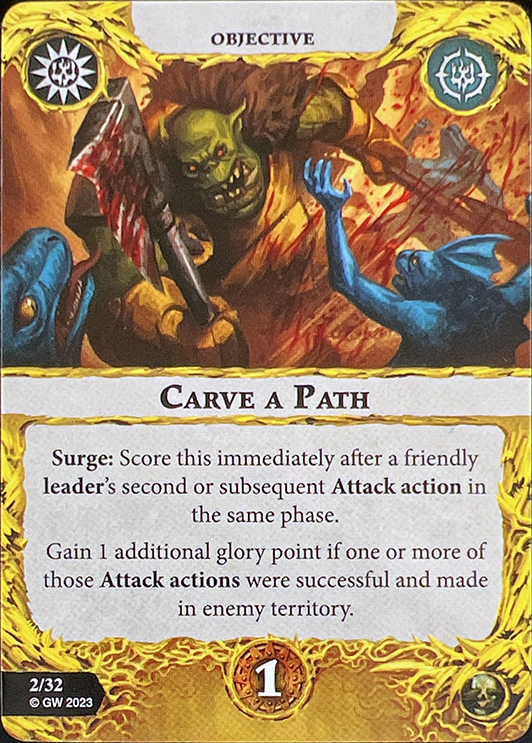
Carve a Path can be played multiple ways but is potentially a 2 glory surge. It is actually the hardest objective (I believe) cause of your leader’s lack of range to be able to hit multiple people without charging.
Finally, Off With Their Head just needs your leader to get a kill. Pretty simple. For Leader Surges, just kill with your leader, and you should be good.

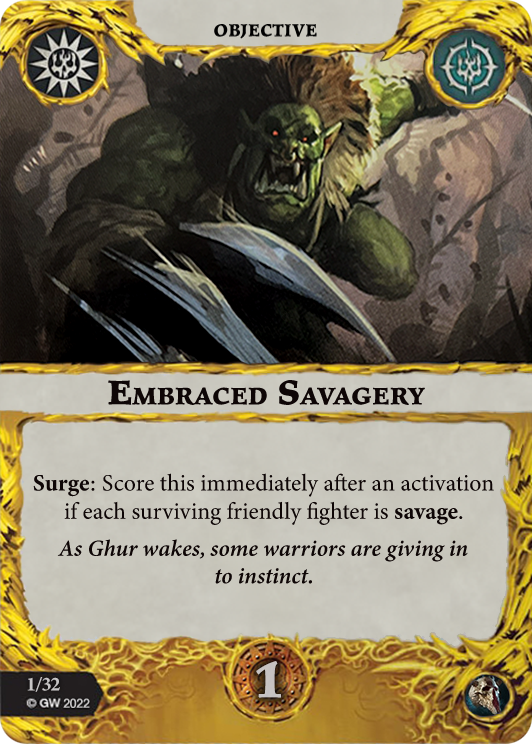
Other Surges – Loyal Allies and Embraced Savagery are your other 2 surges. Loyal Allies is scored for rolling a single or double support and having it count as a hit, while Embraced Savagery needs all your fighters to be savage. Since you Chainrasps are actually really good supporters (and there being a lot of +1 support tech in the deck), Loyal Allies should be fairly easy, especially since the attack does not need to hit.
Embraced Savagery needs you to dedicate a round to getting everyone savage, but it should also be fine. It’s also your only passive glory surge, which might be problematic since it’s the only way to get glory without engaging in enemies.


Leader End Phases – Focal Point is scored when you have your leader in enemy territory within 2 hexes of fighters from 2 different warbands. This is pretty easy since your leader needs to be in the fray, and you need to have some Chainrasps with him as well.
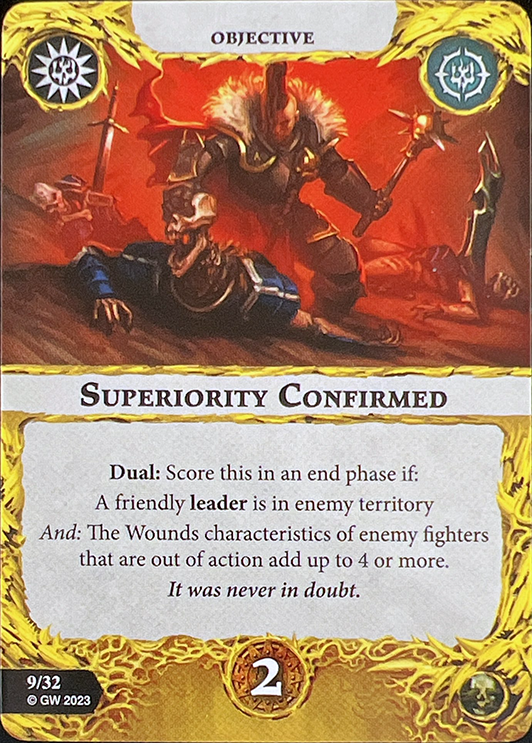
Superiority Confirmed is harder, needing your leader in enemy lands and having 4 wounds worth of enemies out of action. While your leader does do 4 damage per hit when inspired, it might be hard to do Round 1 but gets easier later.
All Rise is technically a leader end phase, requiring you to either have 2 fighters with Raise counters (revived by Terminus) or one Raised fighter and one dead enemy. The second condition is really easy, but the first is doable as well. Overall, for leader end phases, you need to get into enemy territory and do stuff there.


Other End Phases – Basket of Bonces is achieved when you have 2 dead enemies. It’s basically a kill 2 get 1 free objective, just to get even more rewards for what you already plan to do.
Judge, Lest Ye Be Judged is a Move or Die clone; just BE CAREFUL of reviving Chainrasps when you have this, as they will need to get a token to help score this. This can potentially screw you over as well, as you might need to abandon your leader and move some little Chainrasp in the back to score this. In cases like these, just ignore this objective. It’s only 1 glory, while your leader is far more important.
Tools of Death is achieved when you have 3 friendly fighters with an upgrade. It’s passive glory, which is sometimes needed, and it’s 2 glory as well. It’s difficult Round 1, but it should be fine late game especially cause your leader can resurrect people, meaning it’s easy to have 3 fighters alive.


Stay Alive Gambits – Healing Potion is a classic, allowing you to potentially Heal 2 someone (hint hint it’s the guy who this deck is based around). As your leader REALLY needs to stay alive I recommend saving it for him.
Death’s Soldiers is a really annoying Death card, allowing you to receive -1 damage at some point in the round. This can come in clutch; once again try to save it for the leader.
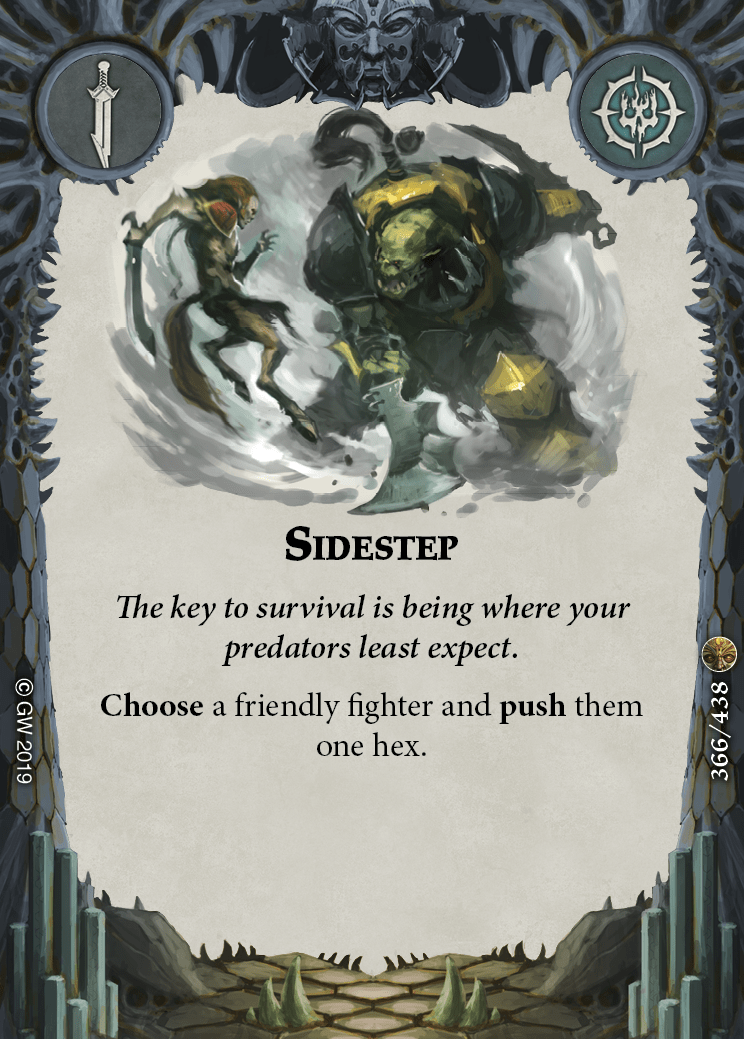

Pushes – There are 2 of them, Sidestep and Call to Heel. Both are used in cases your leader needs to get closer to an enemy because they are out of Range, or to get out of trouble. Or something else, but those options are why I put them in.


Support Gambits – Unexpected Ally gives a friendly fighter additional support till they make their next attack. As you need supports for Condemned counters, this is really good. Also, the support is a nice accuracy buff.
Helping Hands is the same as Unexpected Ally, except it affects all friendlies and persists for 1 activation.
Hold Them Still! is like Blindside, allowing you to move another friendly fighter adjacent to an enemy after a friendly fighter makes a move action. This can provide some clutch support and in the Bearer of the Block’s case, can also provide Cleave.


Condemning Cards – Roaming Witness can also be used as a getaway vehicle but can do some MASSIVE Condemns (in the unlikely event that all enemies decide to group up in one edge hex).
Condemned, Step Forward is also a really good Condemning card, potentially providing double Condemnations in one power step. Or it can be used to move enemies around.


Other Gambits – Mighty Swing is used to achieve some hilarious group one-shots with your leader or just to kill 2 enemies in one swoop. Point is, it can be really useful. If you don’t like Mighty Swing, you can bait with it by playing it and watching your opponent burn all their pushes to get away.
Finally, You Must Serve is a revive card. Revive cards that don’t have nasty side effects are always nice, and this card is most of the time one of them.


Damage Upgrades – Great Strength is THE damage upgrade, just giving you +1 damage. While you usually won’t be needing it, there are some cases where you do, and it can enable your Chainrasps to maybe cause some trouble as well.
The same goes for Gloryseeker, except it is a bit more limiting, as it only applies if the enemy has 4+ wounds. You can use it to help kill Large fighters for your leader or once again enable Chainrasps.


Accuracy Upgrades – Gifted Ferocity provides a much-needed +1 dice to your leader, enabling him to get 3 hammers, which is REALLY accurate. It can also be given for free after a kill.
Deaf to Mercy gives someone Ensnare something really nice but can also be swapped for something else. Since your warband already has cleave due to the Bearer of the Block, this can potentially lead to a Cleave/Ensnare attack.
Guided Blows gives you a re-roll in attacks. Kind of like a +1 dice but a little bit worse. It’s still really good accuracy!


Support Upgrades – Ever-Hungry Fiend gives a fighter additional support if you are adjacent to the target. Due to your leader’s Range 1 attack, this is pretty much always going to work for him. This also allows you to receive more Condemned counters, which is always great!
Lurking Crony allows Chainrasps to support adjacent fighters in attack. On the Bearer of the Block, this is really good since it also gives Cleave, but it works on any Chainrasp. This makes it much easier to gain support as well, so more Condemned counters.


Defensive Upgrades – Enduring Executor is a +1 wounds, the best part is you can give it to your leader without making him Large since he already is!
Ethereal Immunity lets you count double supports as successes in defense, which is really good for 2 Dodge warbands like this one.
Job Satisfaction lets you get a Guard token after any attack the fighter with the upgrade makes. If combo-ed with Ethereal Immunity, you count everything but Single Supports as success! If all of these are given to your leader (which I recommend), he becomes REALLY hard to kill.

The One Other Upgrade – Swift Judgment is included for a more aggressive Condemned counter generation. It’s one time use, but that is fine, as it also gives you +1 Move which is also helpful to reach other areas or fighters, as there are fighters who can hide from a 5 Move Flying executor apparently. Not anymore!
Strengths (of the deck):
+ Fun to play
+ Oneshot almost anything you hit
+ High glory generation
+ High denial potential to your opponent
Weaknesses:
– If your leader dies, it’s game over.
– Activations are hard to balance between scoring stuff requiring all your fighters to do something, Condemning people with the Scriptor, and killing.
– Inspiring is pretty difficult unless you get a really good combo off at the start.
DECK 2 – MOVE AND KILL

This deck is slightly less leader-reliant, and I believe the leader-reliant deck works better. Still, this is always an option if you don’t like having one fighter who everyone relies on! Once again, I am using Tooth & Claw. Here is the link to underworlds.db.


Kill Surges – Paragon of Ferocity is a savage fighter kills an enemy in enemy territory. Since you plan on being in enemy territory anyway, this is easy.
Bound in Servitude is the Chainrasp kill someone objective, but it can also be scored if your leader kills someone and a Chainrasp supports that. This makes it slightly more flexible than Off With Their Head!
Attack Surges – Loyal Allies makes another appearance, partially due to you needing to rely on supports a lot. It’s just a generally good objective for this warband.
Quick to Judge appears again, since you will be invading enemy territory it’s pretty easy to Condemn with both cards and the Scriptor, meaning you can score this fairly easily.
Other Surges – Embraced Savagery is useful since you will need to activate all your fighters and get them in enemy territory, making it really easy to score since most of the get-in-enemy-territory actions will be charges.
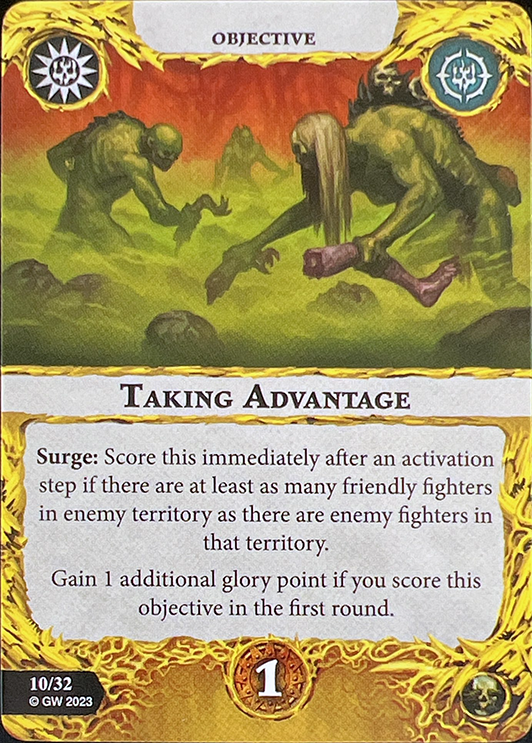
Taking Advantage is achieved when you have the same or more friendly fighters in enemy territory as enemies. It can also be scored as a 2 glory surge in Round 1, providing more glory for upgrades early on. In late game, when more enemies are dead, it will be good as well.


Invasion End Phases – Path of Death is a 3 glory objective for having 2 enemies dead and no enemies in your’s or no one’s territory. This fits your Move and Kill playstyle and is heavily rewarding.
Lengthening Shadows requires you to have more friendlies than enemies in enemy lands. This is hard Round 1, but later game it becomes much easier because there will be fewer enemies alive!
Hurricane Force is a good invasion objective, just try not to let enemies into your territory while keeping your fighters in enemy territory.
A small top for Invasion End Phases – if enemies try to go to your territory, ignore them and move to their territory. You score more glory that way and will probably force them to walk back eventually. Just don’t leave any stragglers behind; take EVERYONE in into enemy territory so they can’t attack anyone in yours.
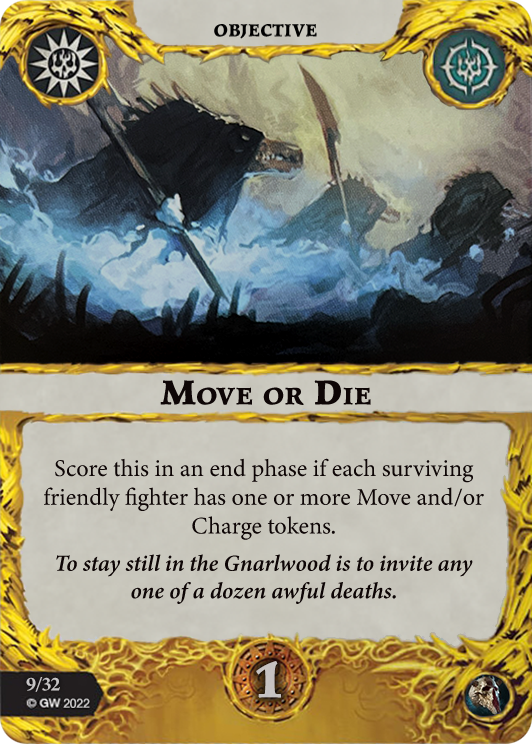
Move or Die – These objectives are clones, both scored when all your fighters have more or charge tokens. This fits well with the invade enemy territory style, and is hard to deny. Just be mindful of the fact that reviving a Chainrasp with Terminus removes the tokens!
The Other End Phase – All Rise is the only uncategorized card, and is pretty easy so I left it in. Theoretically, you can kill one enemy and then revive your guy, and score this just off that, making it technically a kill objective, which this playstyle likes.
Pushes – Sidestep is a good push, and can be used to get in or out of enemy fire and maybe even back into enemy territory if you get pushed out.
Call to Heel is more limiting but has a higher range, allowing you to push 4 hexes. This makes it harder for enemies to kick you out of their territory, but it can also be used to push enemies closer to you.
Support Ploys – Hold Them Still is used to gain extra support mid attack, so enemies don’t have time to react. This is useful for accuracy and Condemn counter generation.
Helping Hands is the same, but it doesn’t move another friendly fighter, it just gives an extra support.
Unexpected Ally is also the same, but only affects one friendly fighter instead of all of them like Helping Hands, and it persists till the next successful attack.
Condemn Ploys – Roaming Witness can also be used as a support ploy, but its Condemn generation is really helpful. It is also used to save Chainrasps from certain death by teleporting someone out of trouble.
Condemned, Step Forward is Confusion but Condemning every enemy affected. It can potentially pull off a double Condemnation, helping with inspiring.

Other Ploys – Unfair Fight is used to get off some crazy attacks, getting you Grievous for one attack and Staggering the enemy. Since you have many supporting cards and fighters, this should be fine to pull off.
Death’s Soldiers is used to be more durable. Always nice to have, especially since your leader is important to the warband.
You Must Serve is a revive ploy, reviving a Chainrasp somewhere in your territory. Not really much downside, except it might accidentally block some cards like Hurricane Force if you don’t get into enemy territory after the resurrect.
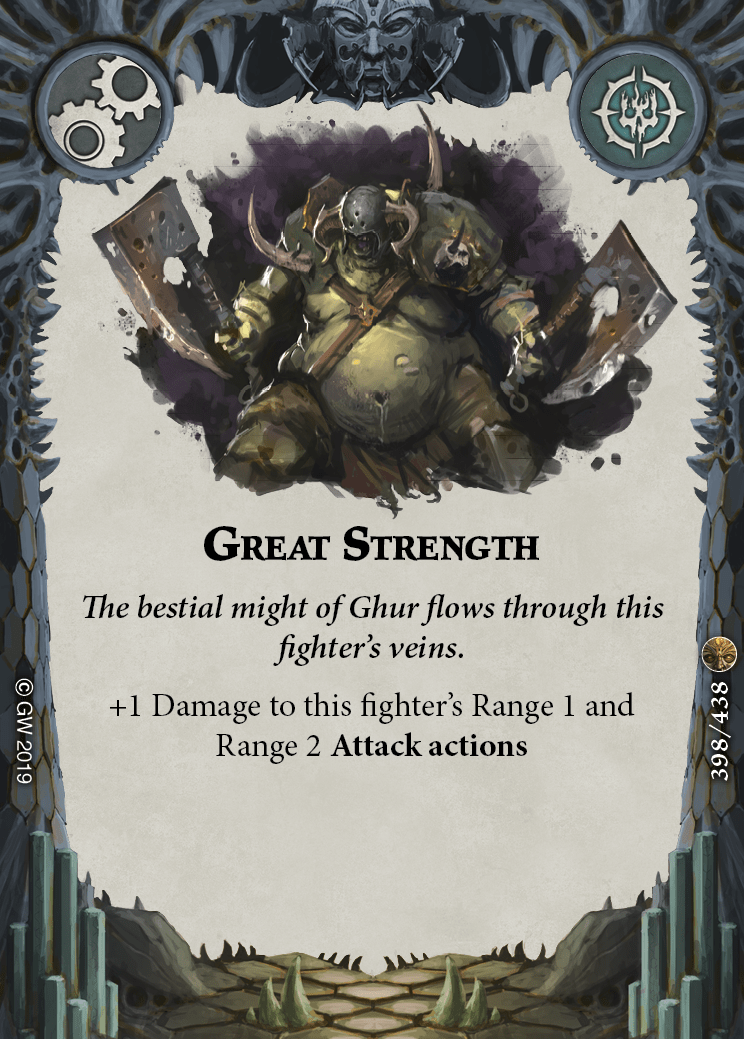
Damage Upgrades – Great Strength is the go-to +1 Damage card, letting you kill tougher opponents.
Gloryseeker is also good, and since your leader already one-shots everything with 4 Wounds, it’s a nice buff to your Chainrasps or against Large fighters.
Accuracy Upgrades – Gifted Ferocity is a +1 Dice to Range 1 attacks, since your whole warband but the Scriptor is already Range 1, this is really good. Your leader on 3 Hammers is terrifying!
Ever-Hungry Fiend gives you one extra support if you are adjacent to your target. Once again, Range 1 makes this very doable. Plus, it helps with Condemn counters, and you are planning to be in enemy lands anyway so the limitation of it is avoidable.
Guided Blows gives you a re-roll in attack dice. Again, This is a very good accuracy upgrade with little to no downside.
Durability Upgrades – Enduring Executor is a +1 Wounds, which is always nice and since you already have a Large fighter this would not downgrade your leader by giving it to them. However, the Bearer of the Block DOES become Large if he receives this so be careful.
Ethereal Immunity lets you count Double Support as a success in defense, and with 2 Dodge (which you have) this becomes a really big defense buff. No need to delve for cover hexes anymore!
Job Satisfaction gives you a Guard token when you attack, which is really good with 2 Dodge. As in the previous deck, combining it with Ethereal Immunity makes you a real pain to hit!

Other Upgrades – Cursed Boarding Pike is currently the go-to weapon upgrade, and since you warband lacks a Range 2 attack this is really good for them. Additionally, you can give it to some minions to make them serious threats as well as your leader.
Lurking Crony causes the Chainrasp with the upgrade to support adjacent fighters in attack. This is really good for Condemned counter generation and even for Cleave (cause of the Bearer of the Block), making it a fantastic accuracy upgrade (I didn’t classify it as one cause it doesn’t always affect you).
Strengths (of the deck):
+ Really rewarding if done right
+ The game does not immediately fall apart if your leader dies.
+ It’s easier to balance activations out between killing and moving.
+ Deck gets easier to play the farther into the game you go, since all your fighters will be in enemy territory by Round 3.
Weaknesses:
– It’s really easy to get denied a lot of objectives.
– Does not really work well in a BO3 game.
– Is countered by swarm warbands, since they outnumber you in their territory.
And that’s it! If you liked or didn’t like this new article type, please leave me some feedback on Discord (VintroV2#0001) or Twitter. I think I will finish this batch of releases with the Dexamples format. Thank you for reading, and I hope to see you again soon!
