Hello! Both Michael and Ben here. Today we will be discussing the kill priority for each warband. A common question any Underworlds player asks is ‘who should I be killing first?’ Today’s article aims to address this common question!
Due to the large quantity of warbands in the game and the not so large amount of screen space people have, we have elected to split this article by Grand Alliance. Today we will start with Order. Soon(ish) we will have the Destruction article coming out as well, and the rest will follow!
Before we start, a quick disclaimer:
Please do NOT go for the kill order in the article in every single case possible. There are always exceptions to the proposed orders below. If going for Ardorn will cause you to lose your strongest fighter, but going for Farassa will let you end on an objective and score Supremacy, please go for Farassa!
Bottom line – don’t blindly apply these suggestions, make sure to consider your position first. This is meant to be a ‘tiebreaker’ kind of list if you have multiple targets 🙂
Let’s begin!
The Farstriders
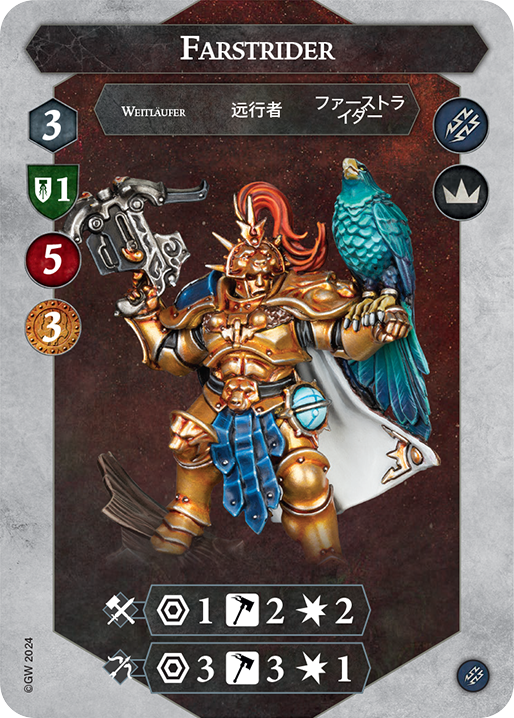
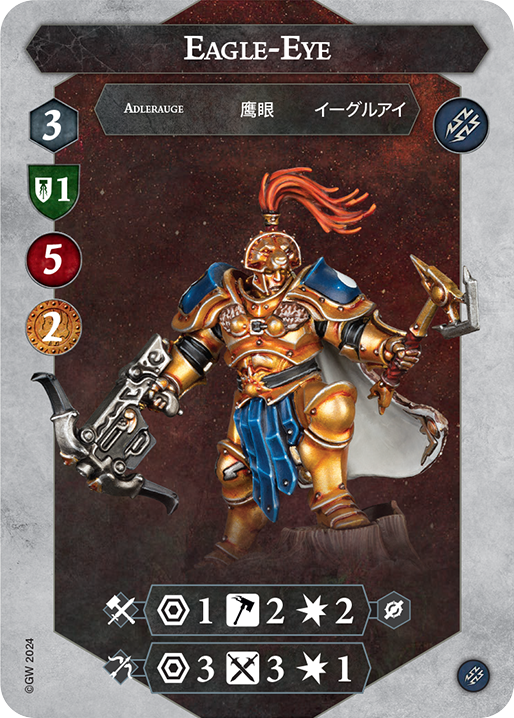

Michael: It is pretty clear that the first fighter to die in the Farstriders should typically be Almeric Eagle-Eye. This is mainly due to his Grievous on his Inspired side. Additionally, he is tied with Farstrider himself for the most accurate melee attack in the warband when uninspired. This makes him a big threat if he ever does get into melee range, making him a huge priority target.
Ben: I agree with killing Almeric first. Grievous is scary, especially on three hammers, and with the option of using brutal for even more accuracy, he can rip through your warband very quickly.
Michael: Typically, you’ll be wanting to go after Farstrider himself second. This is because when inspired, he is the most accurate fighter in the warband. Another nice bonus for getting rid of the leader is his juicy 3 bounty. Cases where you want to focus this fellow first are where Eagle-eye’s 3 damage is not scary for your warband, such as the Briar Queen. This is because Farstrider has the most accurate ranged attack, allowing him to take out your low-wound fighters more efficiently.
Ben: I also agree with Farstrider dying second. 3 bounty is huge and having the most accurate attacks is also threatening.
Michael: Last on the chopping block is Elias Swiftblade. He’s not as threatening as the other two. He’s basically a carbon copy of Farstrider, just a little less accurate. Obviously, a great exception to this rule is if your warband is affected by his Cleave when he inspires. I would recommend going for him second in this case.
Ben: That leaves Swiftblade for the longest to live. He hits on 4 swords, which is not as accurate as the others and only gives 2 bounty.
Here is a quick summary of the above:
General Order: Eagle-eye, followed by Farstrider, followed by Swiftblade.
Low wound count warbands: Farstrider, Eagle-eye, Swiftblade.
Shield-heavy warbands: Eagle-eye, Swiftblade, Farstrider.
Thundrik’s Profiteers
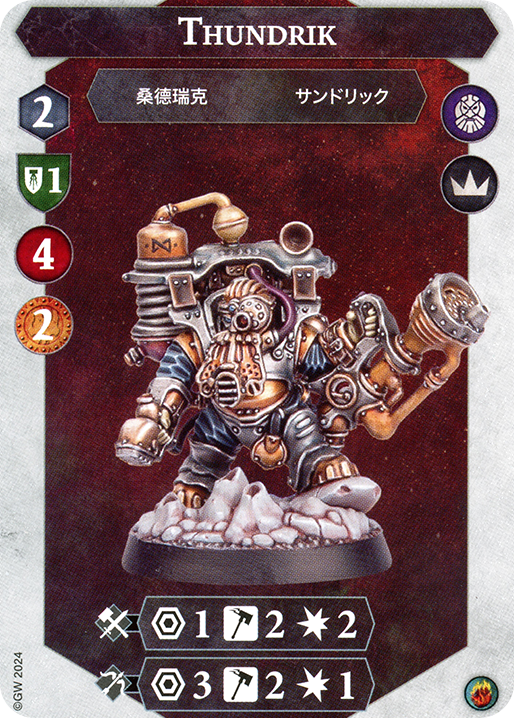
Michael: Thundrik’s are a complex warband to determine kill order for, due to their inspire mechanic being reliant on the leader… who himself isn’t the deadliest.
Michael: Your first target is 100% Thundrik himself. He has 4 wounds and is super tanky when inspired, not to mention the rest of the dwarves can’t inspire if he dies. He also gets Cleave on both of his attacks, as well as having a large presence on the battlefield due to the Atmospheric Isolation ability.
Ben: Yes, Thundrik should definatly die first. The ability to prevent the entire warband from inspiring is very powerful and should be chased.
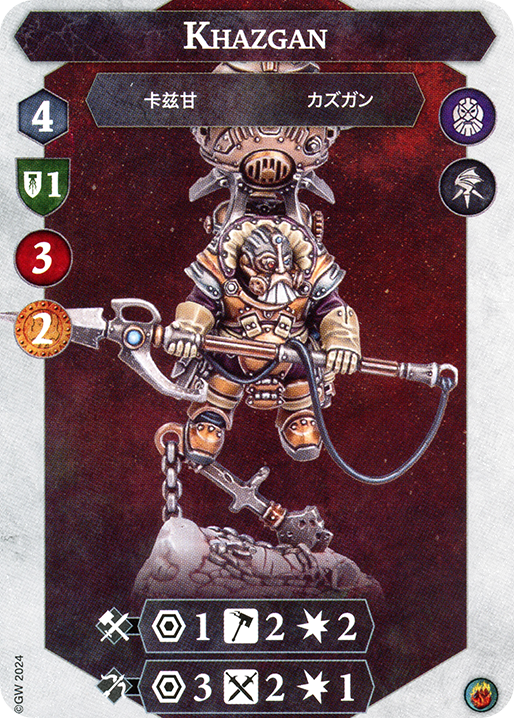
Michael: Your second target, or your first if he gets inspired, should be Khazgan Drakskewer, aka the ballon fellow. First of all, he is the fastest dwarf by far. Second, he boasts a massive 3 damage which allows him to one shot most fighters with Great Strength. This makes him a major threat, and the only case you wouldn’t prioritize him is if Thundrik is still alive and there are no inspired dwarves.
Ben: I agree with this one! Drakskewer does a lot of damage, has the highest movement speed and gives two bounty. Get rid of him while you can
Michael: Your third kill should generally be on Garodd. This is mainly due to his attack being the most damaging in the warband other than the above fighters. He doesn’t have a strong ranged attack but it is a usable ranged attack which creates threats around the board.
Ben: I also believe Garodd should be killed third. He is the only 2 damage fighter remaining and two hammers on the ranged attack is still pretty good.
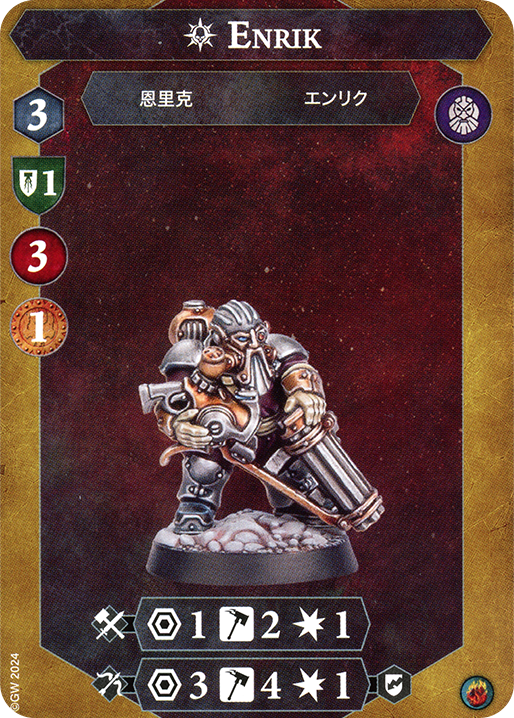
Michael: Lund is typically going down 4th due to his outstanding shooting skills. However, he only ever does 1 damage without Grievous which makes him annoying at most.
Ben: I think that Enrik should die fourth as getting a reroll on each attack from his Stagger is very good.
Michael: Finally, the only Staggerer in the warband, Enrik Ironhail should get killed last. He is basically Lund but instead of 4 range he has 3 range and Stagger. If you are more scared of Stagger than the Range 4 on Lund, go for Enrik before Lund.
Michael’s Order: Thundrik, followed by Drakskewer, followed by Garodd, followed by Lund, ending with Enrik.
Ben’s Order: Thundrik, Drakskewer, Garodd, Enrik, then Lund.
After inspiration: UNInspired Thundrik, then Inspired Drakskewer, then the same order as usual.
Ylthari’s Guardians

Michael: All fighters in Ylthari can pull their weight due to their warscroll. This one is difficult to analyse, but here goes!
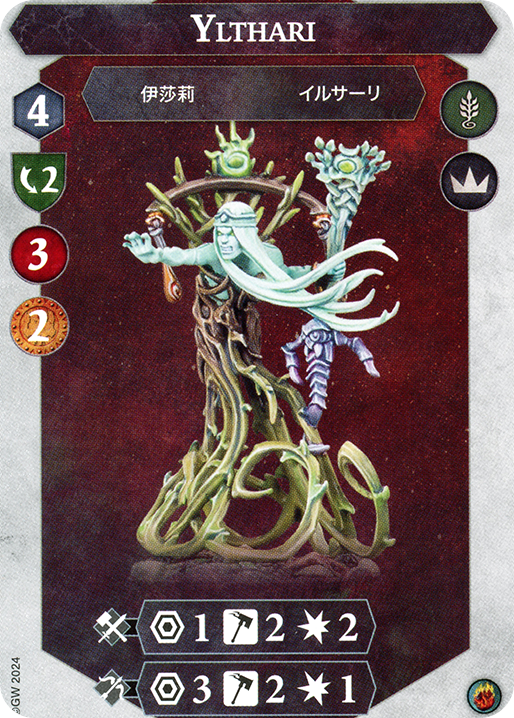
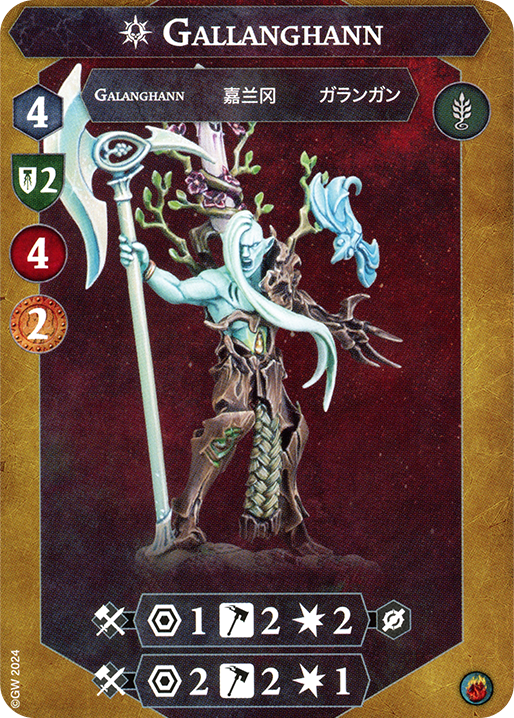
I’d argue that the first fighter to die should be Gallanghann, mainly due to his 2 shields when Inspired as well as his 2 range. However, if you are a warband that relies on your dodges, always target Skhathael first. This is due to his Ensnare that will destroy your warband.
Ben: I’d argue Skhathael goes first due to the Ensnare and very accurate attack that he possesses.
Michael: Second, I would argue that Skhathael should go down. This is because of his high accuracy as Ben has stated and due to his 4 wounds and lower Save than Ylthari. For dodge heavy warbands, since Skhathael dies first, I’d argue Ylthari is your second priority as she is the most accurate in the warband and can get through your defenses better.
Ben: I would put Ylthari, due to her accurate melee attack and lower wounds and Save than Gallanghann.
Michael: Ylthari is definitely third. She doesn’t gain Save dice when inspired so she should still be kind of easy to kill… she is also definitely scarier than the archer. Dodge-heavy warbands will want to kill Gallanghann here because he is the only scary fighter left.
Ben: I’ll say Gallanghann is 3rd due to having actually accurate attacks and giving 2 bounty instead of the 1 the archer gives.
Michael: Both Ben and I agree that the archer is definitely the tamest fighter in the warband. Turns out 2 swords is not the best attack in the game, and her Range 4 attack isn’t that scary as it seems.
Michael’s Proposed Order: Gallanghan, followed by Skhathael, then Ylthari, and ending with Ahnslaine.
Ben’s Proposed Order: Skhathael, followed by Ylthari, then Gallanghann, and also ending with Ahnslaine.
Dodge-heavy warbands: Skhathael, followed by Ylthari, then Gallanghan, ending with Ahnslaine.
Ironsoul’s Condemnors


Michael: Ironsoul’s have a complex order.
At first glance, Brodus seems like the obvious choice, and in general, he is. However, Brodus is the only one who does not get 2 shields upon inspiration. This means that a warband who lacks accuracy but has damage like the Grymwatch will want to focus some of the Shield Aetherics first, Ironsoul preferably.
Ben: I’d say Brodus goes down first because he has a very accurate and highly damaging attack that can get more accurate the longer he is alive. What’s better than dealing 3 damage on 3 hammers? Dealing 3 damage on 6 hammers!
Michael: I’d say Ironsoul is second due to her Cleave. She also nicely has 3 bounty. Unfortunately, she does get 2 shields when inspired which means she is quite hard to take down.
Ben: I’d also agree with Ironsoul here. Cleave is scary and getting 3 bounty from the kill seals the deal for me.
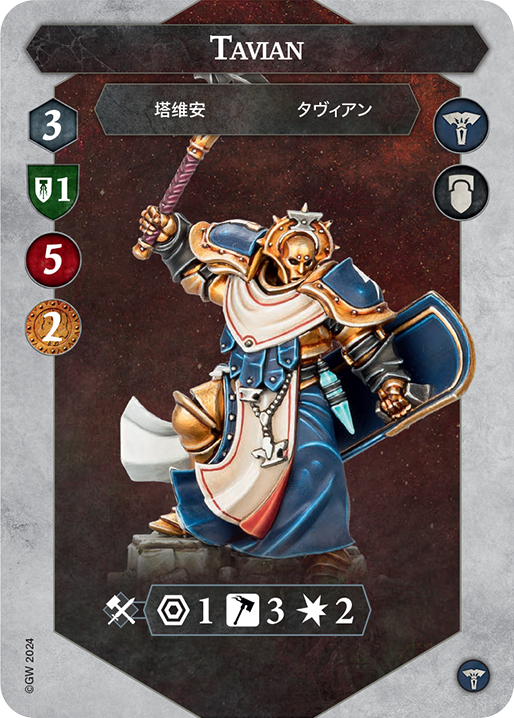
Michael: Taviann is the only guy left so kill him, I guess. If your warband has no shields you may consider killing Taviann first but there’s always a chance you may go on guard and Ironsoul just Cleaves through your shields… yeah. Rarely you should focus Taviann. Unless of course, you are a high damage swarm warband who is scared more of the 2 shields than of Brodus’ 3 damage.
General Order: Brodus, then Ironsoul, then Taviann.
High damage swarm warbands – Ironsoul, Taviann, then Brodus
Myari’s Purifiers
The 4 high elves are similar to the 4 tree elves… but let’s see in more detail!
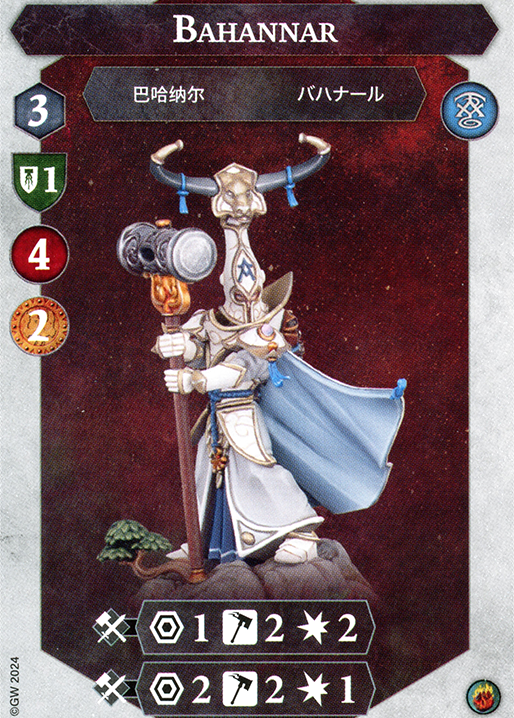
Michael: Bahannar is almost always the most scariest fighter. What may put you off killing him early and first is mainly if he gets inspired super early on. This is because he gets 2 shields, which is an absolute PAIN to hit, much more several times! If he does get to 2 shields before he is in one-shot range, you may consider focusing someone else first.
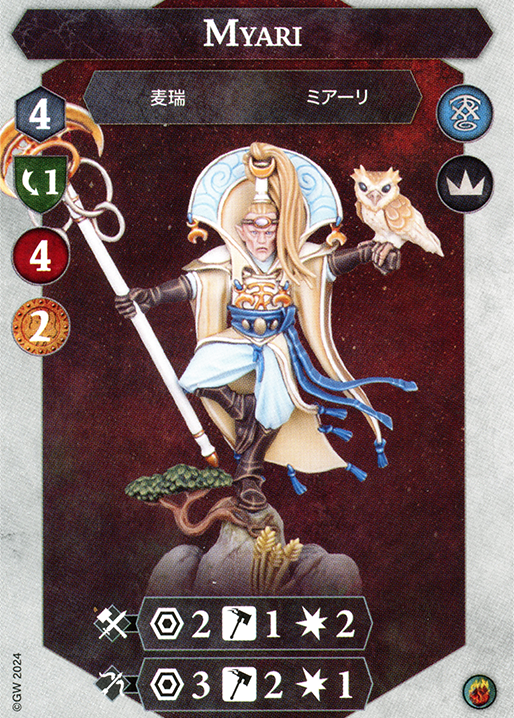
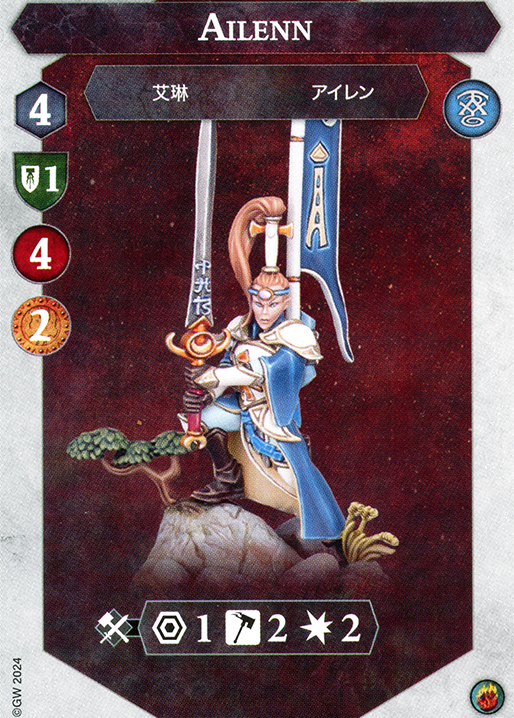
Ailenn is generally the second most scary. She is hyper accurate due to her Aetherquartz token giving her Flanked on all her attacks. However, she doesn’t do 3 damage baseline as Bahannar does. This means warbands that rely on their high defense like Thorns may consider killing Ailenn first and Bahannar later. There are also cases for killing Myari second, mainly if your warband consists of Range 1 heavy fighters who want to brawl (like the Krushas). This is due to Myari’s superior Range 2 attack dealing 2 damage. Ailenn will charge into you, but Myari will not!
Myari is definitely a strong fighter but outstatted attack-wise by the other 2 elves above. This means he is typically going down third. Once he burns his Aetherquartz he becomes really easy to hit, so keep that in mind! He may sometimes be easier to earn bounty from than others. His main power comes from his 2-2-2 attack when inspired which may be scarier for some warbands than the Range 1 threat of Ailenn, so consider how big of a threat is the ranged damage for you. Melee warbands will want to kill Ailenn 3rd, as she is a much bigger threat than the archer, even though the archer can always damage you. Senaela just does not do enough damage to be a threat!
Finally, just like in Ylthari’s, the archer dies last. Yes, she can get 5 range at 3 hammers, but that’s pretty much it. She can consistently hit you for 1 damage from almost anywhere but it’s rarely ever going to be more than 1, making her not a big threat.
General Order: Bahannar, then Ailenn, Myari, and Senaela.
High Defense, Low Wounds Warbands: Ailenn, Bahannar, Myari, Senaela
Brawl-heavy Range 1 Warbands: Bahannar. Myari, Ailenn, Senaela.
Hexbane’s Hunters
Michael: Hexbane’s Hunters can’t really pose that big of a threat individually, but they do get stronger the more of them die, so kill order is really weird yet important here.
A case can be made to kill Brydget first. Brydget is the only Agent Azyrite (Sidenote – love the name change from hunter to Agent) who gets defense when inspired. This means that it’s actually a good strategy to kill her while she’s the least-tanky fighter in the game. This is obviously a risky strategy as it inspires another stronger Agent, but still, worth trying! If you aren’t a risk taker, I’d go for Hexbane first. He has a strong melee attack and a really good ranged attack, and gives 2 bounty. This makes him very worth killing if you want to play it safe.
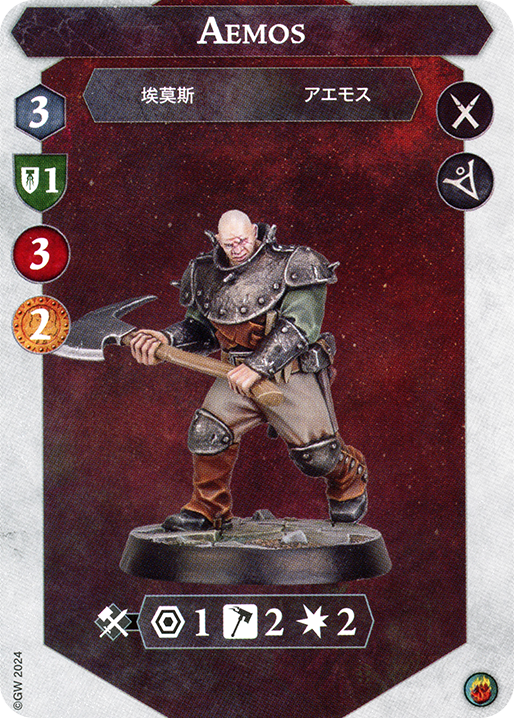
In the ‘risky play’ department, second up should be Hexbane. This is mainly due to the same reasons as mentioned above coupled with the fact that he is likely inspired now. In the safe play area, Aemos is probably the biggest threat to your warband after Hexbane. He had a really strong melee attack and while he no longer had Woodcutter’s Strength he is still a capable fighter. He also had the least defense except from Brydget/the hounds uninspired.
Risk takers would want to kill Aemos here for the reasons listed above. Safe players would want to kill Brydget, as she can do 2 damage without Grievous unlike Pock. If Brydget isn’t inspired, she isn’t as big of a threat, but then is also super easy to kill, so might as well take the free bounty!
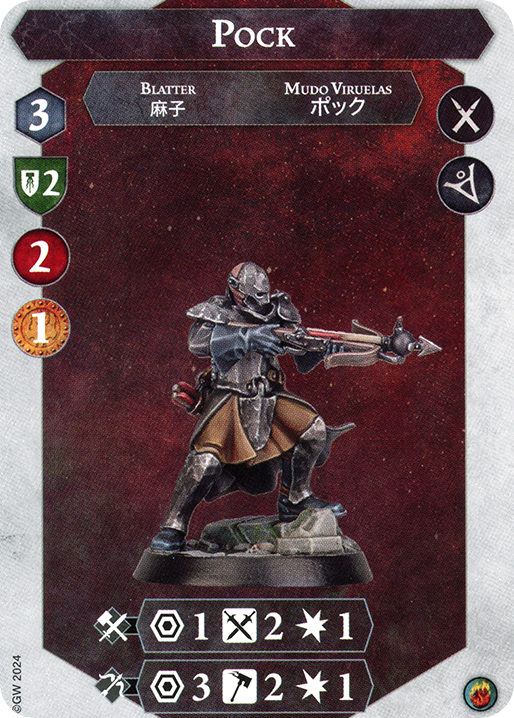
4th death is often times going to be Pock for both risk-takers and safe players. This is mainly due to the fact that by the time you get to this stage, Pock’s 2 shields shouldn’t be as scary due to you hopefully having some extra accuracy already in play. If you do have Cleave off the bat, Pock is actually one of the stronger fighters and you may want to get rid of him early.
5th and 6th deaths are the hounds. They aren’t as scary as in the first edition because of the fact that they can no longer use their reaction with a move token, effectively making it once per round. If your opponent is playing Emberstone Sentinels or Pillage & Plunder, you may want to kill the dogs BEFORE the Agents for one simple reason – you deny them a lot of activation economy, which Sentinels and Pillage both like. If you want to play against this positioning based decks, I reccomend playing the ‘risky route’ after killing the dogs due to Brydget being 2 dodge inspired makes her hard to displace.
‘Risky’ order: Brydget, then Hexbane, then Aemos, Pock, and the hounds.
‘Play it safe’ order: First Hexbane, then Aemos, Brydget, Pock, and finally the hounds.
Anti-Emberstone/Pillage: The hounds first, Brydget, Hexbane, Aemos, and finally Pock.
Cyreni’s Razors

Michael: So I have quite a bit of experience with these fellows, but I never actually played against them…
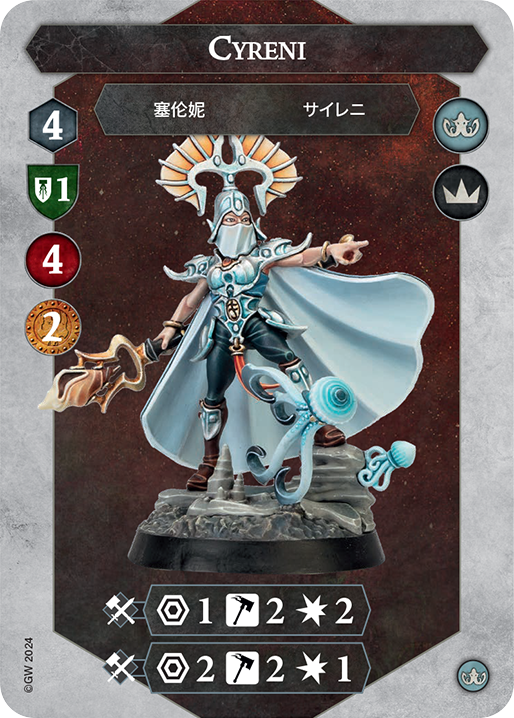
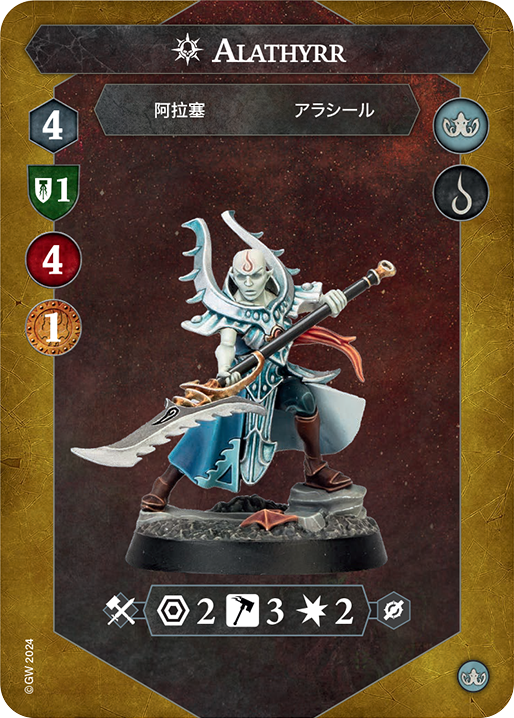
As a Cyreni player what pains me the most is if Alathyrr dies first. She has the strongest attack when inspired and can slice through most warbands if left unchecked.
Cyreni is sad to lose second, even though she typically isn’t inspired early. She has a really accurate attack as well as the most accurate ranged attack in the game, otherwise known as ‘Hammertide’.
Renglaith is kind of just the squid but more glassy. The third fighter should be either Renglaith or Cephanyr, and a case can be made for killing whoever is inspired first. However, if both of them share the same inspired status, then go for Renglaith first as he poses the threat of a Range 2 attack. If a Cyreni is playing Emberstone Sentinels, go for the squid first, as he is a valuable asset in holding tokens with Phantasmal Ink and 2 Dodge..
Finally, finish off whoever wasn’t killed in Step 3. Just a reminder, it should typically be the squid as the last one standing due to his lack of a Range 2 threat. Once again, vs. Emberstone Sentinels Renglaith is typically the least priority target.
General order: Alathyrr, Cyreni, then whoever is Inspired, and if both of them are or aren’t: Renglaith, then Cephanyr.
Vs. Emberstone Sentinels: Alathyrr, Cyreni, Cephanyr, Renglaith.
Brethren of the Bolt
The Brethren have a really unexpected kill order due to their ability to chain attacks.
Michael: For the Brethren, a major strength they have is the more of them they are, the stronger they all are, due to better Range and faster inspires. This means a lot of the time, you’ll be wanting to kill whoever you can first, and the easiest one to do so is Arcus. He is scarier than Yakob due to his Range 2.
Ben: I would argue Yakob is first because he has 3 swords and I am a 3 swords enthusiast.
Michael: Yakob is second, being the second easiest to kill.
Ben: Then for me it has to be Arcus.
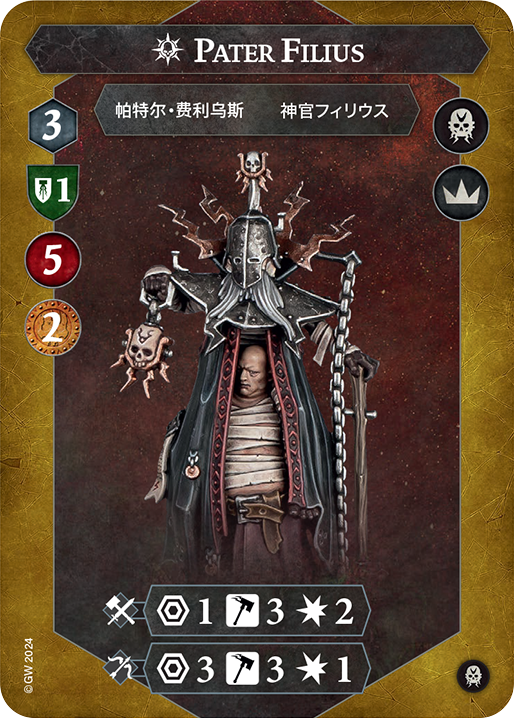
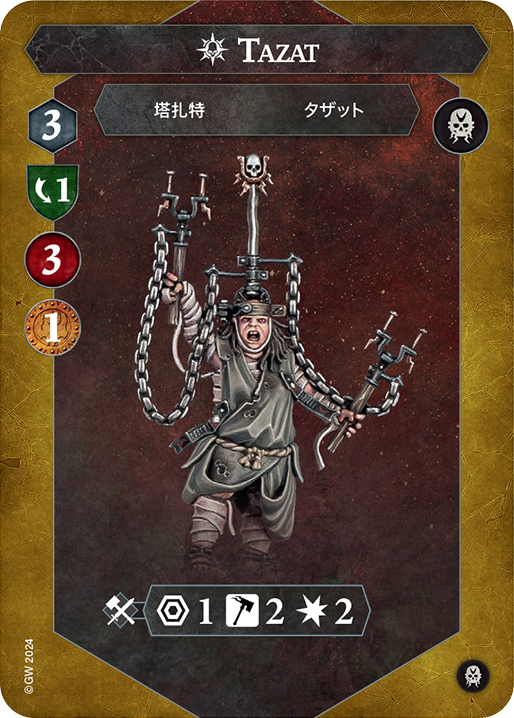
Michael: Here is where the path splits. If a Brethren player is not playing Blazing Assault or another deck with voltron capability, I would finish off the weaker ones, so the third death is Tazat. However, if they are playing Blazing Assault, third can be Pater Filius himself. This is because he is the only one left with a ranged attack, and he also has the second best melee attack. Killing him doesn’t allow the Brethren player to voltron him with accuracy buffs and Grievous. Sure, others can also be voltroned, but they are much easier to kill than the big guy.
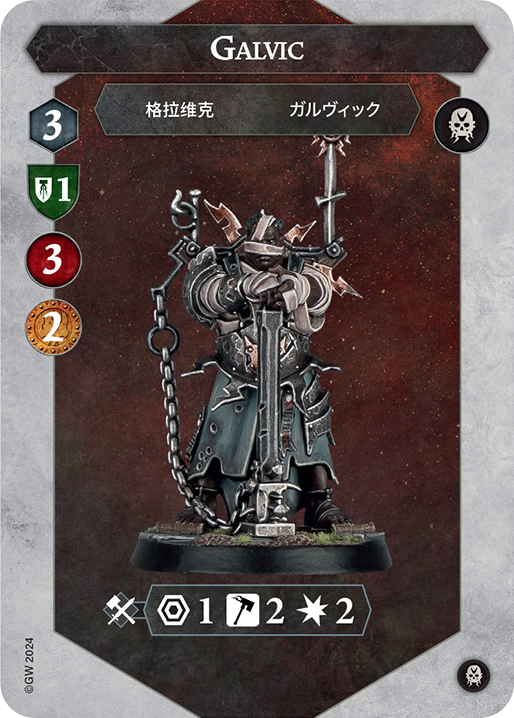
Ben: I’d argue generally you got Galvic befoe Tazat as he gives more bounty and is more scary, but is of similar difficulty to kill.
The general order will have Friar Galvic go next. This is because he is much easier to kill than Filius but is also pretty strong. Vs. a Blazing Assault player, I would go for Tazat next, UNLESS Galvic already has some scary upgrades on him, in which case go for him.
Finally, the typical order will have you whittle at Filius till he is dead last. It may not happen but it’s worth trying. Against Blazing Assault, kill whoever is left, which as a reminder is Galvic or Tazat if you already killed voltroned Galvic.
Michael’s General Order: Arcus, Yakob, Tazat, Galvic, Filius.
Ben’s General Order: Yakob, Arcus, Galvic, Tazat, Filius.
Anti-voltron: Arcus, Yakob, then Filius, Galvic (if he is voltroned), Tazat, normal Galvic.
The Emberwatch
Emberwatch have only 3 fighters so it’s kind of important to pick a target.
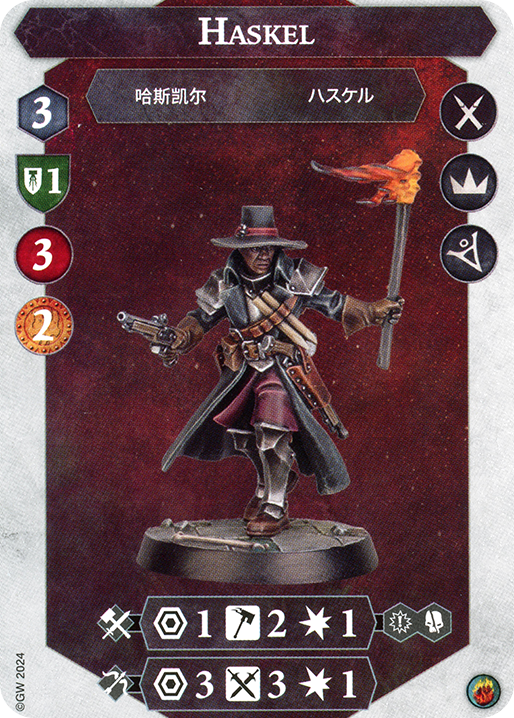
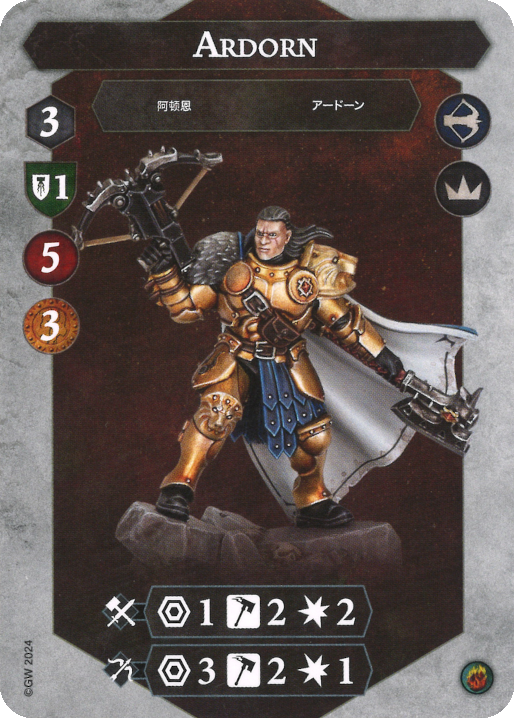
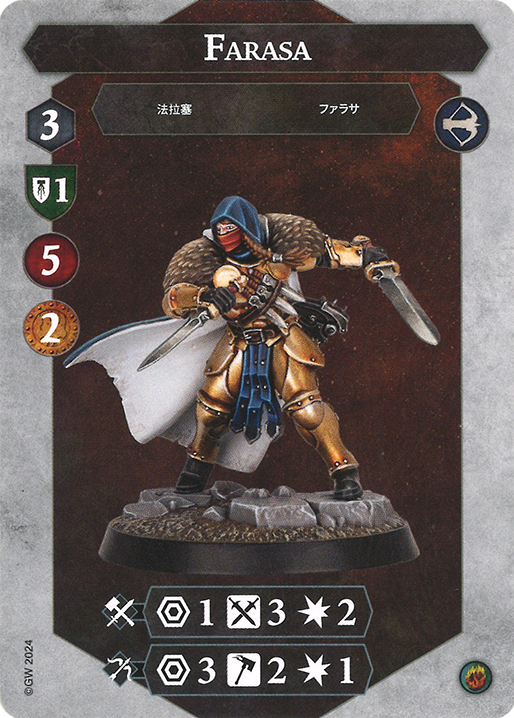
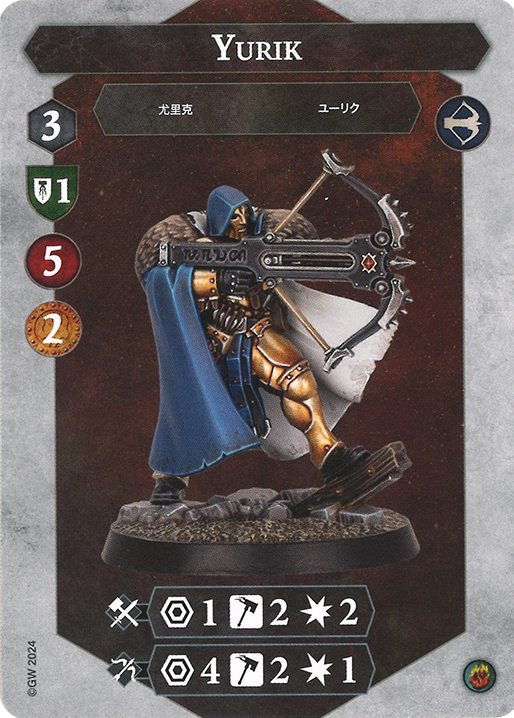
Michael: I would argue Ardorn dies first. He has the highest bounty in the warband, the best melee attack, and a really good ranged attack. Before he inspires, he is 1 Shield as well, making him a better target than when he is inspired at 2. If he Inspires early on, you may consider switching your target early to Farassa until she Inspires as well.
Ben: I agree, Ardorn. He gives the highest bounty as is not as tanky early on. Also he is the only target for Commanding Stride. Finally, he has the most accurate melee and ranged attacks.
Michael: Yurik is probably the second fighter to die, as he has a really good ranged attack and a good melee attack as well. he is also much easier to hit than Farassa or Ardorn Inspired, as he is only 1 Shield compared to their 2. Chances are, by the time Ardorn is slain, Farasssa is already inspired.
Ben: Yurik as well, cause at this point it’s likely everyone is inspired and he has the lowest defense. He also has a good ranged attack which is scary.
Michael: Farassa is the last fighter to die in general. She poses the smallest threat out of the 3, and she is hard to kill. If you killed her first as a result of Ardorn inspiring early, then Ardorn would be the 3rd to die in this case.
Ben: Then Farasa, because she is the only one I painted so she needs to be on the board the longest because she has 2 shields and the least accurate attacks.
General Order: Ardorn, then Yurik, then Farassa
Inspiration: Ardorn, Farassa, Yurik, then Ardorn if he is Inspired, and finally Farassa Inspired.
Jaws of Itzl
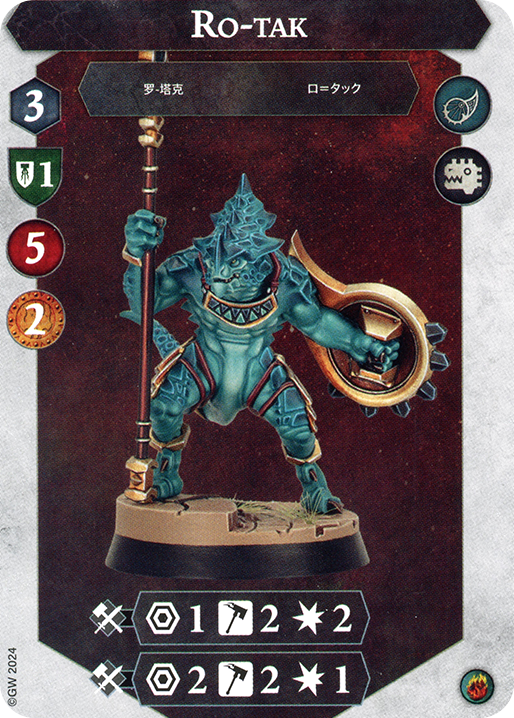
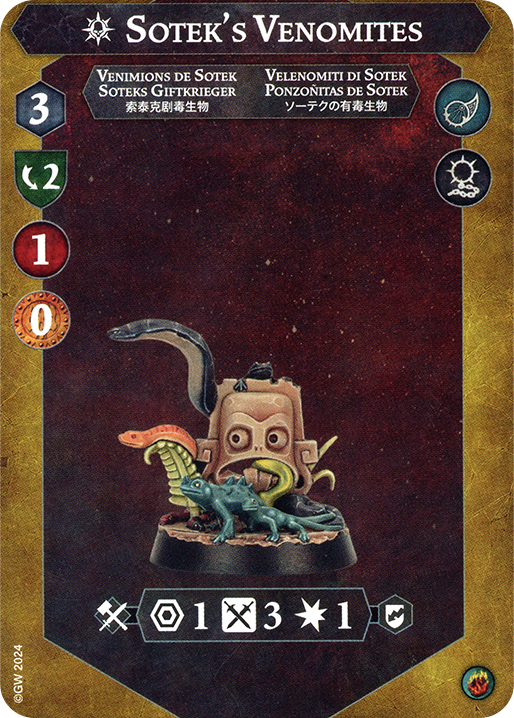
Ben is really experienced with playing Jaws and I have played a lot against his, so we have may have differing opinions here!
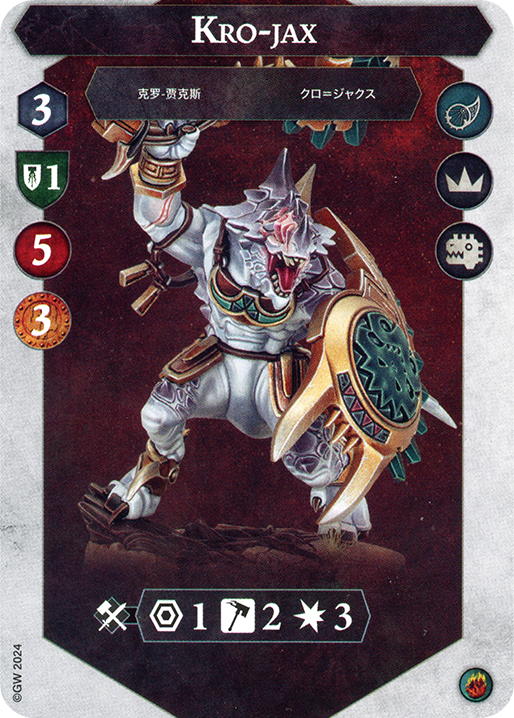
Michael: As someone who has played a lot against Jaws I just want to say Kro-jax had better die before he inspires. His 2 Shields are VERY annoying, so I try to wittle him down before he gets Inspired. If he does inspire, I like to switch target to Ro-Tak due to his ranged capability.
Ben: Ro-Tak is really annoying to lose first. This is because he is the only guy with more than one range. However, I do play a more hold-oriented Jaws, so I may be placing more value on the Range 2 than it should be. Still, So-kar can theoretically replace a lost Kro-Jax. Crit-grievous is ALMOST as good as a natural 3 damage!
Michael: If he isn’t dead yet, Ro-tak would be second. If he is as a result of Kro-jax inspiring early, I would kill So-kar next. This is because attacking a 2 Shield dino who keeps biting back whenever he defends with a shield is going to get really costly damage-wise really fast. If So-kar gets extra defense for whaetever reason, then kill Kro-jax second.
Ben: Kro-jax is second to die. This is because I couldn’t care less about losing So-kar, but when Kro-jax dies I actually experience remorse. So-kar is a replacement to Kro-jax. It’s not a good replacement, but it is A replacement.
Michael: So-kar is third, partially cause your only other target is the Venomites, who fall to literally every ping in the game. I love how Damned if You Do just makes them lose Set Explosives.
Ben: As stated above, So-kar is not the best fighter around. Maybe even consider killing Venomites first cause at least they have high defense.
Michael: And a quick note on Venomites – as I said in the third death section, they fall to any ping in the game, but just because you can ping them doesn’t mean you should. My favorite strategy is to wait till they are on an objective in the last power step, and then pinging them with Fault Lines or something similair. This prevents counterplay, which is always nice!
Michael’s order (played against them): Kro-jax, Ro-tak, So-kar, Venomites (whenever a ping is in hand).
Ben’s order (plays a lot of Itzl): Ro-tak, Kro-jax, So-kar, Venomites.
And that’s it! Thank you for reading! We hope that this article has been of at least some use to you. The next article in this series is set to be the one for Destruction. If you have any feedback or would like to discuss some of the choices we made here, you can find both of us on the Staggerers discord server. With that, we hope to see you again soon!
