Hello! Both Michael and Ben here. Today we will be discussing the kill priority for each warband. A common question any Underworlds player asks is ‘who should I be killing first?’ Today’s article aims to address this common question!
Before we start, a quick disclaimer:
Please do NOT go for the kill order in the article in every single case possible. There are always exceptions to the proposed orders below. If going for Ardorn will cause you to lose your strongest fighter, but going for Farassa will let you end on an objective and score Supremacy, please go for Farassa!
Bottom line – don’t blindly apply these suggestions, make sure to consider your position first. This is meant to be a ‘tiebreaker’ kind of list if you have multiple targets 🙂
Let’s begin!
Sepulchral Guard
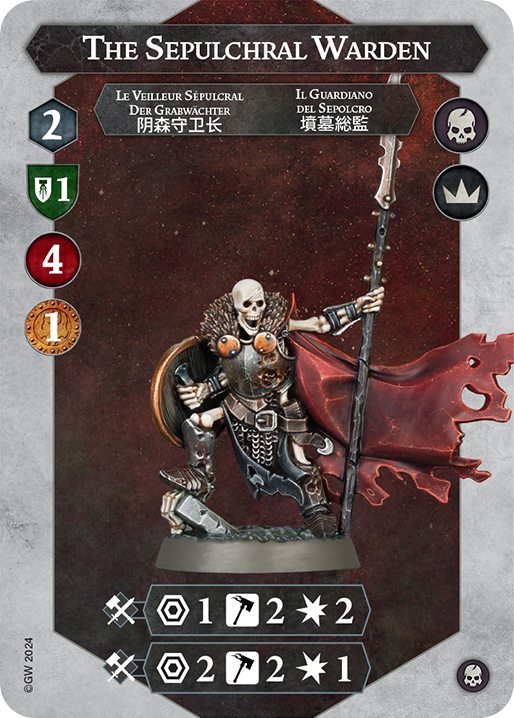
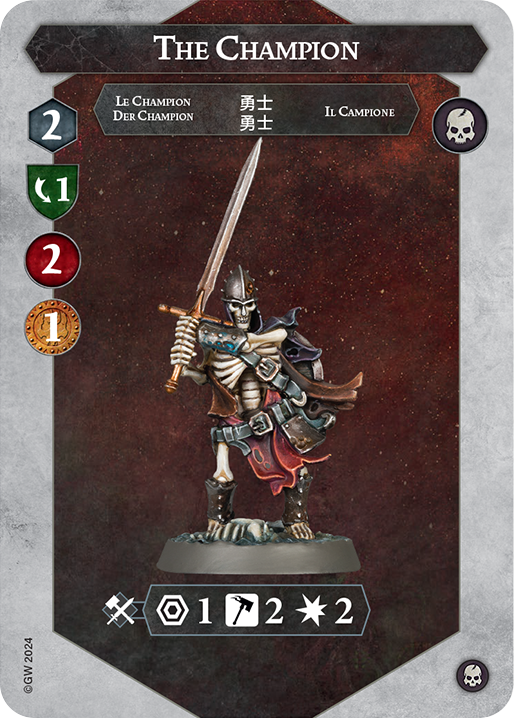
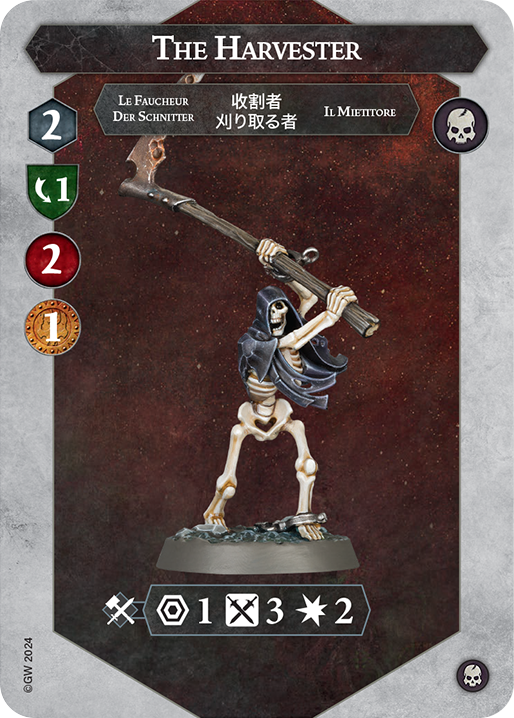
Michael: A lot of death warbands will have similar issues to the Guard where there is a CLEAR obvious target (here being the Warden), but that target is usually inaccessible. Therefore, we will omit the Warden from the rankings for now but just assume he is always a first priority.
Michael: First, I would like to kill the Champion. By killing a strong fighter the Guard player is much more likely to use an action to Raise him, and the Champ is one of the strongest fighters! Cases where I wouldn’t kill the Champ first is if you have a lot of shields, as he being raised means he gets Cleave. In this case, kill the Prince first.
Ben: I would also kill the Champion first , as he is the easiest fighter to kill with the scariest attack from the warband. Also, if your warband is not very reliant on shields, his inspiration is not scary at all, so the clear first target.
Michael: Second is going to be the Prince. The Prince gets arguably the most out of any fighter when inspiring, as he gets Stagger, which we all know is hyper busted. (jokes aside, his inspiration is probably the least impactful of all the skellies, so kill him early). If you already killed the prince, I reccomend downing the Harvester as he is already decently accurate and raising him to 4 swords is much better than raising a petitioner from 2 swords to 3.
Ben: I agree killing the Prince next. The Prince does not gain that much from inspiring and is the most threatening uninspired fighter.
Michael: Third, I would kill the Harvester. This is because as already stated, killing him lets him come back with Brutal (which is scary if you are a swarm warband, so consider killing him last in this case, and just start farming petitioners now) and +1 dice. The Harvester is already pretty accurate and making him 4 swords might not have the biggest impact. However, making a petitioner 3 Swords instead of 2 is probably going to have a large impact on accuracy! Cleave-heavy warbands would kill the petitioners here, as their 3 swords is less scary than the Champion’s cleave.
Ben: Next, I would kill the last fighter of the two damage fighters. He gains a lot from inspiring, going to 4 swords, which is the most accurate of all the skeletons. But the petitioners boost in accuracy makes a bigger impact than this skeleton and temporarily locking your opponent out of 2 damage fighters could be important.
Michael: Fourth, come the petitioners! They are all the same so the order doesn’t matter. They are much weaker and less accurate than the big skellies so make sure to not let them inspire as long as possible. It is also important to remind you to keep killing the above 3 strong skellies if it would improve your position!
Ben: The petitioners are last. The clear order is Zealous first, Rising second and Inevitable third, as the Inevitable clearly has the best model and therefore should stay on the board as long as possible.
Michael: Finally, for the alternate orders. Cleave will like to end with the Champion and swarms with the Harvester. This is because these two weapon abilities make them much more accurate when killed against the respective kill orders!
General Order: Warden, Champ, Prince, Harvester, Petitioners
Shield-heavy Order: Warden, Prince, Harvester, Petitioners, Champ
Swarms Order: Warden, Champ, Prince, Petitioners, Harvester
Thorns of the Briar Queen
Luckily, Thorns don’t have Raise capabilties!

Michael: There will be two orders here: the high damage warbands one, and the low damage warbands one. The reason for this is that low damage warbands will struggle to effectively kill the 3-wounders due to their two dodge usually requiring two attacks to hit, while for the 2-wounders, only one attack needs to go through, making it more efficient.
High damage will be starting with the Briar Queen, as she is the most threatening of them all. She is the only one to be able hit 3 Damage and has a very accurate attack. It is important to not let her inspire, so kill her off early (which can be hard) to prevent this. Low damage warbands will be starting with the Ever-hanged, as he is the best two wound fighter in the warband. He is the most accurate as well as has Ensnare.
Ben: I agree with Michael on this one. I think that the Briar Queen is the most threatening fighter and importantly has a range 2 attack while for low damage warbands the Everhanged the obvious first target is for the reasons mentioned by Michael.
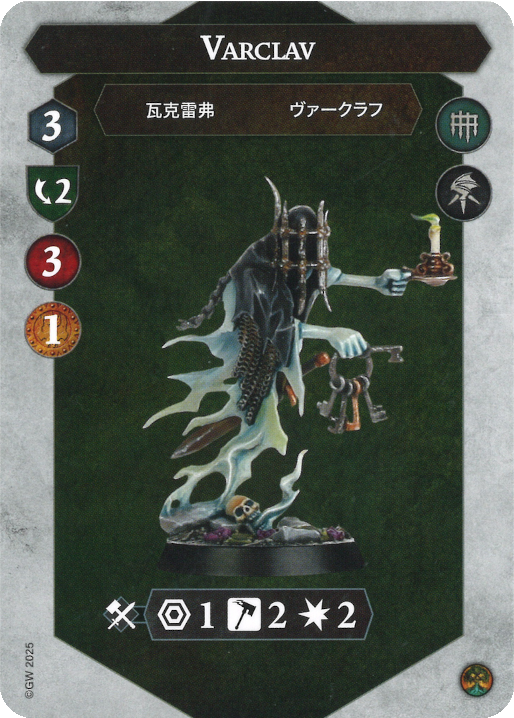
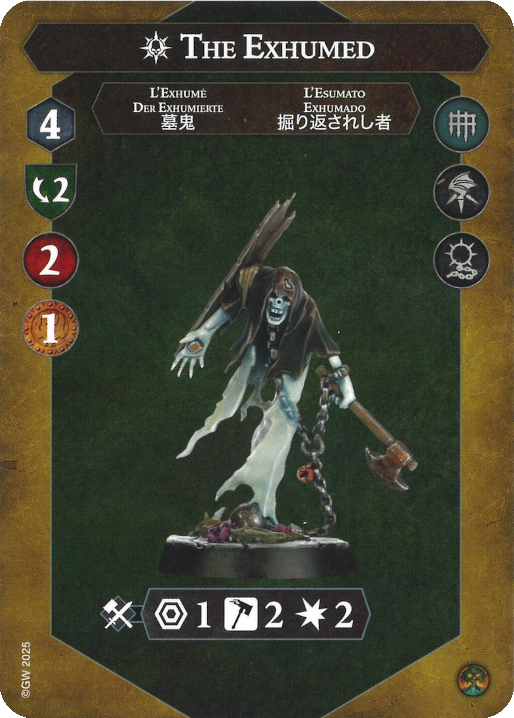
Michael: High damage warbands will kill Varclav second, as he is the most accurate one left. Not much other justification required! Low damage warbands will aim to kill either the Ironwretch or the Exhumed next, as these two are the more accurate of the chainrasps left, hitting on 2 hammers instead of 3 swords when inspired.
Ben: I agree with the high damage warbands killing Varclav second, however I think that low damage warbands would rather kill the Uncrowned and the Silenced first, as the accuracy difference between two hammers and three swords is not that big, but the boost that three swords gets with surrounded is way higher than the boost two hammers gets and the only time you will be inspiring is when you can most likely use the surrounded warscroll ability.
Michael: High damage warbands will follow the low-damage kill order from the beginning right now, so far the order is Queen – Varclav – Ever Hanged – Exhumed/Ironwretch. Next in line are the Uncrowned and the Silenced. They are less accurate than the other two chainrasps and are still two health so they are easy to kill.
Ben: The high damage warbands will now just follow the low damage guide from the top and for low damage warbands the next are the Ironwretch and the Exhumed, as the slightly more accurate natural attack is a bit worse than the slightly more accurate double support attack.
Michael: Low damage warbands from now will aim to kill the Briar Queen. This is because hopefully at this stage you have damage/accuracy buffs and are able to reliably hit your attacks. The Queen is very powerful so it is important to kill her.
Ben: If you miraculously managed to kill 5 of the 2 dodge fighters, the Queen herself is next on the chopping block for the reasons mentioned above.
Michael: Finally, Varclav is last. This is because unlike the Queen, he doesn’t have a ranged attack and cannot hit for three damage, making him much less of a threat.
Ben: Varclav is last in this order, as he is the Queen, but less threatening.
High Damage Order: Briar Queen, Varclav, the Ever-Hanged, Ironwretch/Exhumed, Silenced/Uncrowned.
Low Damage Order: The Ever-Hanged, Ironwretch/Exhumed, Silenced/Uncrowned, Briar Queen, Varclav.
‘Wave of Terror’ Low Damage Order: The Ever-Hanged, Silenced/Uncrowned, Ironwretch/Exhumed, Briar Queen, Varclav.
The Grymwatch
The Grymwatch have similar case to the Guard.
Michael: First of all, an obligatory talk about the Duke. He is always first priority, even if he already used the In The Name of the King ability in Round 3. This is because he has a really strong attack either way. The only case he isn’t target is if you know you won’t be able to kill him, in my opinion.
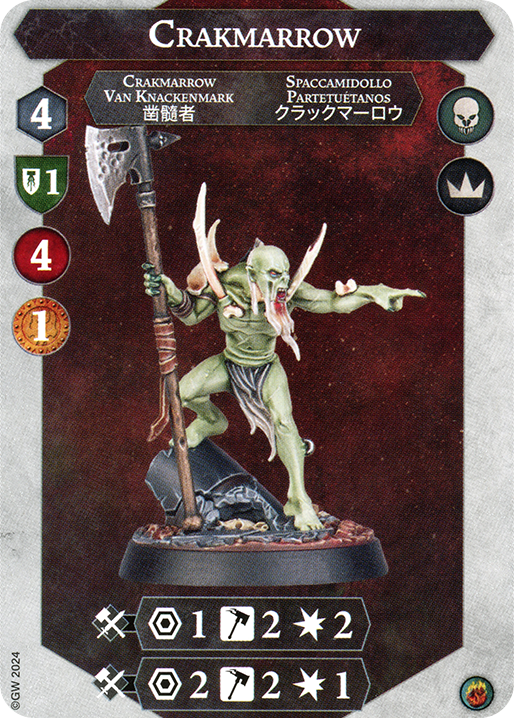
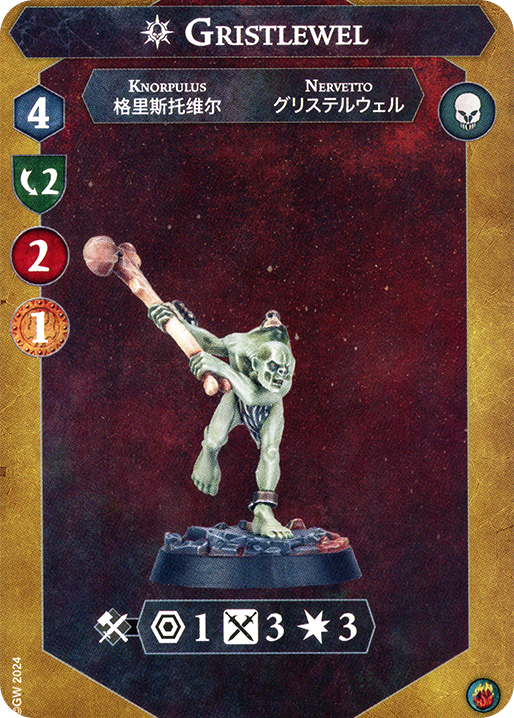
Michael: Now for the ghouls! There are two tactics here, the ‘safe’ way and the ‘I’m not scared of Gristlewel teleporting behind me and one shotting me’ way, shortened to ‘risky’. Obviously, if you kill Crackmarrow, the risky order is no longer risky. The safe order will see the small ghouls killed first, starting probably with the Herald or Master Talon (as they are exactly the same). The have the least threatening attacks if raised behind you, so it shouldn’t be a big worry. The risky order will see Gristelwel dead first. This prevents him from charging you early for 3 damage but allows him to be raised anywhere on the board pretty much, so now you have to be careful of edge hexes.
Ben: Gristlewel is the mandatory three damage fighter in swarm warbands, which obviously makes sense (naturally a random ghoul deals more damage than a warrior blessed by Sigmar himself). However, as he randomly revives and teleports behind your fighter, he should not be killed early. The first fighter to die should be Herald and Master Talon in any order, as they don’t randomly revive and kill your fighter.
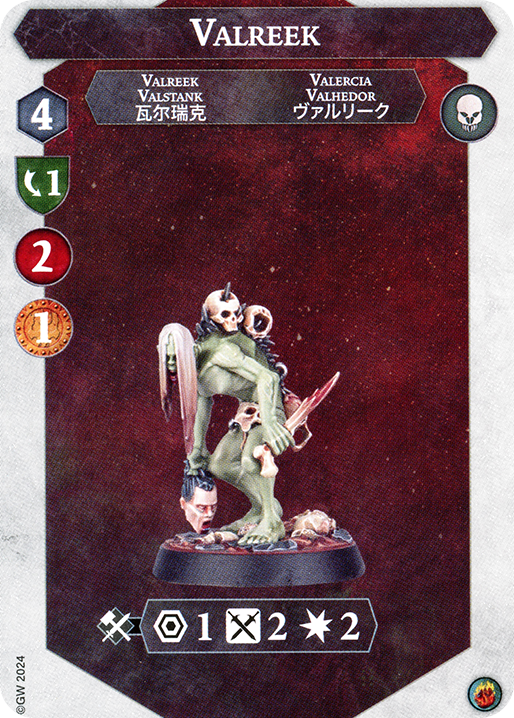
Michael: Safe order will see the Harriers dead next, as they have the second least scary attack if raised behind you. Risky order will see Valreek dead next, as she is the only ghoul with 2 damage left.
Ben: Next either the Harriers or the royal butcher should die, which depends on wether your warband has a lot of 2+ dodge fighters or not.
Michael: Safe order will want someone not very ‘safe’ if they are Raised dead next, which is probably the Butcher. He is super accurate when inspired but very inaccurate when not, which means that it’s worth taking the risk compared to Valreek for example that he isn’t instantly inspired upon getting Raised. Risky order will want the Butcher dead next for the same reason, he is the highest accuracy ghoul left on the board!
Ben: Next should be whoever you did not kill the previous step.
Michael: Safe order wants Valreek out for the count now. She is less scary than Gristlewel and there is not much other fighters on the board (of course, unless they get Raised), which means she is probably safer to kill than Gristlewel. Risky order is no longer risky when you kill the Harriers, they are simply more accurate than the other two ghouls left, making the bats the priority.
Ben: At this point, Valreek has to be the next target, as 2 damage is slightly less than three damage.
Michael: Safe order wants Gristlewel dead last. It is important to not let him raise in an edge hex and one shot you, so stalling can help this. This does not remove his threat completely as he can still cover some serious ground without the raise! Risky order wants the Herald/Talon dead last, as they are the weakest of the ghouls and pose no threat.
Ben: I agree with killing Gristlewel last, as he randomly snipes miniatures off of the board after he is revived.
Safe order: Crackmarrow, Herald/Talon, Harriers, the Butcher, Valreek, Gristlewel.
Risky Order: Crackmarrow, Gristlewel, Valreek, the Butcher, Harriers, Herald/Talon.
Ben’s Safe Order: Crackmarrow, Herald/Talon, Harriers/Butcher, Valreek, Gristlewel.
The Crimson Court
Finally, a warband with less than 7 fighters!
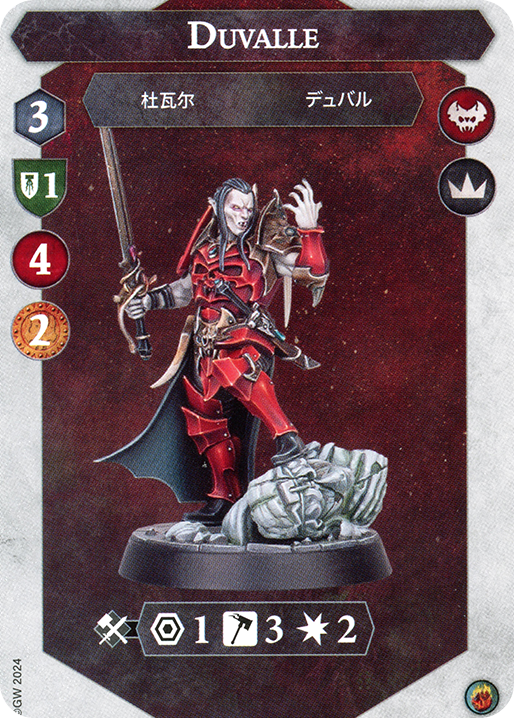
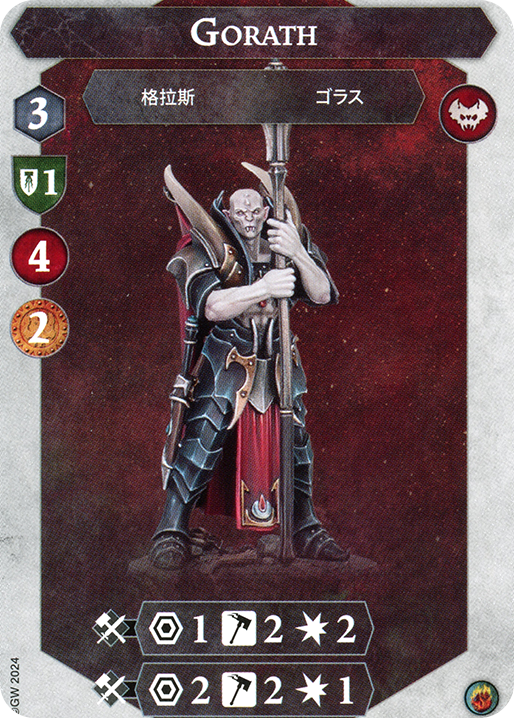
Michael: The first target has to be Gorath or Duvalle. Swarm warbands will want to kill Duvalle first, due to his marvellous attack hitting on 4 Hammers! It will easily slice though many swarms. Elites will want Gorath dead ASAP as inspired, he does 3 damage base. This allows him to do some heavy damage to you and puts all your 5-wound guys into one shot range.
Ben: Duvalle is the clear first target of this warband, as against any warband hitting on 4 hammers for 2 damage is on average more damage than hitting on 2 hammers for three damage.
Michael: Swarms will aim to kill Gorath next, due to his Range 2 Damage 2 attack. This allows him to get rid of you really fast and from a safe distance. Elites will aim to kill Duvalle probably, mainly due to that fantastic four hammers attack.
Ben: Second to die should be Gorath as he does three damage and has a range 2 attack for 2 damage, which is better than the other fighters.
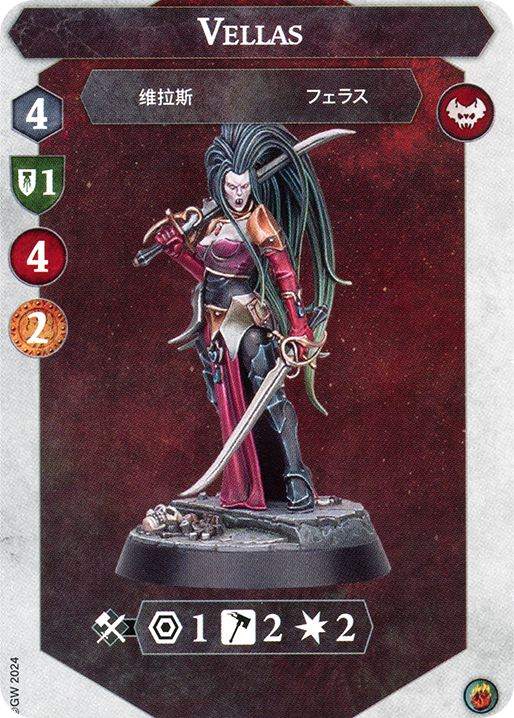
Michael: The orders converge here. Both of them will likely want Vellas dead, as Vellas gives more bounty and on average takes the same amount of attacks to kill. They also have the same defense when inspired. Vellas is slightly less accurate than Ennias when inspired, so you can more carefully approach.
Ben: Vellas should be the next to go, as he gives more bounty than Ennias, is slightly less accurate (but in practice 2 hammers is more accurate than 4 swords, trust me and my Kro-Jax experience) and can go savage without losing much, giving him +1 move and the cleave and ensnare warscroll ability.
Michael: Finally, Ennias is last. He doesn’t give much bounty and he is a little hard to hit when inspired. He also doesn’t boast the best attack. If he starts flying too close to you he is easy to swat away due to his low wounds as well.
Ben: Ennias should be the last on the chopping block, as he does not give enough glory for it to be worth it and isn’t accurate enough to be threatening.
Swarms Order: Duvalle, Gorath, Vellas, Ennias.
Elite Order: Gorath, Duvalle, Vellas, Ennias.
Kainan’s Reapers
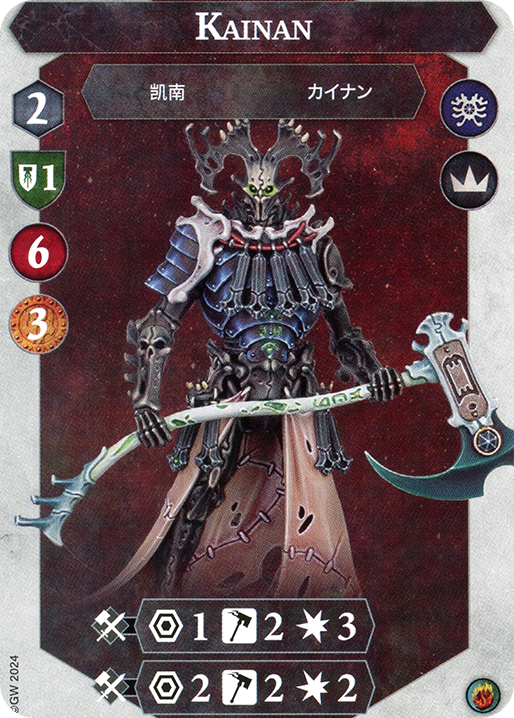
We are back to our familiar Kill Big Guy/Don’t Kill Big Guy orders!
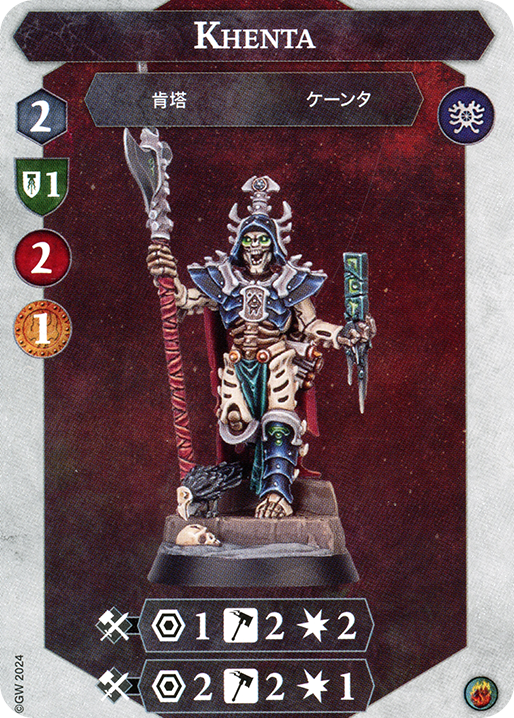
Michael: Kill Big Guy will aim to kill the big guy first. Multiple Kainan’s Reapers experts such as Baconborne from Path to Glory and Pastor ‘the Titehemaster’ have said that Kainan is an extremely important target to kill early on, as he makes up the bulk of the warband, and I agree. He gives a juicy 3 Bounty and does 3 Damage at Range 2 when inspired, a well as being a heavy hitter uninspired. He makes up a lot of the warbands firepower as well as Dire Ultimatum being tied to him make him a very good target. There are cases where you are scared to approach him, which is where Don’t Kill Big Guy comes in. I would argue for this order it is important to kill Khenta first, as he is the easiest to kill of the Morteks and is actually pretty damaging when inspired, which he will fast because Kainan is alive and swinging.
Ben:
Michael: Kill Big Guy will aim to kill the rest of the morteks after Kainan goes down. Out of these, I would prioritise Khenta, mainly due to his ability to do 2 Damage at 2 Range when inspired. The Kill Morteks order will focus on Hakor next, as he packs the next biggest punch when inspired.
Michael: Kill Big Guy will want to see not Hakor, but Karu dead next. Hear me out – if you are focusing Kainan, it means you probably have high damage and high damage usually means not high accuracy. This means it is important to rid the board of the two shield guys, and Karu is the scariest! Kill Morteks will also see Karu dead next, for the same reasons as above.
Michael: Kill Big Guy and Don’t Kill Big Guy have agreed to kill Senha next. He is also inspiring to two shields, but he hits on three swords which is less accurate than Karu. This allows for more leniency when killing him!
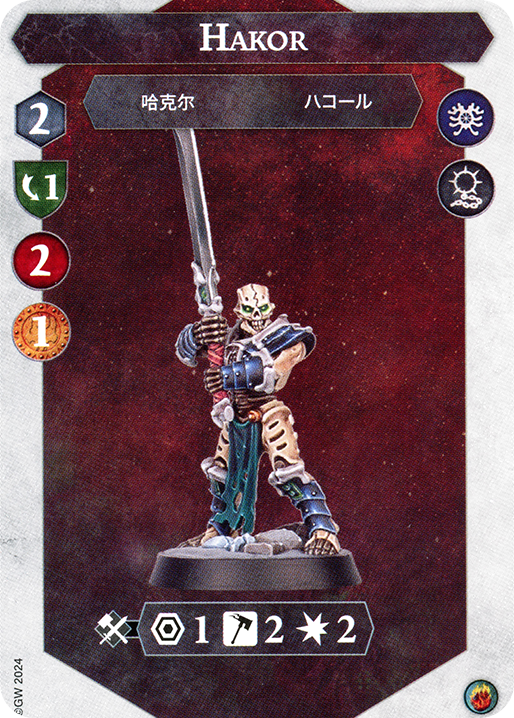
Michael: Kill Big Guy will want Hakor dead next. Part of the reason he is still alive is he can only charge 4 times a game and with his Range 1 he will typically need to charge. He is also 1 Dodge, so super easy to hit. Kill Morteks will aim to knock out Nohem next, as he is the last non-Kainan dude left alive.
Michael: Finally, Kill Big Guy will kill Nohem. While he is super accurate and super annoying, that’s all he is. He doesn’t give much bounty (or any bounty) and he does only one damage. Don’t Kill Big Guy is unlikely to kill Kainan now but can still try.
Kill Big Guy: Kainan, Khenta, Karu, Senha, Hakor, Nohem
Don’t Kill Big Guy: Khenta, Hakor, Karu, Senha, Nohem, Kainan.
The Headsmen’s Curse
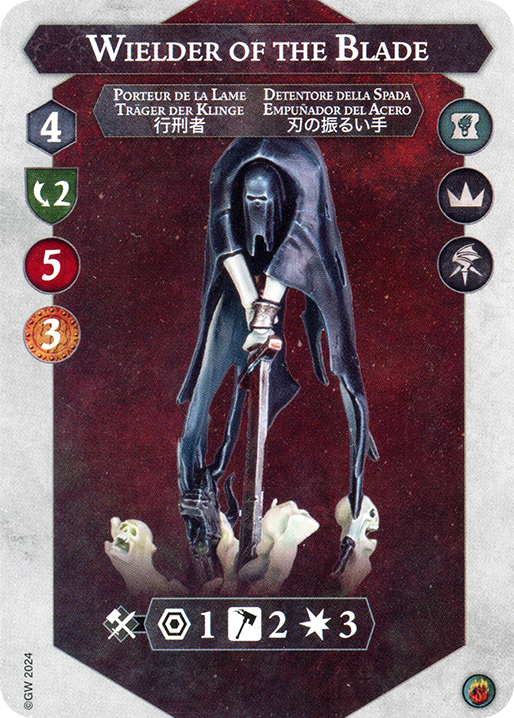
The Headsmen follow a similar kill/don’t kill big guy order!
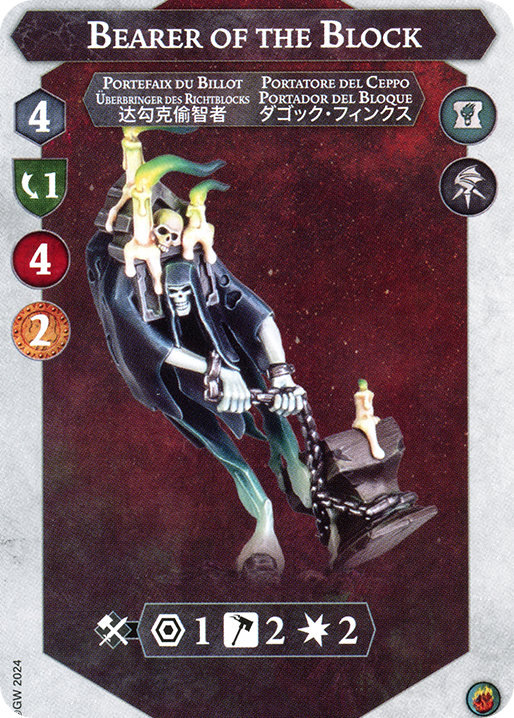
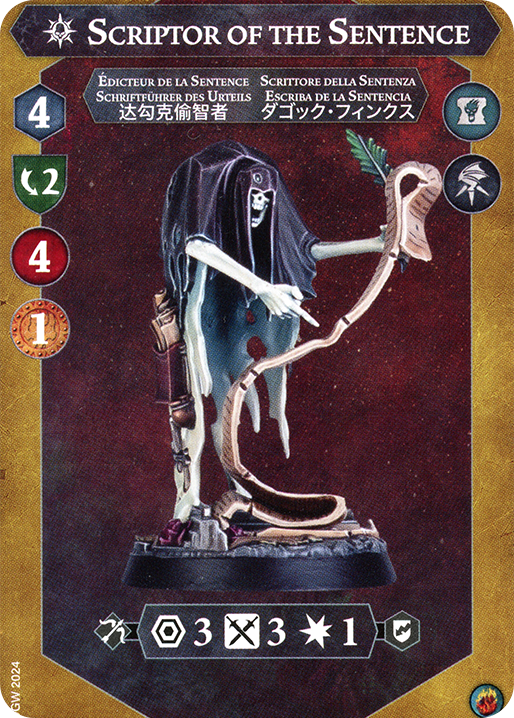
Michael: In the Kill Big Guy Order, the obvious first target is the Wielder, due to him being the ‘big guy’, hitting at 4 damage with two hammers. I do not personally recommend this order as unlike other ‘big guys’, he has two dodge and he has ONLY a Range 1 attack, while all others have 2+ Range as well. In the don’t kill big guy order, I recommend killing the Scriptor first, to prevent early inspires, and maybe to prevent the early raising of the Bearer.
Ben: I would kill the Scriptor first as well, as removing the inspiration and card draw. Also he is the only fighter with an attack with a longer range than one and stagger can make the 2 hammer 4 damage attacks way scarier.
Michael: In the Kill Big Guy order, I like to kill the Bearer second, as he has the best attack remaining and he can sometimes benefit from Great Strength and other melee-buffing upgrades. In the don’t kill big guy order, I would kill the Bearer as well, for the same reasons.
Ben: I would also kill Bearer second as he randomly hits for three damage and is pretty accurate with his 2 hammers.
Michael: In the Kill Big Guy order, I would like to kill the Sharpener next unless the Scriptor somehow got a melee weapon upgrade, as the Sharpener is mainly an annoyance but doesn’t do much damage, while the Sharpener can maybe do a cheeky Twist the Knife or Great Strength for a kill. In the Don’t Kill Big Guy, I would kill the Sharpener (or someone who got revived) due to him being the last non-big guy.
Ben: I would recommend killing the Sharpener next, as he is the last fighter that is not the Wielder.
Michael: Finally, in the Kill Big Guy order the Scriptor dies last. He doesn’t do much damage and his inspires are kind of pointless in the late game as everyone has already inspired. In the Don’t Kill Big Guy order, you can choose to kill or not to kill the Wielder. He is a big threat but doesn’t take as much attacks to kill as others do, so maybe worth a shot!
Ben: The Wielder is definitely last, as moving next to him is asking for him to obliterate your fighter. He might not even be worth going for, but he is a valid target if the other fighters have already died.
Kill Big Guy Order: Wielder, Bearer, Sharpener, then the Scriptor last.
Don’t Kill Big Guy Order: The Scriptor, then the Bearer, then the Sharpener, then the Wielder.
Zondara’s Gravebreakers
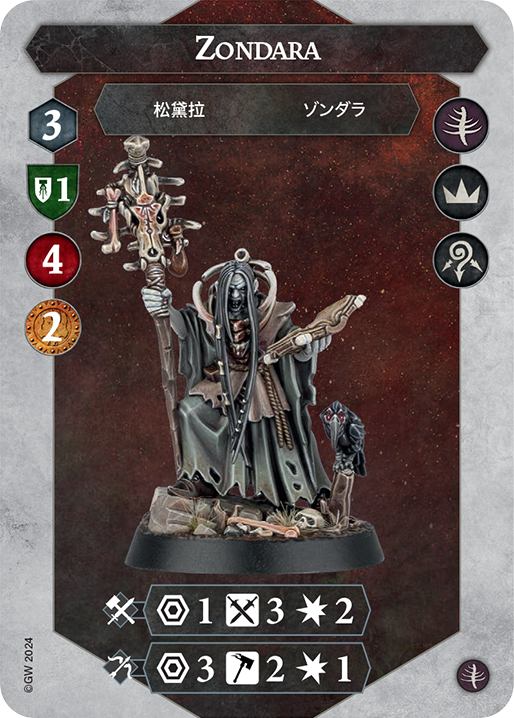
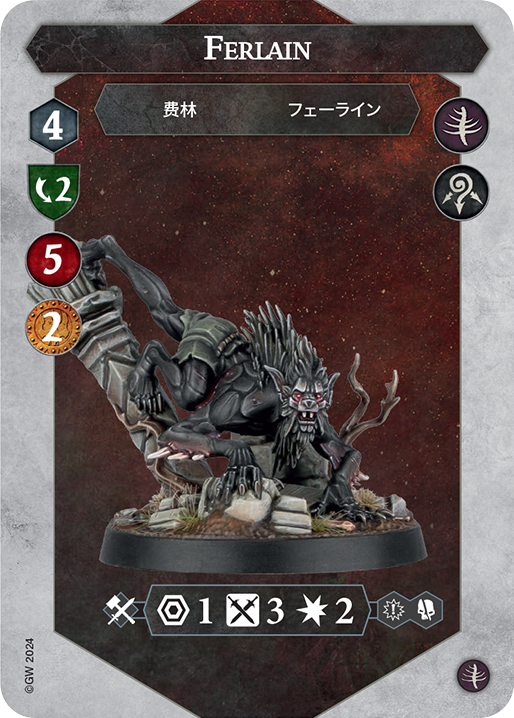
Zondara’s have a clear first target and a not-so-clear order for the others.
Michael: So obviously, Zondara is your first target. The minions cannot be Raised while she is dead, making her death vital, even if it does mean Ferlain gets an extra attack die. However, it isn’t always easy to kill her.
Ben: I have won multiple games off of charging and killing Zondara round 2. The warband relies on her, as the revives are vital and removing them makes the warband way less powerful.
Michael: Ferlain will probably be second but he is also kind of hard to kill, meaning you can also focus on the minions if Zondara died (or you get all three in one power step). Ferlain is annoying due to his potential three damage but he is also ever only Range 1, meaning it’s quite easy to just… run circles around him. This makes it an actual choice between killing Ferlain or the minions second.
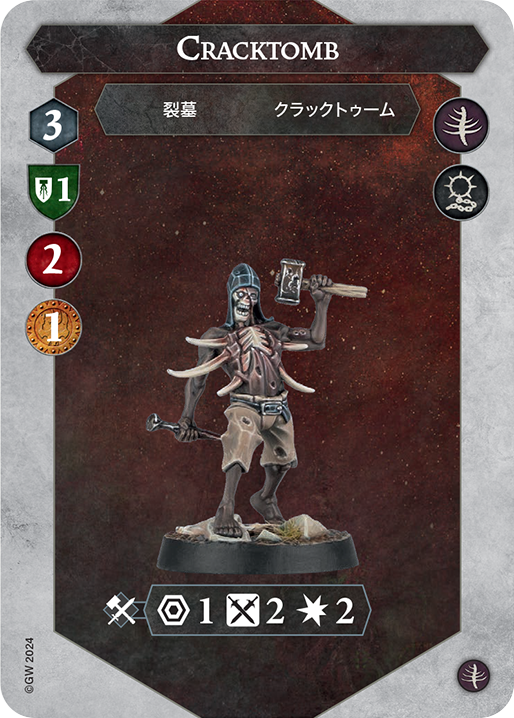
Ben: I personally am a bigger fan of killing the minions at this point, as they can run around the board and removing as many bodies as possible is really good against delving. I would kill Pick first, as he does not gain enough from inspiring (in case Zondara is still alive) and can hit you for 2 damage uninspired.
Michael: The minion order I would provide would start with Pick, as she gets the least when inspired. She does get Cleave but it doesn’t usually matter with her two swords and if it does you can ignore this advice.
Ben: Cracktomb has to be next, as the uninspired 2 damage is too scary.
Michael: Second would be Cracktomb, mainly to prevent Toyle from inspiring to two damage. He does get an extra dice, which is a massive accuracy boost, but less scary than Toyle nonetheless.
Ben: Last of the minions would be Toyle, as he only hits for 1 damage uninspired, and getting him killed last means he will inspire last. Win, Win!
Michael: Third would be Toyle as he gains extra damage when inspired. This does make me want to leave him to be inspired last. Obviously if you kill Zondara, the order can change, but this is what I would recommend for the minions if she is alive.
Ben: Last should be Ferlain, as even though his attacks are scary, they are only at range 1 and he is more difficult to kill than the minions by a lot.
General Order: Zondara, Ferlain, Pick, Cracktomb, Toyle
‘Scary Wolf’ Order: Zondara, Pick, Cracktomb, Toyle, Ferlain
The Skinnerkin

Not the strongest warband around but still important to cover.
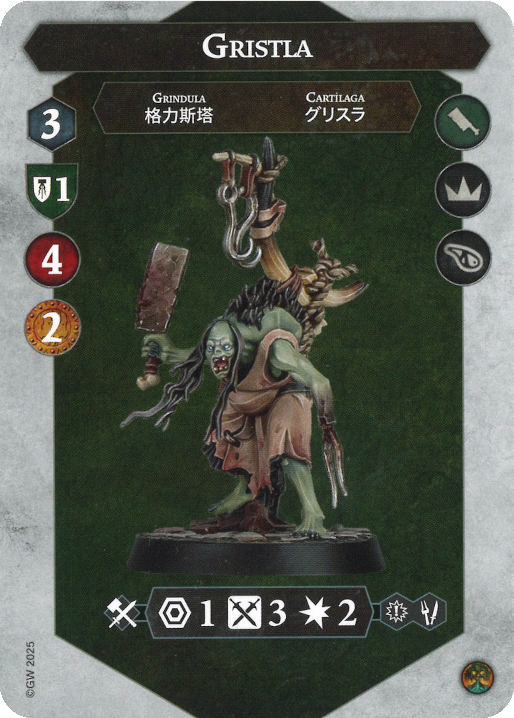
Michael: I would argue that first target is either Gristla or Kretch, but leaning towards Gristla. It is important to stifle the Haunch generation early on for this warband and these two are the prime generators, Gristla being slightly better at doing so when inspired than Kretch is, putting her first.
Ben: I would kill Kretch first, as the haunch generation is very important for this warband. Also, his 5 move allows him to almost guarantee a charge and a haunch generation when inspired, making him a good first target.
Michael: Second is Kretch. He hits ‘hard’ and generates Haunch, and is quite easy to kill while yielding two bounty, making him a prime target. It is important to note he actually loses defense when inspiring so consider this when debating his fate.
Ben: Next would be Gristla, as let’s be honest, the warband has not inspired yet and she is the prime target to deny that. Also, she is very accurate and is the last 2 damage fighter as well as giving two glory.
Michael: Third would be the Carnskyr, mainly for it’s Grasping Talons ability. It isn’t as scary as it was in V1 but still worth to watch out for, making the ‘bat’ the priority target after the Chefs are dead.
Ben: Carnskyr’s ability, although not that scary, as it can fail, is still very strong and makes him the prime third target. He is also the only semi consistent haunch token generator left, which makes him the prime third target.
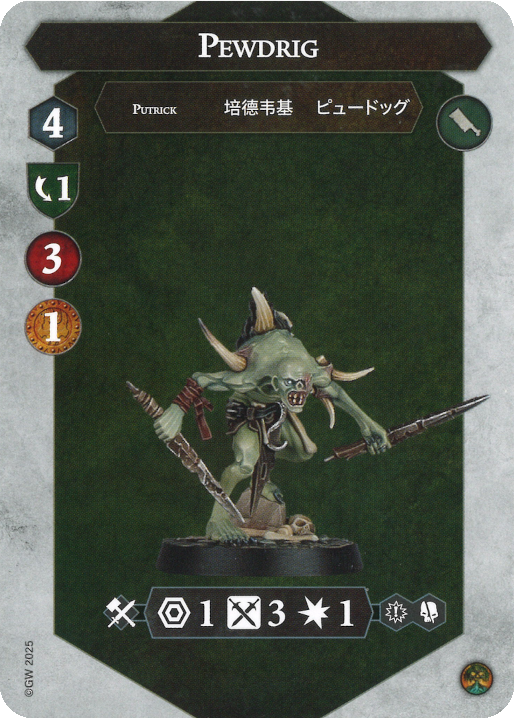
Michael: Pewdrig is fourth, as he can hit for two damage when inspired, which is scarier than Sedrik’s Range 3 but tamer than the Grasping Talons. Mainly it comes down to him being stronger than Sedrik.
Ben: Pewdrig is forth two go as 2 damage at 4 swords is scary.
Michael: Sedrik is last, being the ‘archer’ of the warband, which as we have discovered in this series are historically last to die. He isn’t too scary and isn’t even that accurate, leaving him last on the chopping block.
Ben: The archer curse claims another victim (or survivor, I guess), which leaves Sedrik last to die. Turns out only dealing 1 damage is not that valuable.
General Order: Gristla, Kretch, The Carnskyr, Pewdrig, and Sedrik.
Ben’s Order: Kretch, Gristla, The Carnskyr, Pewdrig, and Sedrik
Michael: And that’s it! We hope you enjoyed this series! In case you missed any of the other articles, here they are:
– Order
– Chaos
– Destruction
With that, if you have any feedback for us regarding this series, please do let us know on the Staggerers discord server. Apologies for this series taking so long but at least it all finished up in the end. With that, I hope to see you again soon!
