Hello! Michael here. Today I wanted to talk about an interesting thought experiment. Back in the V1 days, we had a deck in Championship Format that was designed to win without making a single attack. Here is the decklink. I played against it at the Austrian Masters, and it truly was impressive to see. That got me thinking, is it possible to reproduce the same thing in V2? Well, this article will showcase that three weeks and a couple of bad attack rolls truly can make quite a spectacle!
RATIONALE FOR WARBAND AND DECK CHOICE
Before I even started deck building, I had to pick a warband. And this was quite a difficult choice! Most warbands aren’t designed to just move around, go on Guard, and spend activations not attacking.
My initial thoughts ran to Sepulchral Guard, mainly because of their last edition success as well as double move being very helpful for the pairing. With them, I intended to run a ES/PnP pairing to maximize the glory gain per move. However, they had a slight problem where only a single warscroll ability did something (other than the double move/raise). This means there HAS to be a more efficient warband out there.
Next, the Gitz thoughts started flooding in. They have Scurry, decent move, decent defense, and Snirk to deny tokens. So what made me not take them? Well, they can’t really retake tokens in any special way and they can’t HOLD ON to tokens too well either when not attacking. Plus, it is quite hard to inspire them with no attack surges. With them, I was also leaning towards a more PnP/ES route for quick moves onto tokens for a quick delve.
I then thought about Dromm and his Gorechosen. This idea lasted for about 3.5 seconds in my head because then I remembered that I hate Dromm and will not play them out of principle. Still, a case can definitely be made for them to work – they have two ways to get enemies off tokens without attacking them and they can come back to life to hold tokens. They can run a more ES focused build due to their easy Supremacy, but you really want CtC as well for Utter Conviction. Dromm does have a disadvantage with their low Save and low movement, though…
What warband has good movement, tankiness, and ideally can double move and raise? Well, none. But, one warband comes super-duper close – Spiteclaw’s Swarm.

They have 3 Health across the board, 4/5 fighters go to 2 Save, and they have a full board raise. They also have not one but two fighters who can Raise, which is huge, as an early game snipe is impossible with good positioning. Finally, something that is often overlooked is their GODLY warscroll for this playstyle. You have two ways to go on Guard+get on a token. You have a way to get OFF of tokens to score Step by Step and Stand Firm. I feel like just having Justified Paranoia is REQUIRED to play this playstyle – it’s so strong! Skitter is also criminally underrated – a Guard action + push is often enough to win you the game here. ‘Out of my way, fool-things!’ is also pretty good – just doesn’t come up every game. It has creative uses.
Now – what deck pairing to use? So I actually tried several ones. Most of them were theoretical but the ones I playtested were ES/PnP and ES/CtC. In the end, I went with ES/CtC as the ‘best’ one. Here are my thoughts on each pairing I considered:
ES/PnP
First of all, here is the decklink. This pairing is definitely very strong and actually scores more than my ES/CtC final. So why not use it? Well, simply put, there is simply too much stuff to do. You HAVE to expose your Schemers in order to score Supremacy which makes Raising with them much harder. In addition, the upgrades kind of suck. Did you know those 10 upgrades are the ONLY upgrades I could play? Every other upgrades requires an attack. Point is, scoring Supremacy is very difficult and without it I am at a 2 Glory loss compared to ES/CtC. Also, scoring all the stuff at the same time is a little hard while balancing raising. You have to get a VERY good Confusion and Sidestep in to win games consistently.
ES/WnR
Here is the link. This plays closely to ES/PnP. However, it loses to swarms significantly. Which sucks. Also 3 glory relies on your opponent hitting you, so that could be hard to set up. Finally Alone in the Dark and Stay Close kind of contradict your gameplan.
PnP/WnR
Decklink – this pairing is actually very decent on paper. You can set up Strip the Realm very easily. However, a major disadvantage is your low glory count of 17 without being allowed to kill. That’s the biggest reason I chose ES/CtC over this one – but it definitely has legs. A lot of displacement tools and a lot of free scoring make it good!
PnP/CtC
So, here is the decklink. And on paper it definitely seems really good! So what is my reason for not taking it? First of all, the ploys are DIABOLICALLY bad. Like I couldn’t find a 10th ploy and am now forced to run Do or Die – ditto with the upgrades. But the biggest caveat is that this deck crumbles into enemy PnP, which happens to be the most popular pairing in the game right now. This is because of one card – Torn Landscape. This pacifist playstyle focuses a LOT on denial and one of the most crucial cards to deny in the game is Torn Landscape, which this deck suffers a LOT more from denying than ES/CtC does.
Anyways, through process of elimination we ended with this:
THE DECK
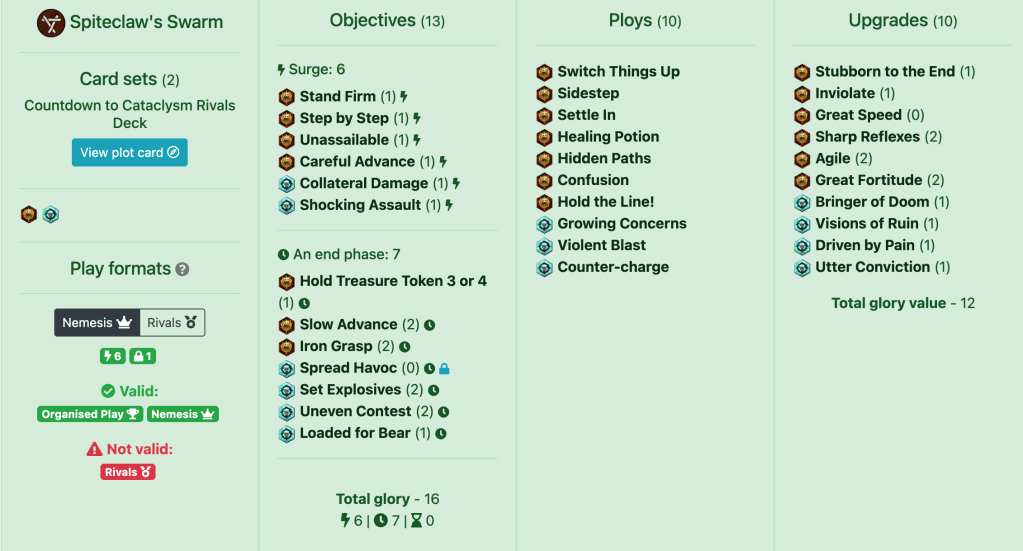
Here is the decklink in case you don’t know the cards.
Before we get started, just keep in mind, the point of this deck is to make ZERO attacks. Nome. Nada. Whatever other word means ‘zero’. Therefore, some card choices might be… interesting.
As usual, I will go over a quick overview of the cards first, then I will give a quick 101 on the deck and we will close with some tips and matchup advice!
OBJECTIVES
Let’s start with the surges.
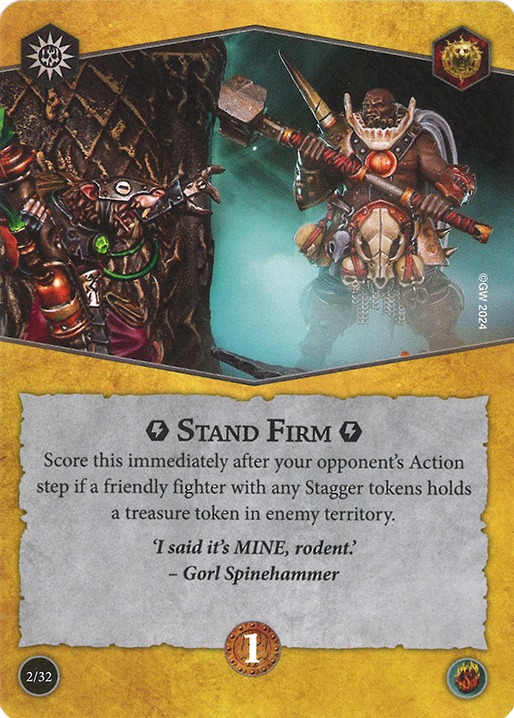

Stand Firm – it’s pretty nice. It scores relatively easily with a warband that has 5 move and native guard access. You just need to delve or move through a Stagger hex to get the token. As long as you get some anti drive back tech in your deck (there’s isn’t much you can get without attacking) this card is trivial. Since you also have bunch of free activations from not charging, you get some extra Guard actions!
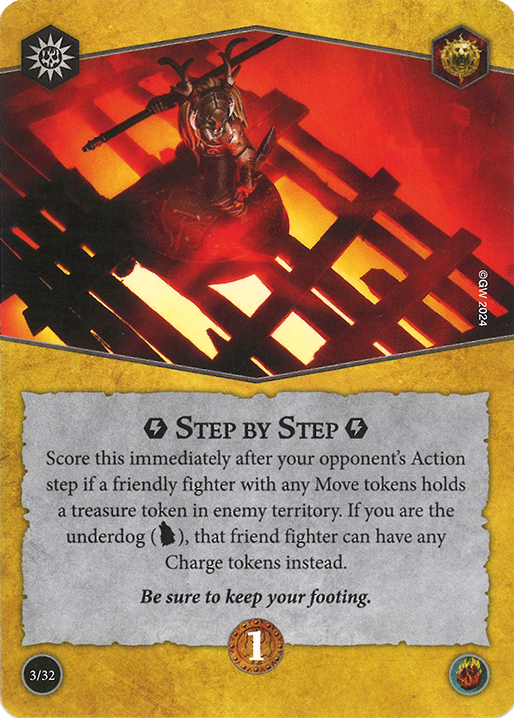
Step by Step – same reasoning as with Stand Firm. One quick comment about this – we all get in situations where we are standing on a token, but we CANT move off of it else our opponent will take it. “But that makes Step by Step impossible!” This is where the warscroll comes in, cause clearly you forgot about ‘Out of my way fool things’! You can move a minion adjacent to the guy already on the token, and then you can score this card next turn!
Unassailable – with the amount of Guard tech you can access this card is trivial.
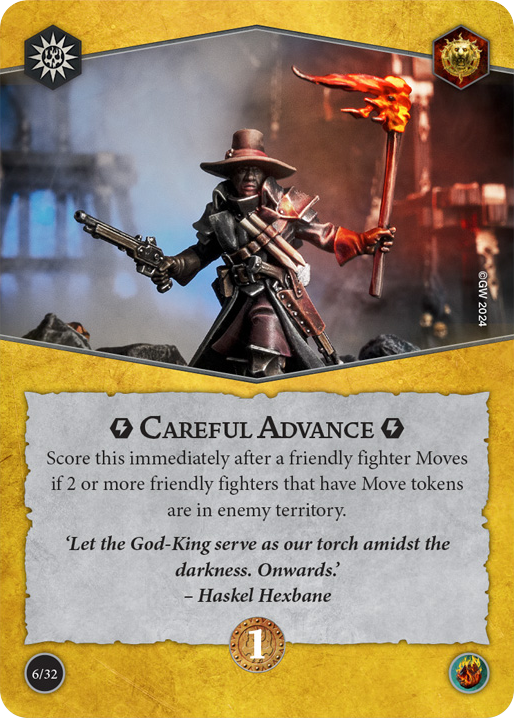


Careful Advance – ok, this is the most slept on card I’ve ever seen in Underworlds. Well and truly busted especially if you don’t want to charge a lot. Like it’s part of my game plan to move a lot anyway, and often times I need to stand in enemy lines, so might as well get rewarded for it!
Collateral Damage – odds are at some point you will lose a fighter so might as well get rewarded for it.
Shocking Assault – this is one of the hardest surges which says a lot – a canny opponent will put two tokens in the middle. In this case, you can score your other objectives easier but remember you can always delve one middle token and hold only the second one.
Now onto the end phases!
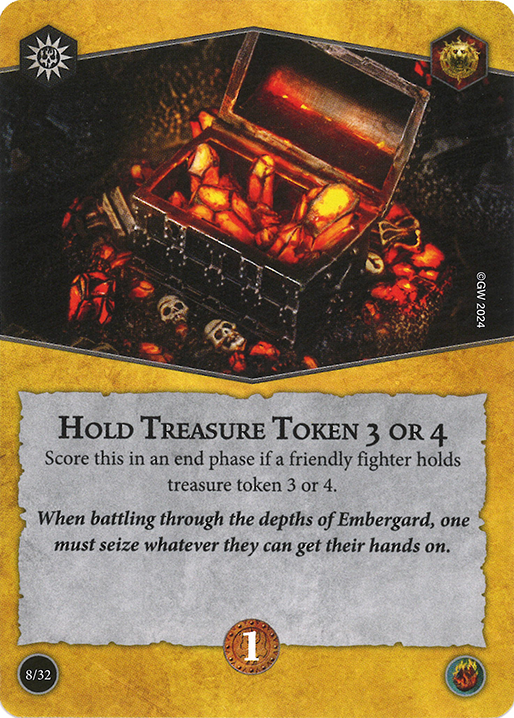
Hold Treasure Token 3-4 – this is a pretty easy card to score and I even threw in Switch Things Up to make it easier. Its main purpose is to bump my glory count. If you like the alternate card art of Hold 1-2 more than this one, feel free to switch it out (I did).
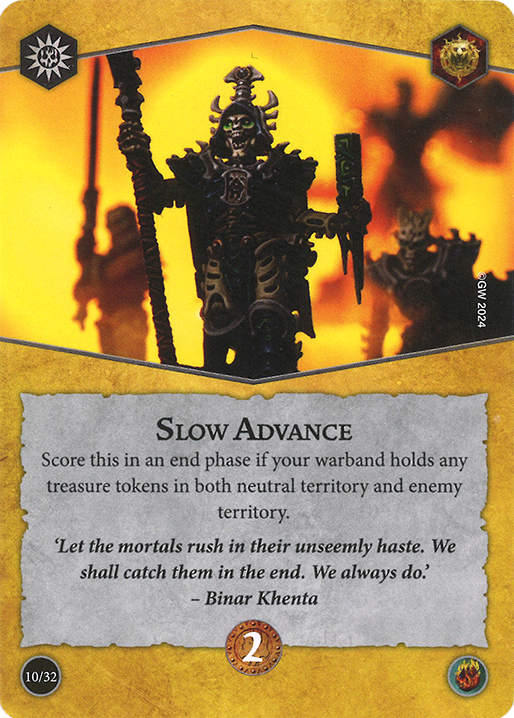
Slow Advance – this is genuinely one of the hardest cards in the deck to score but it’s necessary. Ideally you will be using the fact that your minions aren’t a priority after they get Raised to score this as well as some cheeky guard tech. It’s also made much easier by Violent Blast and Confusion. It’s actually a lot easier to score when you know you cannot attack opponents cause you can dedicate an entire round to scoring it (Guard – Guard – Move – Move).
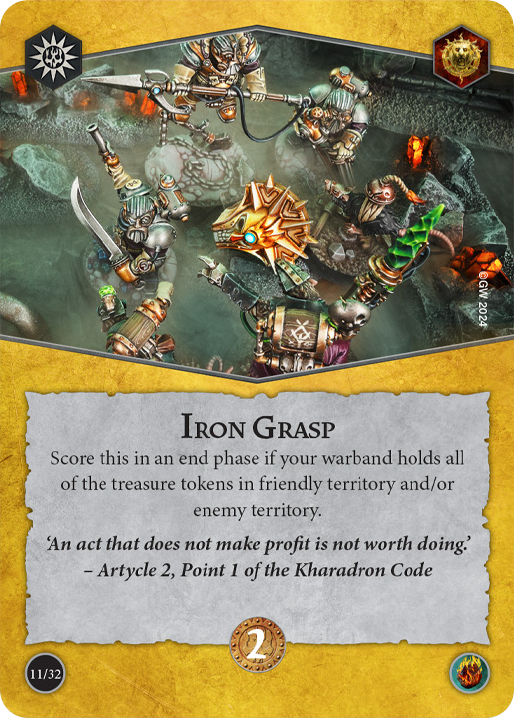
Iron Grasp – this card is fairly simple and a strategy I find to work well with helping set it up is delving tokens I don’t need away in order to minimize the risk that I will be driven off a token I want.

Spread Havoc – since this card doesn’t have a strategy behind it except score it for two points always, I will justify NOT taking Supremacy (which competes for the R slot). Supremacy notably requires either all three minions to be holding WITHOUT a raise token (which pretty much never happens) or requires me to get my Schemers in a close position. I found that having my fighters that are worth a collective 4 bounty hiding in the back to be a pretty good strategy for denying points from the opponent. Supremacy makes it very risky to push up with the Schemers. Yes, technically you do net one more glory than you lose but keep in mind also that Spread Havoc is literally undeniable while Supremacy is often times the most sought after objective to block.
Set Explosives – very similar to Iron Grasp, often times it’s scored by just holding two treasures. Overall a very reliable card, not much else to say other than this card and Shocking Assault both kind of necessitate you to put precisely one token in neutral land.
Uneven Contest – this card is a rare one but in my experience it actually works pretty well – mainly due to the surprise factor. By playing this card you have to prioritize tokens 1,3,5 no matter where they are and just defend them the whole game. I like to use early activations to get on those numbers and delve them away to lower the total amount of tokens I need to hold. Additionally, by doing so I force my opponent to hold them himself so that means I can use my surprise tech of Switch Things Up in order to score this card. All in all, try to minimize the amount of odd treasures your opponent has access to and this card becomes pretty simple.
Loaded for Bear – this card is here as a glory buffer. I found that it’s actually scored more often by minions who got raised and then loaded with defensive upgrades that make them unappealing to kill.
PLOYS


Switch Things Up – this card is basically the only reason that Unequal Contest is even playable able thus you have to save it for that card. Or Treasure Token 3-4. Point is, even if you don’t have any of those objectives in hand in your last power step, try to send this card in order to make the necessary numbers easier to access.
Sidestep – this card actually loses a lot of value when you cannot attack because you just move so much, is often I just use it as a Guard+push onto token card. But do with it as you please!
Settle In – this is one of the best ploys in the deck. It’s SUPER good on Festering Skaven and Krrk cause it skyrockets their Save due to it also inspiring them. My favorite use for it is to get Festering onto a crucial token early on and then just hold onto it for like the entire game.


Healing Potion – this is usually saved for Skritch and Krrk but I also recommend healing minions who are defense-buffed out because it makes them VERY annoying to kill.
Hidden Paths – since Skritch and Krrk are often near the back this is used as an escape route. With Sidestep or Violent Blast, you can also use this to steal tokens near edge hexes so it’s a nice combo to keep in mind. It might not seem necessary given your already high move but it hasn’t hurt me yet and has been only good things. Additionally, the fact that it gives you a move token really doesn’t matter for the game plan.
Confusion – this card is the best ploy in your deck and the main reason it even works. You MUST use it to gain HUGE value. This (and Violent Blast in some cases) are the only cards I would keep for 2 rounds just because of how important it is. Since you physically cannot get an enemy off of tokens if they just sit on it, you have to rely on this card to set up token claiming for an end phase. This makes it indispensable as it’s one of the only two ways you have to force an enemy off of a token. Another note is don’t burn it just because it will yield you a token for ‘next round’, if it doesn’t score you anything. Please please please make sure you actually get value from this card!

Hold the Line – I mainly use this to setup my surges or to setup a Move + Guard combo. Since you can’t be driven off for an activation you can go on Guard in the next and keep your token safe. It’s also good to note that your fighters are all at least three health so the threat of a one shot is quite low.
Growing Concerns – this card is pretty good – you have the dealt uses of denying charges into your important fighters but you can also use it to deny tokens that your opponent wants to steal from you.
Violent Blast – this is basically a slightly more limited Confusion. Always try to set up tokens (especially against someone not running CtC) next to Stagger hexes to make maximum value from this card, as just like Confusion, it can win you games.
Counter-charge – this card is mainly here for an extra inspire capability because it chooses a fighter. It also gives good defense as well as punishes bad positioned opponents by letting you push into tokens they stood next to.
UPGRADES
I would like to preface the upgrade section by stating that these are the 10 upgrades in this deck pairing that require no attacks. Every other card amplifies or requires an attack to work or are Burnt Out.
Stubborn to the End – at first I thought this card was atrocious but turns it actually is decent in this playstyle. Opponents cannot instantly steal tokens from you, which means you can for sure move onto tokens you have been driven off in the next action step.
Inviolate – this is decent if you have to move into a stupid position in order to get to a token. It did win me several games which I did not expect.
Great Speed – I know I already have 5 move but 6 move never hurt me so might as well! It’s pretty nice especially when opponents think that they cannily denied a token by moving in between you and it and then you play this card.

Sharp Reflexes – despite most of the warband already being on two save when inspired, I put this in. This is because I can give it Hungering Skaven to make him VERY unappealing to attack or give it to an uninspired guy (who unfortunately are quite common) for the same reason.
Agile – this is especially good on two Save fighters. I don’t recommend giving it to one save guys. With the amount of Guard you will get it becomes even better.
Great Fortitude – you should use this card mainly to MAKE SURE you have a token. If a fighter is dead to rights on one, and a +1 health will save them, don’t hesitate to use it – scoring your cards in this pairing is key.

Bringer of Doom – this is mainly here cause there was literally no other choice (except Burnt Out which I hate) so yeah. Completely unexpectedly I noticed some opponents just don’t attack me if I have this card out. Which is nice. However, the cataclysm advance isn’t really a huge boon here as only 3 cards in this deck actually benefit (Visions of Ruin, Growing Concerns, and Utter Conviction).
Visions of Ruin – this is like Great Speed+. It’s really funny and unexpected and can yield great results but it’s not really necessary for the warband.
Driven by Pain – in a deck where you don’t want to get off tokens this is a really good card to have. Even though oftentimes the heal won’t matter too much. Still, it’s a decent deterrent.
Utter Conviction – in this deck if an opponent is trying they will dent Cata 3 to at least Round 3 so it’s not too good on the 2 Savers. Still, just like Impossibly Quick, it is diabolical on the one save guys. Just keep in mind it disables your crit grievo- oh wait, you don’t attack at all 🙂
THE STRATEGY
So since we cannot attack, the strategy is actually quite different from usual games.
First of all, board choice and tokens. Board choice is kind of important but not really as your 5 move is very forgiving. I prefer the one without blocked hexes personally but both boards are fine. Token wise, it is crucial that you place them to account for Violent Blast, your raise, and maybe even Hidden Paths. It’s also important to have precisely one token in the middle for Shocking Assault and Set Explosives. If you have only one token in your territory, think of it making easier to score Iron Grasp as well as allowing you to play more towards the opponent side of the board. Same for the inverse – if you have three in your territory, your opponent’s only token becomes crucial.
Fighter placement is pretty important for this warband more than others. I like to deploy Skritch and Krrk on opposite ends of the board so they don’t stab each other. This makes it impossible to snipe them both, giving you a comfortable round one. The Lurking Skaven MUST be deployed adjacent to another skaven in order to make earlier use of Justified Paranoia. The other two are pretty free to deploy wherever, but if you have Settle In in hand, then Festering Skaven can go more forward.
Your ideal first hand would be Slow Advance or Unequal Contest (these are your ‘strech’ objectives which you can work for, Iron Grasp or Set Explosives (the easier objectives), and a surge (optimally Unassailable or Careful Advance). For power cards, the faster you get Confusion or Violent Blast, the better. Settle In is always super good as well. Hold the Line is cracked in R1, and honestly I like Stubborn to the End to come out early as well.
An average Round 1 will look like this:
– Activation 1, you should try to use Justified Paranoia in order to get very early access to a token with your Lurking Skaven. Make sure that token is necessary for you (e.g – middle token for Shocking Assualt or odd token for Unequal Contest) and it’s in a contestable position in order to maybe divert some fire off your other Skaven.
– In Activation 2, I like to claim the ‘safe’ token with a Schemer or to go more aggro against other hold warbands to steal all their tokens in their territory.
– In Activation 3, I like to go on Guard with the aggressive pusher if they are still in a good position.
– And in Activation 4, I just take another token.
Overall, your goals should be to get access to as many tokens as possible. Use your spare activations on Guard or on Raising Skaven.
In Round 2, it is vital to not forget about your raise. Your first priority is always tokens but if you have any spare turns, use them on Raising. Ideally you should be contesting a lot of tokens here. Try to feign pressure on tokens even if they are literally impossible to get. All in all, ALWAYS prioritize your cards first and then focus on denial of opponents cards – stuff like Stay Close from Wrack and Torn Landscape from Pillage should never be scored against you.
By Round 3 you hopefully scored at least something so you have to switch into a more denial focused playstyle. Deny your opponent’s cards, Raise your little ones, score whatever you haven’t yet.
Overall, your priority is usually this:
1. Score your own cards (through Move and Guard)
2. Deny opponent cards.
3. Stay alive/Raise.
4. Focus.
It’s a little hard to explain the general playstyle as oftentimes opponents are pretty good at denying you when you aren’t allowed to stop them from doing so….
SO… HOW EFFECTIVE IS THIS?
You might think that a playstyle like this is kind of bad and to be honest it’s highly dependent on whether or not your opponents are playing to deny you. Like, if they get on a token, you can only push them off TWICE per game. Which isn’t good. Still, most of the time it’s actually enough to win!
Playing this deck really forced me to think much more about denial. If your opponent is denying your stuff, odds are they aren’t scoring their own stuff either (unless they are playing PnP or ES in which case it’s much harder).
I actually am currently positive with this deck, which is quite nice. Against stuff like RS/BA Dromm, I was absolutely dominating – my no attack policy let me deny so much Blood Tithe while also block stuff like Unrelenting Massacre. I also played against a bit of PnP/WnR, where the denial of Wrack objectives proved crucial. In fact, I made the delusional call of taking this to my very first Vassal League match this season and managed to pull out a 2-0 victory against a PnP/EotK Borgits, using my practice games and denial to win out.
In Game 1, I managed to win off of my opponent spending not one but 5 activation trying to kill my one Settle’d In Festering Skaven. This gave me a HUGE lead which I leveraged to win.
In Game 2, my opponent caught on to my no attack play and did a GREAT job just hogging tokens. Still, Violent Blast proved crucial here and I won on tiebreakers off of scoring Unequal Contest.
I do have losses with this deck as well. A friendly game I lost was against Gardeners with ES/WnR. I believe I misplayed severely that game, and one good Confusion from my opponent actually messed me up. So that one was definitely winnable.
I don’t have a single game against PnP CtC (thank goodness) or Zarbag/Grymwatch, so no practice against the meta.
Overall, this deck is actually not bad at all. If you like making 200 IQ plays and focusing on winning without luck, as well as want to try a more unique style of play, I do recommend you try this deck!
CONCLUSION
I do hope you enjoyed this deck and playstyle as well as the article! I will continue trying to innovate this playstyle and deck, going into Spitewood we might get some new tools to tinker with for it. If you worked on this playstyle as well, I would love to hear about, please ping me on the Staggerers Discord server! With that, I hope you enjoyed, and hope to see you again soon!
