Michael: Hello! Michael and Ben here today, and we are focusing on the kill priority series once again. In case you missed it last time, in this article, we will go over the optimal kill order for every single (Spitewood) warband. We will do a bit of analysis so it’s not just ‘trust me bro’ the whole article, of course!
Before we start, a quick disclaimer:
Please do NOT go for the kill order in the article in every single case possible. There are always exceptions to the proposed orders below. If going for Ardorn will cause you to lose your strongest fighter, but going for Farassa will let you end on an objective and score Supremacy, please go for Farassa!
Bottom line – don’t blindly apply these suggestions, make sure to consider your position first. This is meant to be a ‘tiebreaker’ kind of list if you have multiple targets 🙂
This article is obviously updated for the Feb rules changes. Anyways, without further ado, lets get right into it!
The Wurmspat

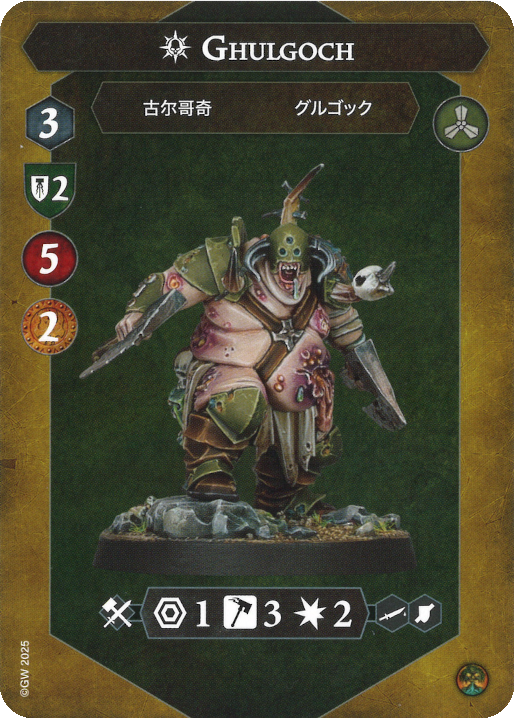
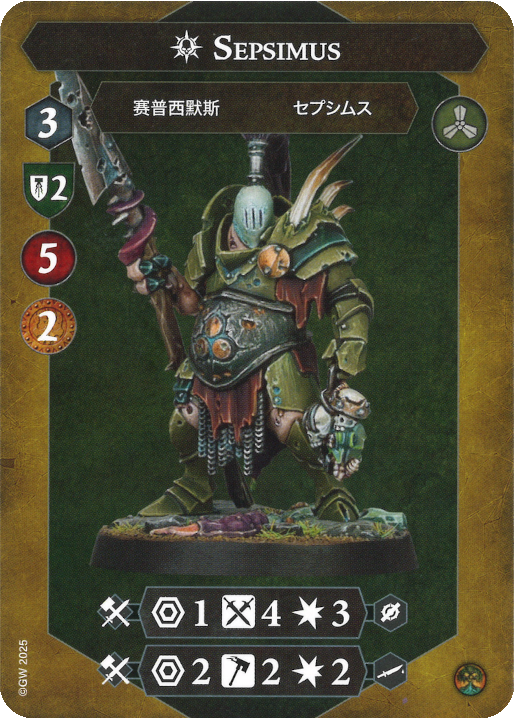
Michael: Wurmspat are very annoying and I would call them the bane of my existence but Dromm exists… Anyways, I would say the first target if you can kill only one reliably is Fecula – she is the highest glory worth, meaning it’s the most bang for your buck. On the other hand, I would say that if you can kill several of them (like CtC/WnR can, for example) then Sepsimus is first, as he is WAYY too scary and arguably the most stat-ted out fighter in the game.
Ben: The first target of the Wurmspat has to be Sepsimus, Plaguesworn. He is the least threatening fighter uninspired, only hitting on 3 swords and not even having bile on his 2 dmg attack, while also having the strongest inspired side, hitting for 3 damage without grievous. Getting him off of the board early is very important.
Michael: I have to say that Sepsimus is second in the ‘kill one’ order. He is very scary and always good to get off the board. In the other order I proposed (kill two or more), Fecula is second, as she is basically Ghulgoch but better – unless of course, the Cleave scares you.
Ben: Attacking inspired Wurmspat is usually a very bad idea, so the chance that the second target should actually be attacked is low, but if it comes to it the second best target is Fecula. This is because Fecula gives 3 bounty instead of the 2 the other fighters give and she has a ranged attack, which could be useful. She is also a bit less scary than Ghulgoch, making approaching her actually feasible.
Michael: Ghulgoch is somehow the weakest fighter in the warband and dies last in most kill orders. There are cases where his cleave is very scary that you might want him dead earlier, so keep that in mind!
Ben: The last to die in this warband should be Ghulgoch. He is simply the least threatening fighter and doesn’t give enough reward to kill him early. Once again, it is usually not worth attacking this fighter if he is inspired, as his very powerful defence and accurate range 1 attack punish this aggressive playstyle.
‘Kill One’ Order: Fecula –> Sepsimus –> Ghulgoch
‘Kill Two’ Order: Sepsiumus –> Fecula –> Ghulgoch
General Order: Sepsimus –> Fecula –> Ghulgoch
Skittershank’s Clawpack
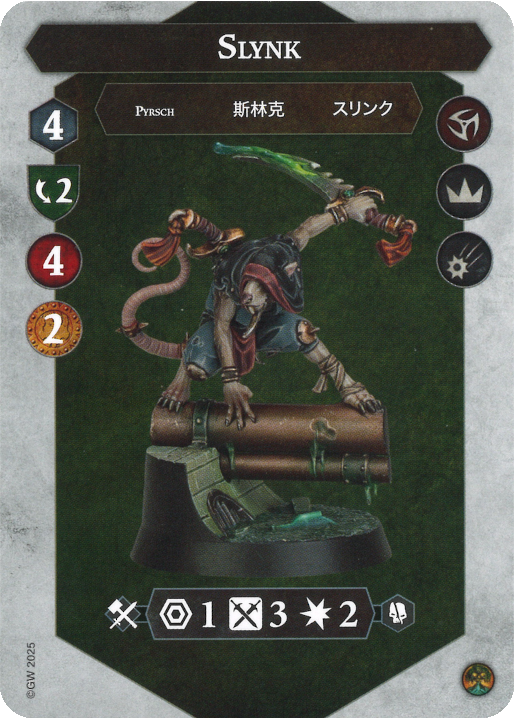

Michael: Yaaay Skaven! Don’t kill any skaven. That’s the kill order.
Now that the skaven spies are gone I can say that the first target here depends on if you are scared of actually losing your leader or not. If you are, then kill Slynk Skittershank first – he is the most threatening and gets REALLY scary when inspired. He is also the only one who can oneshot some leaders. If you aren’t scared of losing your leader (in a warband like Gitz), then kill the minions first, ideally Krowch’t, as they get an extra Save dice when they inspire.
Ben: Slynk himself should be the first to go, as he hits for 3 damage uninspired with fine accuracy, which gets even better when attacking the leader. He is the main threat of the warband and except if you both don’t care about 3 damage and think cleave is very scary for your warband, should definitely be the first to die.
Michael: In the order where you don’t want your leader to die, kill Padpaw second. He has cleave, is worth two bounty, and does two damage. A clear second target! In the order where you don’t mind your leader dying, I recommend killing Skulck next for the reasons listed in the first paragraph and definitely not cause he is a threat to the Skaven throne.
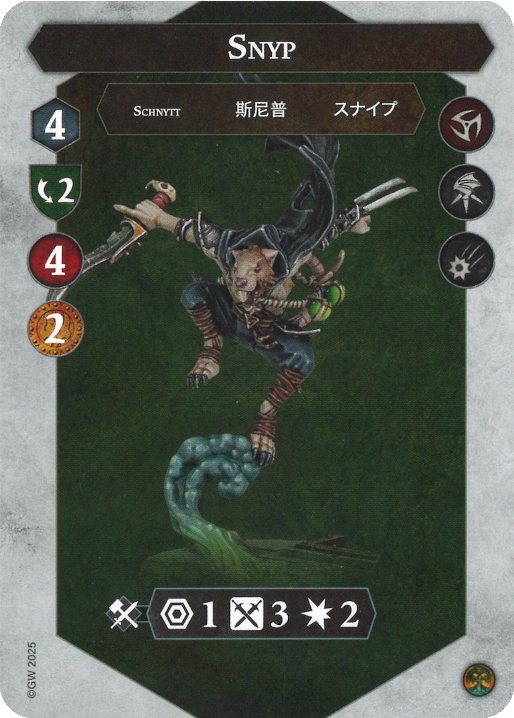
Ben: Snyp should probably be the next target, as he has the best accuracy in the warband while dealing two damage. He also is the only fighter left worth 2 glory.
Michael: Leader-don’t-die players will consider killing Krowch’t next. While he is but a lowly Skaven on face, he is actually a terrifying killing machine. He is also the only two damage guy left on the board – making him a threat. If you could care less if your leader is dead, then kill Skittershank next. He is of course very scary and probably the best to get off the board at this point.
Ben: The next to die should be Krowch’t, as he is the only two damage fighter left, making him the most threatening. The only downside is that he doesn’t have stagger, which is clearly the most powerful weapon ability in the game.
Michael: Leader-don’t-die players will want Skulck ‘the Ranged Master’ dead next. He is somewhat accurate and rewards you with one bounty upon killing him, which is exactly the same as Kinwhisper despite being twice as tanky. Pls-kill-my-leader players on the other hand will want Padpaw dead, as he is the last scary one left standing.
Ben: The next fighter to die should be Skulck, as although he is slightly less accurate, he only has 2 health, making him the easier target to kill and Kreep isn’t as threatening with his 1 damage attacks as the other assassins.
Michael: Finally, the leader-don’t-die order will see Kinwhisper run away last. Odds are you will miss your 4 hammer and ensnare attack into his two dodge so make sure you have some rerolls stored. The other kill order will also want Kinwhisper killed last, but keep in mind he is quite tanky so it might be worth it to just pretend to be a Skaven and run away.
Ben: The last to die should probably be Kreep, as he is difficult to kill and not very threatening if left on the battlefield.
Scared-of-losing-leader Order: Skittershank –> Padpaw –> Krowch’t –> Skulck –> Kinwhisper
Not-scared-of-losing leader Order: Krowch’t –> Skulck –> Skittershank –> Padpaw –> Kinwhisper
Gnarlspirit Pack

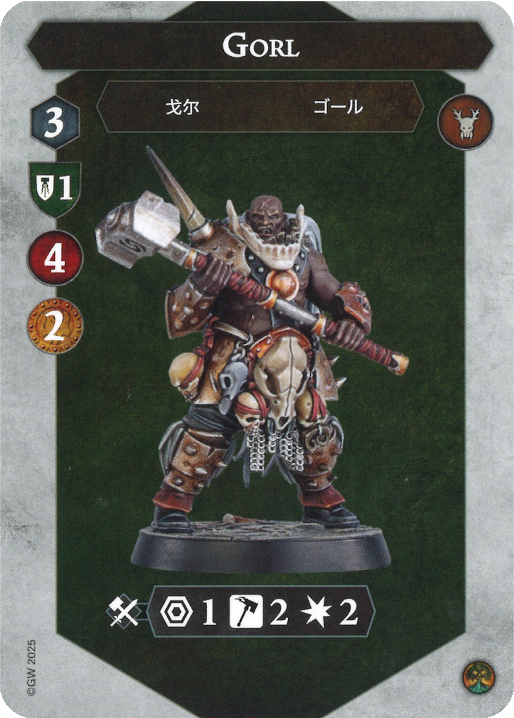
Michael: GSP are all pretty strong, but luckily they don’t flip/flop with their Save stats as much as they used to. Still, I have to say the first guy to kill in pretty much all cases is Gorl if you have the accuracy. It’s not really worth spending 7 activations swinging into his two shields with two swords, but if you can manage, removing the 3 damage threat off the board is helpful. If you do lack the accuracy I would say prioritise Kheira, as she is the easiest to kill for highest reward.
Ben: Gorl has to be the first to go from this warband, as his guaranteed three damage is pretty scary and even though his attack is not as accurate as some Kheira or Lupan, brutal can shut down defencive counterplay.
Michael: For the high accuracy kill order I would say kill Sarakkar next as he does happen to be a very strong fighter with his 2/2/2 attack profile. He does have a decent save profile making him slightly unnappealing to atttack with bad accuracy, but even so I would say kill him second in the bad accuracy kill order as as stated before he is a decent save fighter and not an impenetrable two shields on Guard in Cover save fighter.
Ben: The next target should probably be Kheira, as he is the only fighter left to be able to do 3 damage, even if only around 50% of the time, and has a naturally more accurate attack than Gorl. The only downside to killing Kheira is that he is the only fighter left that can only attack at range 1, however the potential for three damage is still to good to leave on the board for long.
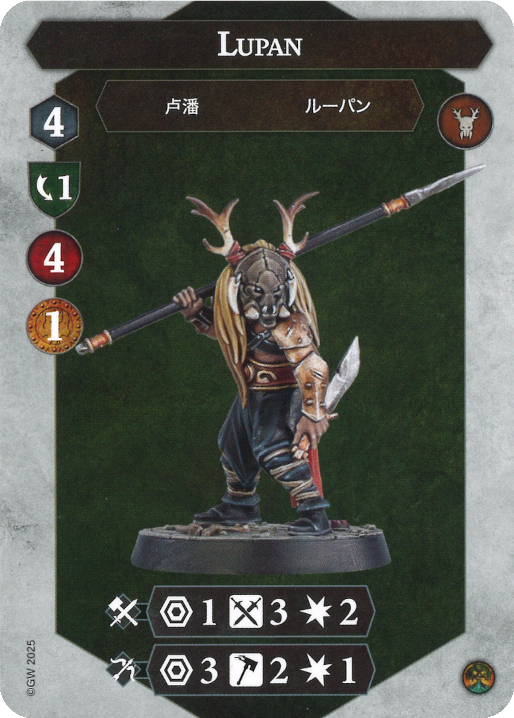
Michael: With good accuracy I would always consider whether or not I need the two bounty of Kheira or the ranged threat of Lupan removed first. However, a rule of thumb would be to kill Kheira, as to win the game you need more glory than an opponent, not less ranged attacks on the board! On the other hand, with bad accuracy, I would say kill Lupan here, as a semi-achievable 1 Bounty is better than a dream of 2 Bounty in this case.
Ben: The third to die from this warband is the leader Sarrakkar, as he has a threat range of 8 (which is practically the entire board) while hitting for 2 damage and having a ranged option as well. He also gives 2 bounty, which is double what the reward for Lupan is.
Michael: The final kill for the accurate kill order is as stated before either Kheira or Lupan but odds are is Lupan. This is because he is a pretty much less damaging Kheira, which is not as scary, on top of being practically immortal in Round 1 when he is a threat AND being only one bounty. Not too sure what happened there balance-wise. Anyways, for the inaccurate order Gorl is probably last because as stated before he isn’t too appealing for his inability to let attacks go through, making killing him a tough ask.
Ben: The last to die probably should be Lupan, as he is only worth 1 glory and his unleashed and inspired side are the reverse of what would be best (You can inspire before an activation and unleash after, meaning that unleashed is better to be defensive while inspired should be offensive).
Accurate Order: Gorl –> Sarakkar –> Kheira –> Lupan
Inaccurate Order: Kheira –> Sarakkar –> Lupan –> Gorl
Threat Removal Order: Gorl –> Kheira –> Sarakkar –> Lupan
The Thricefold Discord

Michael: Despite being very slightly (and maybe justifiably 🙂 ) nerfed, their kill order has changed a lot from last time. First of all, a lack of Wicked Slice means Vexmor is now target number one. He has everything we want – a low save (when uninspired), 3 Bounty, and a semi dangerous attack. He is the biggest payoff with also the least risk!
Ben: What a fall from grace these three daemons experienced. None of these fighters are very scary, but the first target should be Vexmor. His inspiration doesn’t make him very strong, but very annoying to kill due to having very high defences, making him target number one.
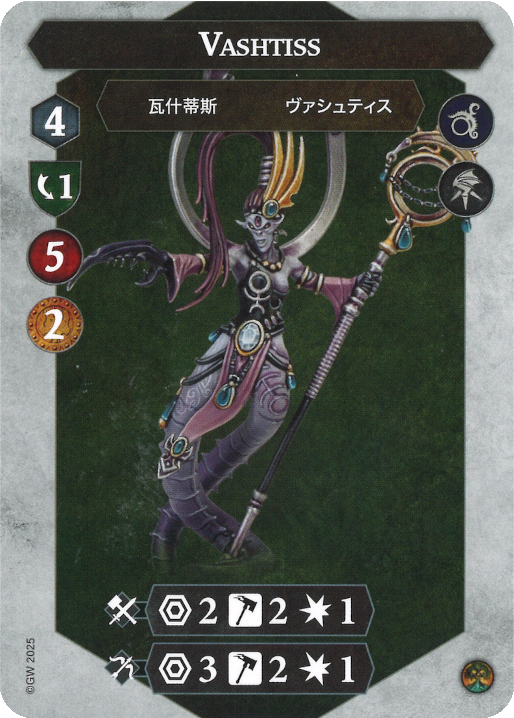
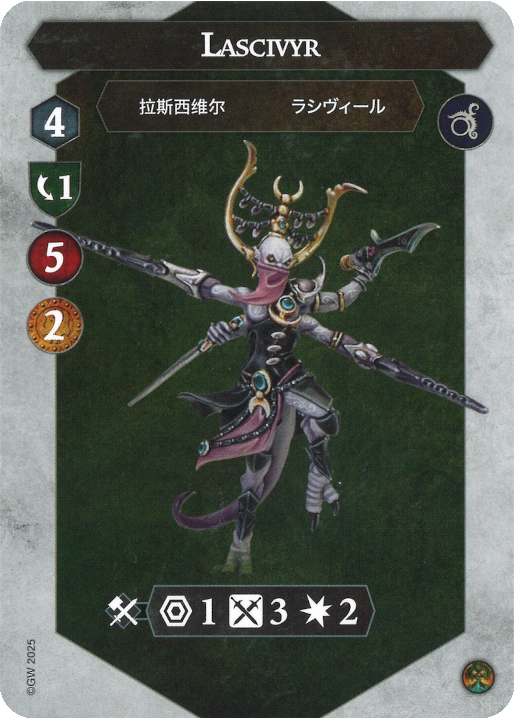
Michael: I would honestly kill Vashtiss next. She is much scarier than Lascivyr after he lost his Wicked Slice, mainly due to her being able to hit more than one target per round. Even though Lascivyr can hit for three damage sometimes, I identify Vashtiss’ threat range is scarier.
Ben: I think the next target should be Lascivyr. Even though he only hits on range 1, he is more accurate than Vashtiss and can hit for three damage sometimes.
Michael: Mainly due to lack of other fighters on the board Lascivyr dies last. Yes, he does do three damage, but he also happens to be the only one with a Range of 1 making him unlikely to strike several times. You can argue with the Temptation dice change Lascivyr is even less of a threat as he will be pushing around the board less (I feel).
Ben: The last fighter to kill in this warband is Vashtiss. She isn’t very accurate and although just better than vexmor, isn’t as rewarding to kill, making her the last fighter to stay alive.
Scared of Range Order: Vexmor –> Vashtiss –> Lascivyr
Scared of Damage Order: Vexmor –> Lascivyr –> Vashtiss
Blood of the Bull
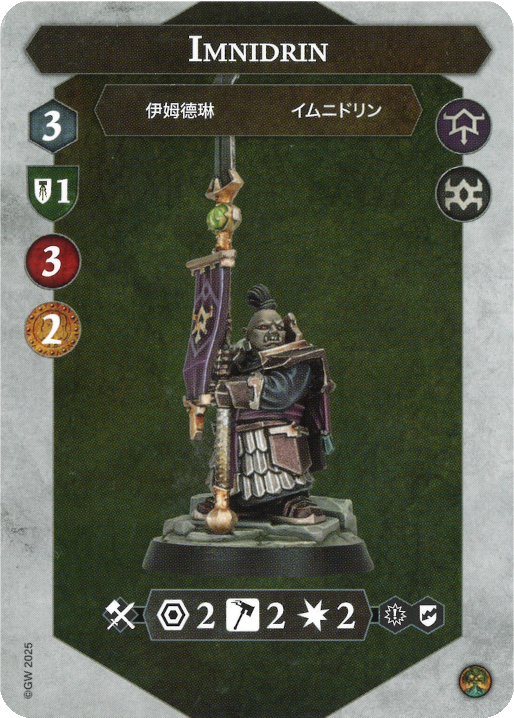
Michael: The Chaos Dwarves (TM) are finally here! And they have wording issues on their warscroll not allowing them to generate demon dice when they want! Luckily those wording issues don’t change the fact that Imnidrin is first to die. Ideally you attack someone else to bait out the Daemon die and then kill her but this is a kill order and not an attack order article. Imnidrin has 2 bounty, 3 health, and is the only other ranged fighter in the warband, making her a super high priority.
Ben: This warband might be the most stagger focused warband in the game with their 3 attacks with stagger and requiring delving for their entire warscroll, which I am a fan of as a Staggerer. Anyway, Immidrin should be the first to die, as her range 2 attack makes her scarier than the rest of the warband while being one of the most accurate fighters in the warband and being worth 2 bounty. Also stagger is obviously broken.
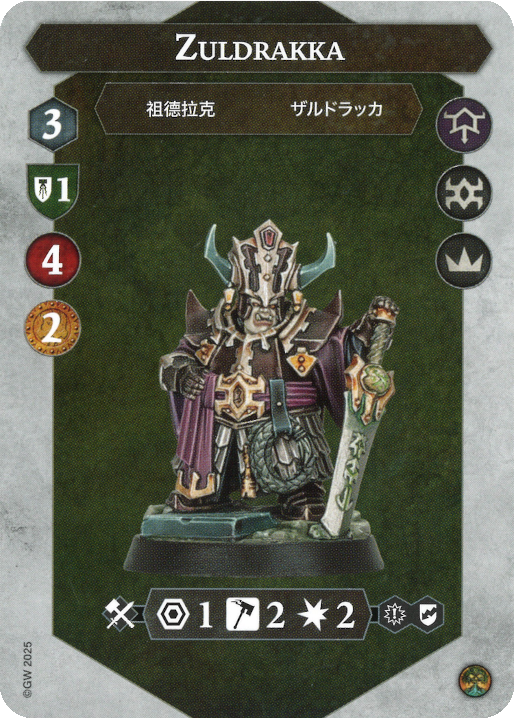
Michael: Second, I would say kill Zuldrakka – she is also worth two bounty so by killing her and Imnidrin you already have more than half your kill bounty. In addition, she is the main threat of the warband, being not only accurate but also damaging with her Crit Grievous. On top of that, her being 4 Health shouldn’t change attack breakpoints too much as most 2 damage attacks still do two shot her.
Ben: The next target should probably be the leader, as she is still hitting on 3 hammers, but she has the chance of hitting for 3 damage with her crit grievous. She is also the only fighter left that is worth 2 bounty. The only downside is that she is the only fighter that doesn’t have stagger, so take that into account.
Michael: Third I would argue for killing Tokkor ‘the Flamespooler’. He is very easy to hit compared to the rest of the warband (Grisk doesn’t count ok) and he is a ranged threat, but can also be a capable melee fighter.
Ben: The next target should probably be Morudok, as he is the only fighter that has a printed 2 damage attack, allowing his to use another Runemark, such as the busted stagger ability he has. He also really likes the Grisk passive to turn his 4 swords into practically 4 hammers with surrounded.
Michael: Murodok just isn’t as big of a threat as Tokkor is as his melee-only profile hits on 4 Swords which is less reliable than 3 Hammers. Ok sure, he does have Stagger pretty much always which I forgot to account for. Murodok is also much harder to hit than Tokkor. When compared to Grisk, he is pretty much a direct statline upgrade, making it a no-brainer.
Ben: The next target should be Tokkor, as he is simply better than Grisk in literally every way (except 1 move I guess) and also has Stagger
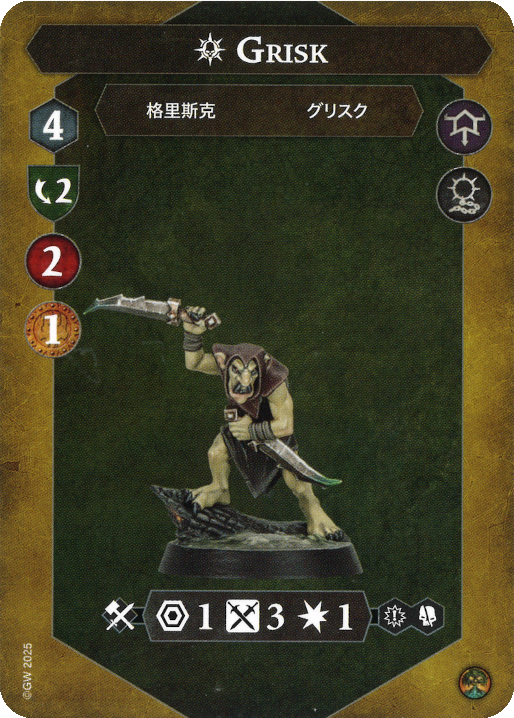
Michael: Yes, you can argue that Grisk should be higher up due to his hobgrot kunnin allowing both swords and hammers to hit in supports. Being fully honest right now, in my 7-8 games vs. Blood of the Bull, I have seen that ability used once. It’s really easy to avoid if you try, making Grisk the least priority target.
Ben: Grisk is simply the least threatening fighter, as you can just move away from him and his 3 sword attack is simply not very threatening.
Scared of Range Order: Imnidrin –> Zuldrakka –> Tokkor –> Murodok –> Grisk
Scared of Damage Order: Imnidrin –> Zuldrakka –> Murodok –> Tokkor –> Grisk
Thorns of the Briar Queen
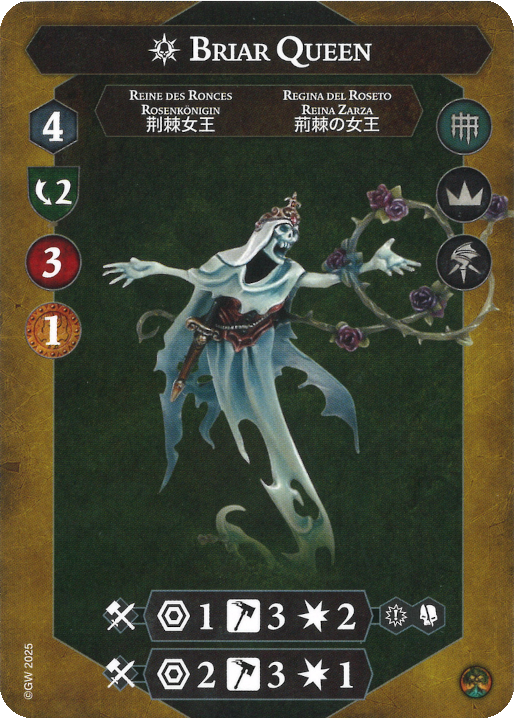
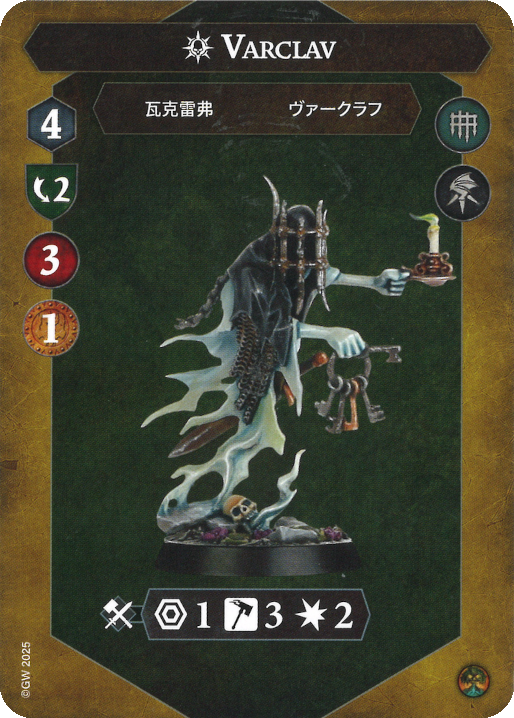
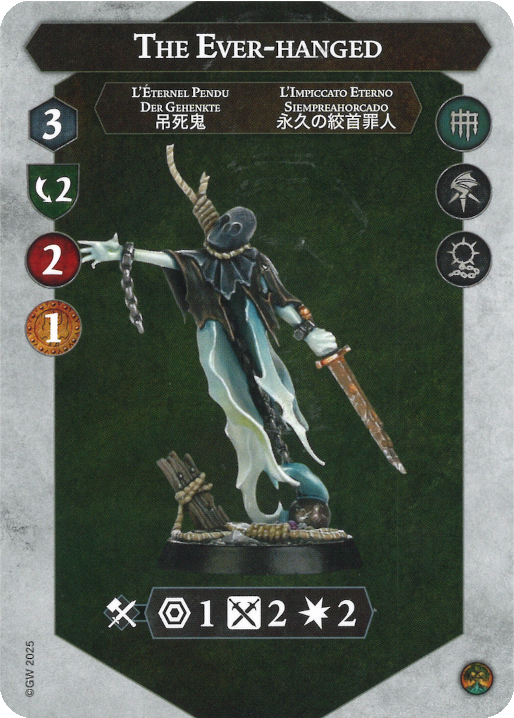
Michael: While I love the Thorns rework I hate that they have seven fighters were kill order actually matters! First, you have to consider whether they are playing EotK or not. If so, focus down the Ever-Hanged first, as he is the biggest Tempered threat. If not, kill Varclav first, as his Soul Warden can get very annoying on top of him having a strong attack.
Ben: As Michael said, vs EotK the kill order changes, however I will be assuming non EotK kill order. The first fighter to die should probably be Varclav, as his Soul Warden ability is very useful and he is actually pretty threatening with his 3 hammer attack.
Michael: Second up in the EotK order would be the Ironwretch/Exhumed, which are the same fighter for legal reasons. This is because they are the more accurate of the minions remaining, and we don’t want to temper Varclav or Queen jusssst yet. In the non-EotK order, I recommend going for the Queen. She is quite the threat on the board doing potentially three damage and having a Range 2 attack. Be sure to consider if Queen or Varclav’s double push is scarier for your warband!
Ben: The next target should almost always be the Briar Queen herself, as she is the most threatening fighter left with her 3 hammer attack that has around a 40% chance to hit for 3 damage while also having the only range 2+ attack in the warband.
Michael: The next target in the EotK order has to be the last two minions – namely The Silenced and the Uncrowned (who have both been merged as well). They are the last untempered fighters and we can’t afford giving Trial to the Thorns, as they net more glory than we do by killing Queen + Varclav. In the non-EotK order, the Ever Hanged is often the strongest, making him a priority target.
Ben: The next target should be the Ever-Hanged, as he hits for 2 damage uninspired while also having ensnare, making him often the most accurate fighters left.
Michael: In the EotK order, I would actually recommend running away here, unless you see The Dark Horse has come out because then it means you can actually kill one of the leaders without giving away Trial! In the non-EotK order, I recommend killing the Ironwretch/Exhumed combo as their two hammers are more accurate than the other two’s three swords.
Ben: Now we come to the minions, which is where the kill order gets interesting. If you want to kill the minions earlier (such as when playing against EotK) I would recommend killing The Silenced and The Uncrowned first, as their attacks scale better with singles and doubles. However, if you are killing them as late as in this order The Exhumed and The Ironwretch should be the first to go, as their 2 hammer attack is naturally better without any accuracy abilities applying.
Michael: Finally, the non-EotK order will have us kill the last two minions – The Silenced and Uncrowned. It is important to keep in mind that an enemy who is cannily using Wave of Terror might make them more accurate than the two hammer guys – just keep this in mind!
Ben: The last on the chopping block is The Uncrowned and The Silenced, as their 3 swords attack just isn’t as scary as the rest of the warband.
EotK Order – Ever-Hanged –> Ironwretch/Exhumed –> Silenced/Uncrowned –> The Dark Horse
Non-EotK Order – Varclav –> Queen –> Ever-Hanged –> Ironwretch/Exhumed –> Silenced/Uncrowned
The Exiled Dead

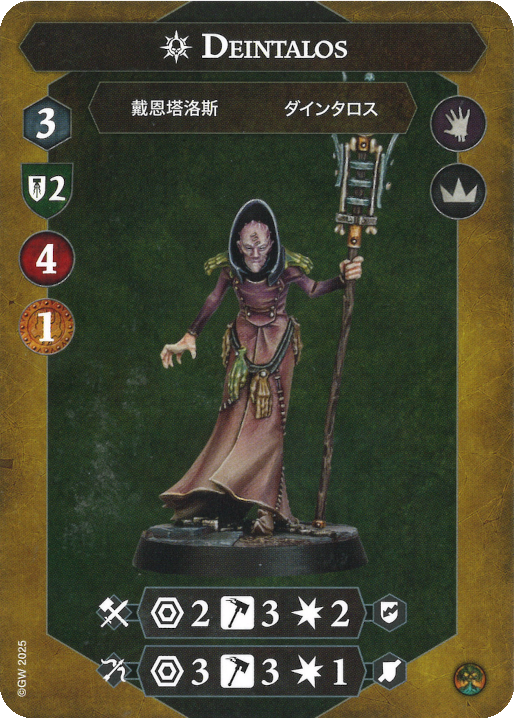
Michael: Not to state the obvious, but the first target for this warband is always Deintalos. Literally half the warscroll is dedicated to him, making him a pretty tempting target. In first edition there was a niche to kill Marcov first but not anymore, with Puppeteer being nerfed.
Ben: Deintalos is the strongest and the first target in this warband, as Danse Dynamic is the main gimick of this warband and it gets completely shut of without Deintalos. He also gets way more difficult to kill when inspired, so kill him before that.
Michael: Ok, call me crazy, but I think Marcov dies second. While he does have the best Save in the warband second only to Deintalos (speaking of, pls don’t call him dentist – he worked a lot as a necromancer 🙂 ). The second half of the warscroll belongs to him and he does have the capability to do 4 damage on literally turn 1 which makes him a priority target – especially when we consider that the 4 damage spike can go to 5 damage when inspired.
Ben: Markov should die second, as not just is he the most threatening fighter left, hitting for 3 damage, but also has puppeteer tied to him, which will randomly sometimes deal 4/5 damage.
Michael: Regulus is probably your ‘go next’ target. He loses a lot of accuracy on de-inspiration and odds are he won’t come back to life too often. He also does have Range 2 making him a big threat on the board.
Ben: The next to die should probably be Regulus, as he is the most accurate fighter left. Also, if Deintalos isn’t dead yet he is not going to reappear on the board as often as the others.
Michael: If you are a shield warband prioritize killing Vlash, with his Cleave. Otherwise, the most important minions to kill are Ione/Bault, as they lose a lot on uninspiring, making them very important to get off the board.
Ben: The next target should probably be Vlash, as he has cleave which can be dangerous.
Michael: For kill #5, make sure to kill Vlash if you haven’t yet and Ione/Bault if you already did. As stated, they do lose a lot on uninspiring, making them a valuable kill.
Ben: Assuming Deintalos is already dead, all three of the rest of the minions are the exact same, so kill them in any order. If however Deintalos is still alive, Ione and Bault should go first, as they go to 1 damage when revived.
Michael: Despite Coyl being technically the strongest he doesn’t actually lose much of the threat when being Raised, making him very unappealing to kill compared to others. Obviously if Deintalos is dead Coyl should go down ASAP but otherwise other minions are more dangerous!
Ben: The last fighter to die should probably be Coyl, as he is simply the most threatening fighter when revived while tied as the least threatening when inspired.
Dodge Order: Deintalos –> Marcov –> Regulus –> Bault/Ione –> Vlash –> Coyl
Shield Order: Deintalos –> Marcov –> Regulus –> Vlash –> Bualt/Ione –> Coyl
Sons of Velmorn
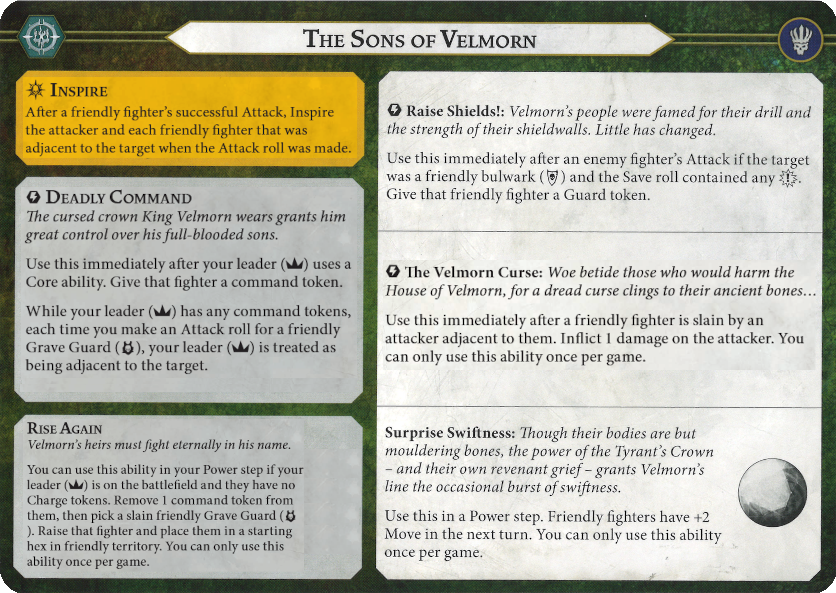
Michael: Before I begin – guys, this warband is NOT bad. Especially after their buffs. I am genuinely losing to them more often than winning (at the time of publishing this is no longer true). Maybe it’s a skill issue but I’d love tips! With this mini-rant out of the way – I’d argue Velmorn needs to leave the board ASAP. This isn’t always possible due to his high save when inspired and usefulness to the warband making him often get deployed at the back, but the pipe dream involves Velmorn’s ‘eternal lineage’ to end. With his Command Counters being permanent now and being crucial to the Raise to work, this is doubly true.
Ben: The first to die in this leader centric death warband should hopefully in fact be the leader. He makes every other attack more accurate while also being 2 bounty and hitting for three damage inspired.
Michael: Jedran is a good second target. He does have the breakpoint 5 Health making him need at least 3x 2 Damage attacks. On the other hand, he isn’t too threatening due to his two swords (though Gristlewel begs to differ). He also inspires much slower with his low accuracy making him appealing to kill early on, before he gets two shields. Arguments can be made for killing him first!
Ben: The next target should be Jedran, as his natural 3 damage as well as his pretty accurate attack make him pretty threatening while also giving 2 bounty.
Michael: Here the order splits. Shield warbands want to kill Helmar ASAP, as his Cleave is very powerful – rolling one success on 3 swords/flanked is pretty likely making him actually an accurate fighter, on top of doing 2 damage! If his Cleave isn’t scary, then kill Faulk – his Crit-Grievous procs wayyy too often!
Ben: The next fighter to die in this warband should be Faulk, as for some reason this fighter hits for 3 damage very often.
Michael: Kill #4 is dedicated to whoever didn’t die in the previous step!
Ben: The fourth fighter to die is in fact not the last, but Helmar. His cleave is very scare, even for dodged based warbands as it makes guard not help with your defence.
Michael: The final Son of Velmorn to fall should typically be Thain, Fourth-and-Last. Even though he does have Stagger, which is very terrifying, we do kind of have to prioritize the other skeletons a little more due to their runemarks being slightly more powerful (I was threatened to say this).
Ben: And the last one to die should in fact be Thain. He is the weakest and even though he staggers, which is very strong, he needs to hit first and does not have any other benefits.
Michael: Before moving on to the next one I do want to quickly also mention that an ES Build will focus a lot on the Bulwarks (Jedran/Thain/Faulk) which means that we have to reconsider the order again. Just something to keep in mind!
Non-Shield Order: Velmorn –> Jedran –> Faulk –> Helmar –> Thain
Shield Order: Velmorn –> Jedran –> Helmar –> Faulk –> Thain
The Skinnerkin
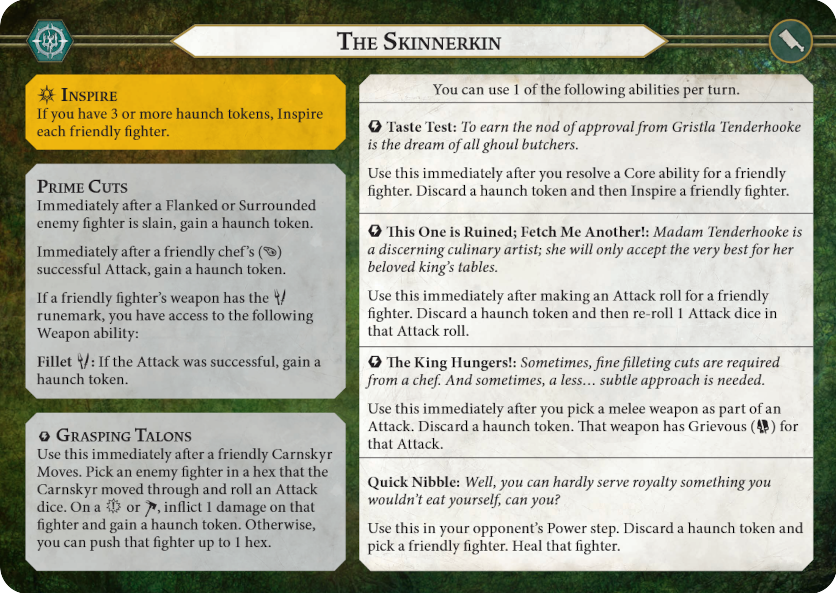
Michael: These guys are now a non-throw pick, as shown by Matteo at Worlds, so they have a viable section now unlike last time! The first kill depends on your ability to ‘snipe’ a target. If you can reliably secure a kill onto Gristla, kill her first. She is very tanky when we consider the once per two power steps Heal. If you can’t, then I would say kill Kretch, as he is much squishier albeit also tanky. Post-February patch I would say the snipe order is a lot more reliable to pull off by the way, as the heals are way weaker.
Ben: The first target of the Skinnerkin should be Kretch, as he is one of the fighters that can generate haunch tokens reliably. He is also more accurate than Gristla while being less tanky and being worth the same bounty, making him fit all the criteria for a good first kill.
Michael: In the snipe-order, I would go for Kretch next, as he is a reliable haunch generator and we don’t like that. In the non-snipe order, Gristla might be a little too tanky, so I would instead focus on the Carnskyr due to it’s high save when inspired but also his Grasping Talons ability also being a reliable haunch generator.
Ben: The next target should probably be Gristla, as she is the other chef and killing her shuts off a lot of the haunch generation. She is also worth 2 bounty while having the worst save characteristic of the fighters when inspired.
Michael: In the snipe-order, Carnskyr dies next as this completely stifles the Haunch-o-matic 5000. In the non-snipe order, I would try to go for Seddrik, of all people, next. This is mainly becuase this only leaves two melee fighters on the board making the Skinnerkin a lot easier to deal with, as non snipers are often very fast and can outmanoeuvre the melee guys.
Ben: The next to die should be The Carnaskyr, as he is the last haunch generator and his Grasping Talons ability is very powerful now that it can’t miss. He also is a minion, which doesn’t matter at all, but why not get rid of the minion anyways (does anybody know why this is still a thing?).
Michael: Snipers would want Pewdrig dead next as that leaves no 2 Damage threats on the board – which is obviously nice! Non-snipers would also want Pewdrig dead to be honest, though chances are we aren’t killing much else.
Ben: The next to die should be Pewdrig, as he does 2 damage and is more accurate into anything other than 2 dodge.
Michael: Snipers want Seddrik dead last as he produces the least haunch in the warband on top of not being able to use the Grievous ability! Non-snipers want Gristla dead last on paper, though in reality, if you see a chance to kill her at any time, take it! She is the main haunch engine of the warband making her a super appealing target.
Ben: The last to die in this warband should be Seddrik, as his attack simply isn’t scary and he is annoying to hit with his 2 dodge.
Snipe Warband Order: Gristla –> Kretch –> Carnskyr –> Pewdrig –> Seddrik
Non-Snipe Order: Kretch –> Carnskyr –> Seddrik –> Pewdrig –> Gristla
General Order: Kretch –> Gristla –> Carnskyr –> Pewdrig –> Seddrik
Zarbag’s Gitz


Michael: One of the main reasons I hate this warband is the last kill order article because they have 9 fighters! Obviously, the goal with Gitz is to kill one fighter per turn. But if you get to pick, then first, the main target HAS to be Snirk unless you are playing a warband with built in displacement. Snirk gains extra Save on inspiration so you really don’t want him to inspire cause he is just a nuisance to kill at that point. He also does happen to have 3 damage.
Ben: The first target should be Snirk, as his 3 damage attack is very scary and being ping-ponged through him with volley is very annoying. He also inspires to 3 dodge and 3 swords (which is usually used with flanked/surrounded), so kill him early.
Michael: Next, kill the squigs. The Gitz damage output lies mostly in them and Snirk so make sure to get these off the board ASAP to really harm the warband’s damage. They are also worth bounty now!
Ben: The next to die should be Zarbag himself, as his melee attack is pretty good. However what sets him apart is his insane ranged attack which hits on 4 hammers for some reason.
Michael: Drizgit is next for the simple reason that he is simpler to kill than Zarbag but does the same amount of damage (though with no ranged attacks).
Ben: The next targets should be the Squigs, as they have they hit for 2 damage on 3 hammers and are pretty easy to kill.
Michael: I’d argue that the Big Z (Zarbag) himself is next. At this stage, you should have some accuracy upgrades out so his death will be easy to arrange. He is a very annoying gobbo and he does have a lot of health but killing him means the warband has no sources of 2 damage left! Wait, what? The archers shoot twice per turn?
Ben: The next to die should be Drizgit, as he is the only 3 hammer, 2 damage fighter left on the board (naturally this warband has 4 3 hammer 2 damage attacks).
Michael: Next, we kill two out of the three ‘2 DMG’ archers because well, they can do two damage. The trick here is that Prog is actually more threatening than the archers if only one archer is on the board, so…
Ben: As Michael mentioned, killing 2 of the 3 archers reduces the damage of the last archer significantly, so only kill 2 of them now.
Michael: … Prog dies second to last! As stated before he is technically scarier than the archers but we want to reduce damage output for the Gitz ASAP making him a very low priority target.
Ben: Prog, being on 2 hammers with ensnare is scarier than the 3 swords of the remaining archer, so kill him first.
Michael: Finally, kill the last archer here. Ideally it’s Redkap cause his model is the best imo but your choice.
Ben: Whichever archer is still alive should be the last to die, as alone they simply aren’t very scary.
General Order: Snirk –> Squigs –> Drizgit –> Zarbag –> 2 Volleyers –> Prog –> 1 Volleyer
Alternate Order: Snirk –> Zarbag –> Squigs –> Drizgit –> 2 Volleyers –> Prog –> 1 Volleyer
Mollog’s Mob
Michael: Mollog has 2 kill orders – kill big guy, or don’t kill big guy.
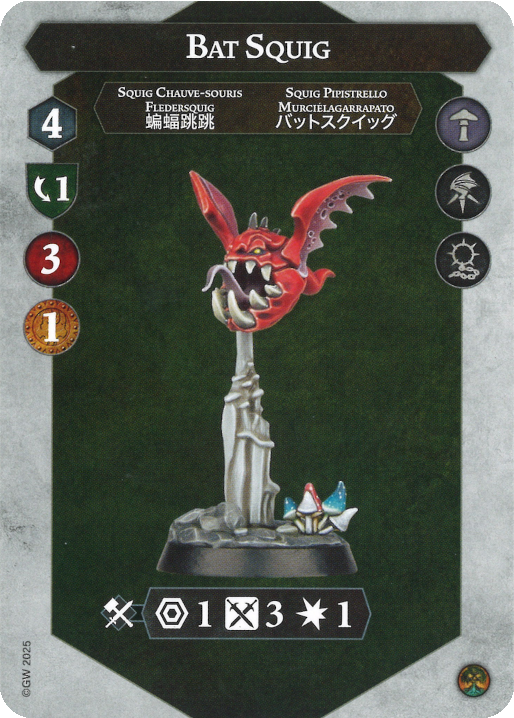
Michael: Kill big guy has a very obvious first target – Mollog himself. With the Spitewood changes and the Raise this has been made a much more appealing strategy. Obviously this is a risky strategy as it involves getting super close to a super dangerous fighter, but it’s worth it in the end. The don’t kill big guy order will have you focusing down Bat Squig. He is the strongest of the minions as he can move faster than all of them and is pretty accurate! In addition, baiting the Raise out early is important and odds are the Raise will be used on the Bat. With the Feb. changes, Kill Big Guy is even better as the minions are only overtuned for one round a game (attack wise).
Ben: I would always try to kill Mollog first, as killing him not just removes the major threat of the warband, but also rewards 4 glory, the most glory any fighter gives. Him only defending on 1 shield also makes him easier to hit and to kill than expected, especially while being flanked and surrounded. Also killing him early makes the revive weaker, by never inspiring the revived fighter.
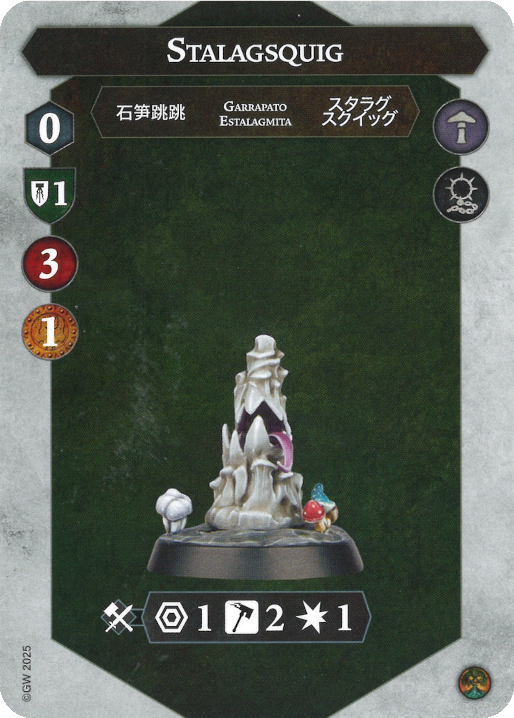
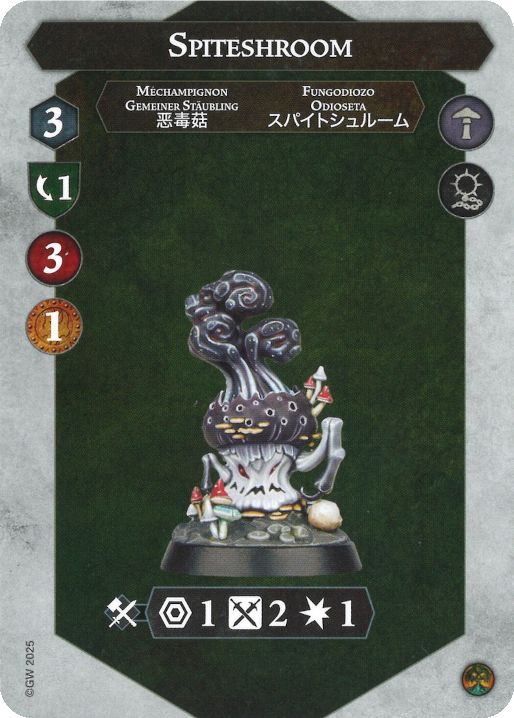
Michael: The kill big guy order will want Bat Squig dead next for the reasons above. The second minion dead in ‘don’t kill big guy’ is Spiteshroom. He poses a slightly larger threat than Stalagsquig because the Spiteshroom can actually move around the board.
Ben: The next target should be the Bat Squig, as it is the scariest fighter remaining and is incredibly fast.
Michael: Third in the kill big guy order is Spiteshroom, for the reasons above, but also for the added reason of killing the rock will allow the shroom to hit charged out – and we don’t want that! Third in the don’t kill big guy order is a gamble – you can try and kill the Stalagsquig, but Mollog might punish you for it by slapping you while you’re adjacent. Alternatively, you can focus Mollog immediately now and pray you survive contact!
Ben: The next to kill should probably be the Spiteshroom, as it has a higher threat range than 1 and can sometimes hit for 2 damage.
Michael: Fourth and last, kill big guy order would want to see the stationary Stalagsquig dead. Despite him having a permanent charge token, he is very accurate and scary to get close to plus he can’t really do anything so just ignore him. In the don’t kill big guy order, Mollog is last to go. You should consider the game state as sometimes the optimal strategy is just to leave Mollog alive and not let him get any attacks on you, but you do you!
Ben: The Stalagsquig should be the last to go, as even though he has a scary attack, his threat range is 1, making him act more like a lethal hex than a fighter.
Kill Big Guy: Mollog –> Bat Squig –> Spiteshroom –> Stalagsquig
Don’t Kill Big Guy: Bat Squig –> Spiteshroom –> Stalagsquig (optional) –> Mollog
Rippa’s Snarlfangs
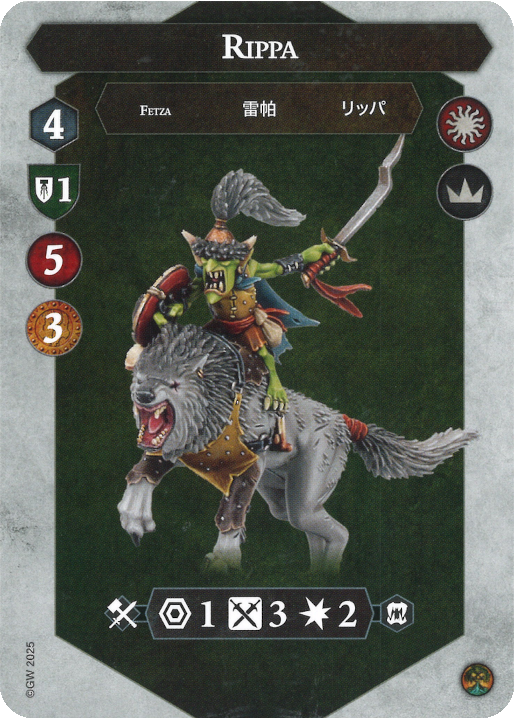
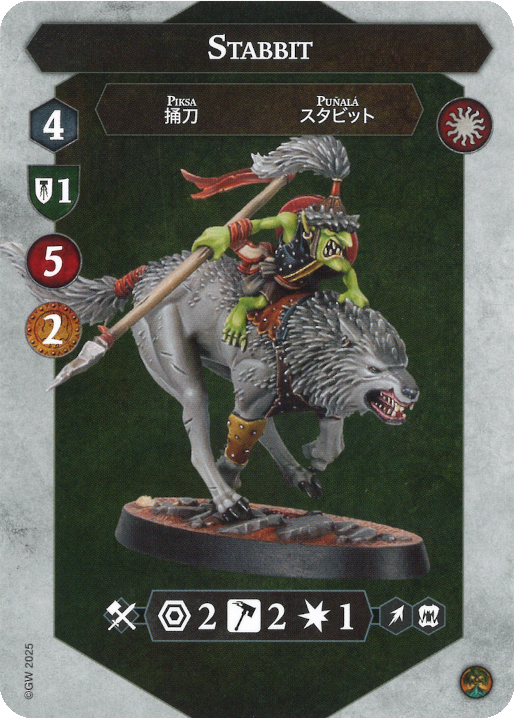
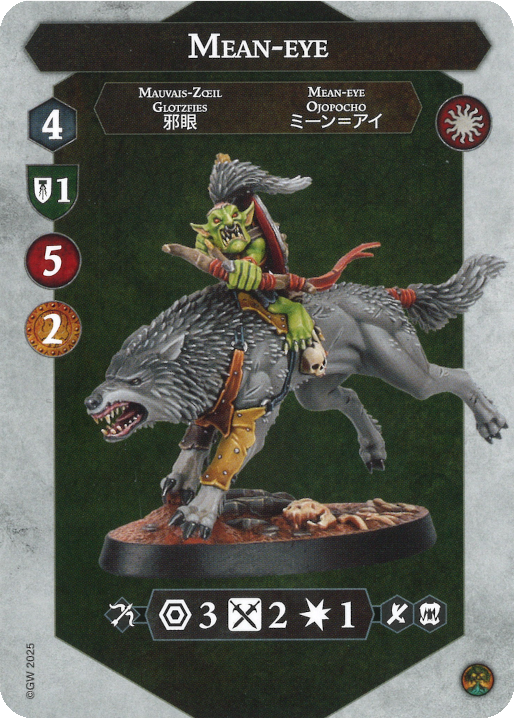
Michael: The bane of first edition. I have to advocate for killing Rippa first. He is by far the most accurate git in the warband and when inspired more so, making his 3 bounty very appealing. In addition his lack of ranged attacks makes him very easy to punish.
Ben: The first to die should definitely be Rippa, as hitting on 3 hammers for 2 damage is the most accurate and damaging attack in the warband, having the potential for 4 damage off of 1 action.
Michael: Next is Stabbit because Stabbit can actually benefit from melee-only stuff like accuracy and damage. Odds are Stabbit is inspired already, which is funny because he actually goes less accurate. However the order between Stabbit and Mean-eye is very interchangeable depending on the deck pairing!
Ben: The next to die should be Mean-Eye, as being range 3 makes a big difference and having the option to use ensnare when attacking from far away makes this attack even better.
Michael: Mean-eye is last cause he doesn’t benefit from any melee buffs, making his bow the only way to trigger the bite. This means he is not often going to be hitting it for three damage – making him the least threatening!
Ben: Stabbit is the least threatening of these three, as having less range and not having ensnare is a major downside. However, he can be upgraded with Keen Eye and other melee required upgrades which Mean-Eye can’t use.
General Order: Rippa –> Stabbit –> Mean-Eye
Alternate Order: Ripap –> Mean-Eye –> Stabbit
Hrothgorn’s Mantrappers:
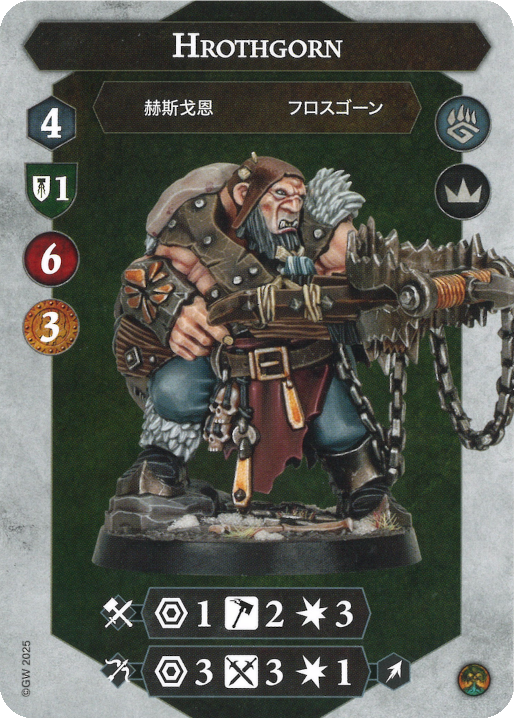
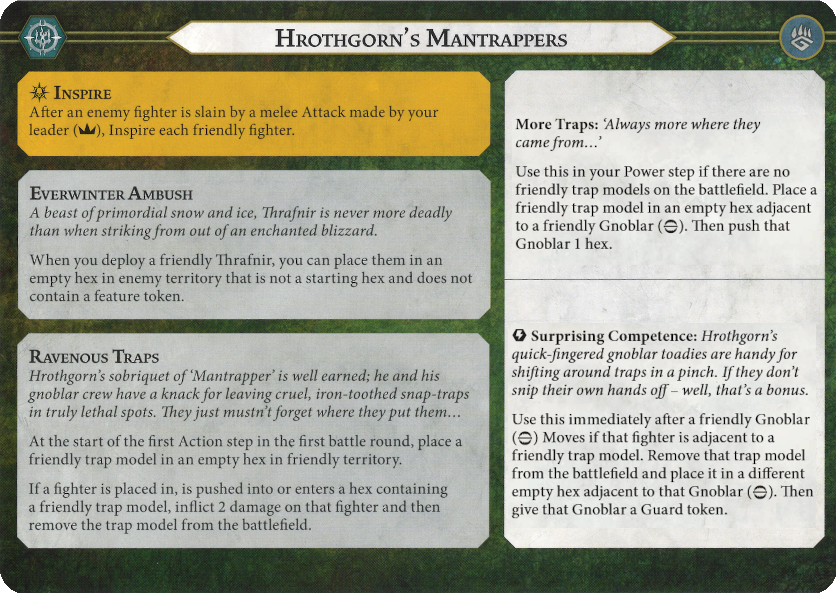
Michael: We are so back with kill big guy and don’t kill big guy! In kill big guy, the target is Hrothgorn cause he is… slightly… bigger than the rest of the group. In the don’t kill big guy, I want to advocate for killing Thrafnir first. His two damage is very annoying and from the Hrothgorn I have played against he is typically in the middle of my territory on turn 1, making him an easy target even with his two dodge.
Ben: For this warband I actually like killing Hrothgorn first, however be careful when doing so as him killing a fighter inspires him, causing him to hit very accurately and go to 2 shields, making him more difficult to kill than Mollog.
Michael: Next up in kill big guy we have Thrafnir, cause he is the closest thing resembling a big guy left in the warband. Two damage is scary. In the don’t kill big guy order, call me crazy, but Bushwakka should die next. Why? Isn’t he one sword? Yes. But he does inspire to +1 Save, +1 Dice, +1 Damage, +1 Move, and ensnare. It’s a LOT easier to deal with him earlier than later. With the new changes and the Gnoblars maybe getting some Guard tokens, this is even more true.
Ben: The next target should be Thrafnir, as he hits for 2 damage with cleave, making him the scariest fighter left on the board. He also is usually easy to reach due to deploying in your territory.
Michael: In kill big guy order, if Bushwakka inspired I would kill him for the reasons above. However since big guy is likely dead meaning you can’t inspire anymore, I would actually go for Luggit and Thwack cause they are the most accurate fighter left! In don’t kill big guy, I would kill Quiv before he inspires as he is in a similar case to Bushwakka inspiration-wise.
Ben: The next to die should be either Bushwakka, if the fighters are all inspired, or Luggit and Thwak if they aren’t.
Michael: In kill big guy, Quiv dies next. This is due to his direct upgrade over uninspired Bushwakka. In don’t kill big guy, I would say Luggit and Thwack is next as you expressed your desire to avoid Hrothgorn making them the only eligible target.
Ben: The fourth fighter to target once again depends on inspiration status, with Quiv dying if they are uninspired and Luggit and Thwak dying if they are inspired.
Michael: In kill big guy, Bushwakka is last due to him having literally the worst accuracy in the game on top of no funny 4 damage mechanic to capitalize off of it (remember Heroslayer?). Finally, in don’t kill big guy, I would reccomend Hrothgorn dying last because you don’t want to fight him which means he is a little difficult to kill.
Ben: The last fighter to die is whichever of the three Gnoblars is still alive.
Kill Big Guy: Hrothgorn –> Thrafnir –> Luggit and Thwak –> Quiv –> Bushwakka
Don’t Kill Bug Guy: Thrafnir –> Bushwakka –> Quiv –> Luggit and Thwack –> Hrothgorn
The Starblood Stalkers
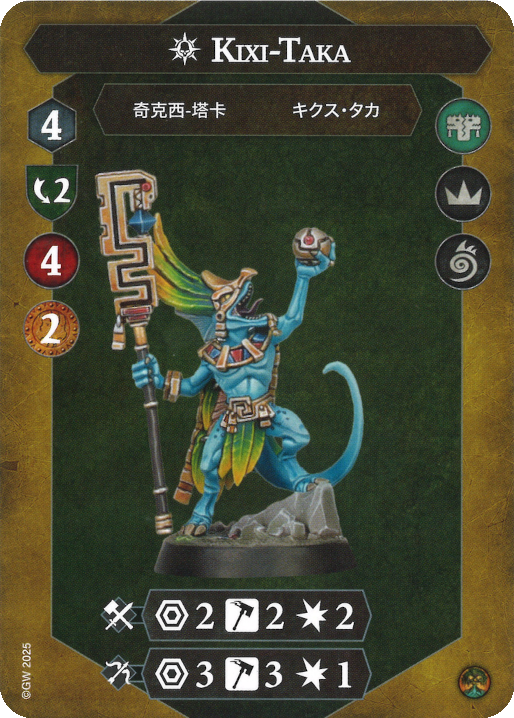
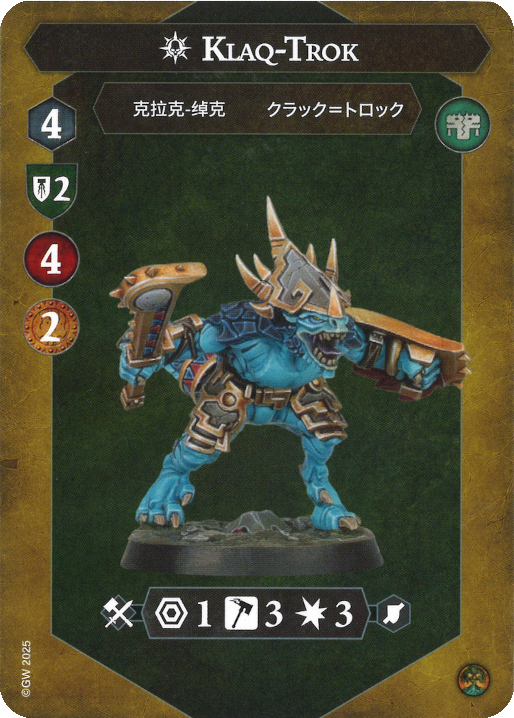
Ben: I have had some experience playing these and the most best fighter to kill first is Klaq-Trok. He is the most threatening fighter by far, especially inspired, and killing him round 1 while he doesn’t defend on 2 shields and hits on 3/4 hammers with cleave is very useful.
Michael: As a professional Ben’s opponent, I can confirm he indeed does play the Stalkers extremely well. When playing against them, I feel like Klaq-Trok is indeed the primary threat and he must die ASAP. He also does happen to give two bounty. However, the most important thing to do against this warband is to prevent inspiration so kill whoever allows this to happen.
Ben: The second target in this warband is Kixi-Taka, as they have a range 2 attack that hits for 2 damage and the most accurate range 3 attack, while giving 2 bounty on a kill. Removing the 2 bounty body is also very useful when trying to deny Supremacy and killing her makes the warscroll ability “The Diviner” unusable.
Michael: Kixi-Taka is a fair second target but he is very annoying to kill with his 2 dice and re-roll, so (as someone who played against rather than with the Stalkers) I say kill Huachi. He is the best of the dinos and he does happen to inspire to two shields so I really want to avoid that! He is a somewhat easy kill when uninspired as well.
Ben: The third fighter to kill against the Starblood Stalkers is Huachi. Of the remaining fighters he is the most accurate, hitting on 2 hammers, and has a ranged attack that could be useful.
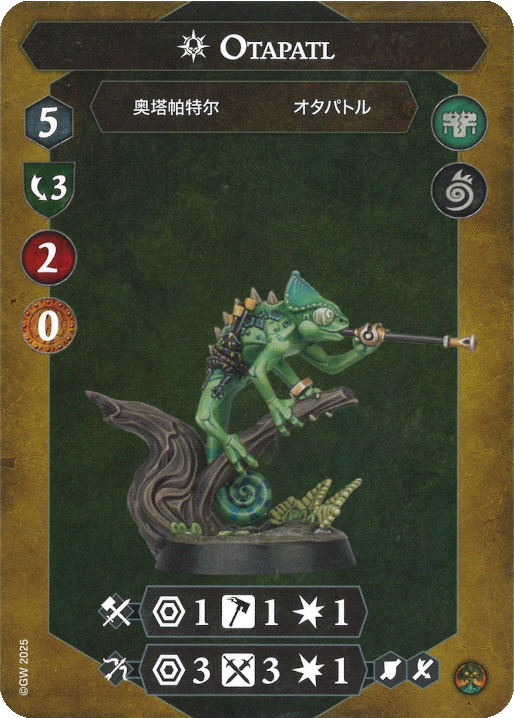
Michael: The third fighter for me would be Otapatl but if and only if he isn’t inspired or you have some unholy accuracy/ensnare. Literally a busted fighter, he has 3 dodge, cleave, ensnare, a decent accuracy attack… what’s not to hate? (his epic model, that’s what)
Ben: The fourth fighter to die is usually Otapatl. He has the best uninspired defence, while not having that accurate of an attack, but once he inspires he has one of the most accurate attacks in the warband with worse defence than all of the 2 shield fighters, with no modifiers. The only downside is that he doesn’t give any glory, but killing him can be very annoying for the Starblood player.
Michael: Next I would probably go for Kixi-Taka. Yes I am being very hypocritical but at this stage of the game if you don’t already have some upgrades out to assist with killing or damage on Kixi, you are probably losing. By killing Kixi-Taka you lock down Supremacy on top of shutting down Diviner which is a very strong ability in late game due to Utter Conviction.
Ben: The fifth fighter to kill in the warband is Xepik. This is because he actually can theoretically hit his 2 damage attack, with 3 swords not being great, but better than 2 swords.
Michael: I agree with Xepik being fifth! He is indeed a two damage fighter making him very annoying to deal with on top of being able to benefit from stuff like Great Strength makes him a priority target. Shame he has two shields with a re roll.
Ben: The last fighter on the chopping block is Tok. His 2 damage attack is simply too inaccurate, only hitting on 2 swords and his ranged attack is shared with Huachi and the worst of the 4 ranged attacks that they have access to.
Michael: I do feel Tok is last. His name scars me but his fighter stats don’t – he isn’t really a threat and on top of that he is also pretty easy to kill (compared to the rest of the warband)! One more note – I do reccomend following Ben’s advice here as he is a wayy better Stalkers player than I am and odds are he is trying to be helpful here, he knows whats more annoying for them!
Stalkers Player Order: Klaq-Trok –> Kixi-Taka –> Huachi –> Otapatl –> Xepik –> Tok
Against Stalkers Order: Klaq-Trok –> Huachi –> Otapatl –> Kixi-Taka –> Xepik –> Tok
Elathain’s Soulraid
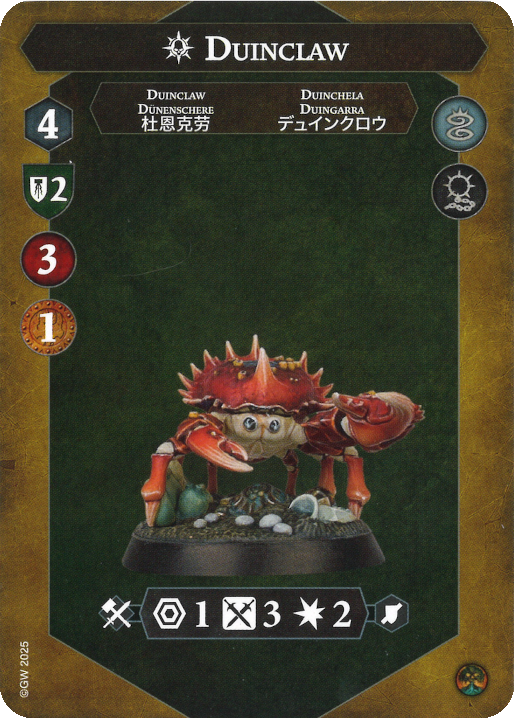
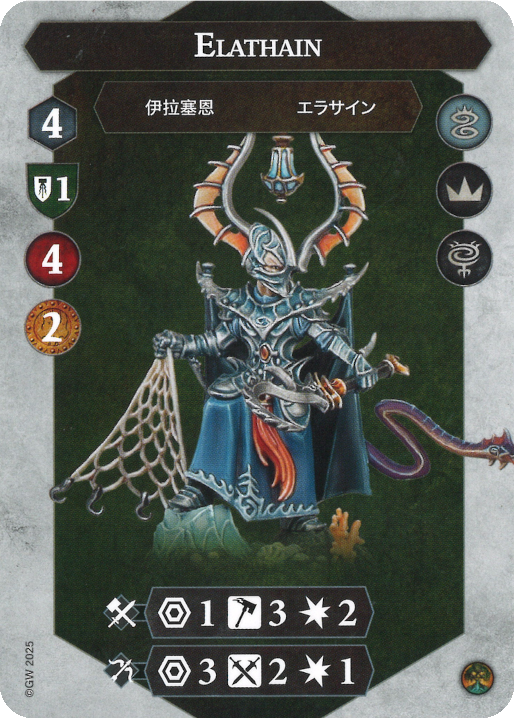
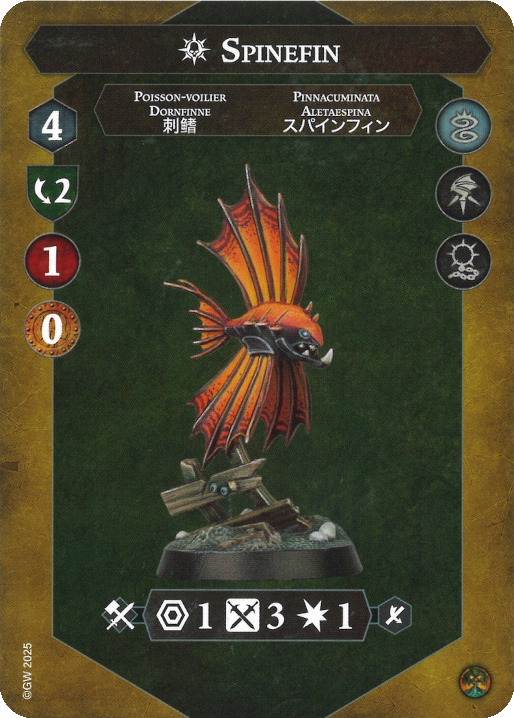
Michael: Whatever you do, don’t kill my fish. He will curse you. That being said Spinefin should die the moment you can kill him cause he enables so much for the warband meaning that the faster he dies the better. It’s genuinely SO HARD to play without him!
Ben: For this warband, probably listen to Michael, as he has a slight bit of experience with them (second at worlds), but I will give my opinion as well. The first to die I think should be Elathain. He is very threatening and isn’t that tanky in round 1. Spinefin is a valuable asset for the Soulraid, however basically every ping kills him, so using an activation to attack it hurts. But if you do have a ping USE IT ON SPINEFIN!
Michael: So Elathain seems like the next target for sure. And he is! Kill him if you can. But any Elathain player worth their souls will deploy Elathain somwhere in between Narnia and a galaxy far far away. Therefore, killing Tammael is actually the best second choice here (or first cause Spinefin doesn’t count). Tammael is the warband’s main source of damage on top of being DIABOLICALLY squishy. He is also worth two bounty. Yes, he can ‘come back to life’. Oh no.
Ben: The next target should probably Tammael, as he doesn’t reduce damage like Fuirann, is worth 2 bounty and is more threatening that Fuirann. He also no longer can be revived due to the death of Elathain.
Michael: Now that Tammael is dead, who is forced to come to the front lines? Oh, it’s Elathain! The strongest fighter in the warband and conveniently pretty easy to hit when uninspired. Yes, odds are he is only going in when inspired but if you can kill him then he is a priority target. His lack of ranged two damage actually makes him less scary than Tammael, but once he is baited out Elathain is a prime focus.
Ben: The third fighter to die should be Furiann, simply because they are easier to hit and give 2 glory over Duinclaws 1.
Michael: Now you have to pick your poison: kill Furiann ‘the Phantasmal’ or Duinclaw ‘the Two-crit Terror’? Furiann is generally the better option, for the simple reason that she gives two bounty making her glory-per-attack actually higher than Duinclaw. In addition with the “unjustified” Elathain nerfs, an overextended Furiann is now killable. This makes her just much more appealing to kill in general, but she is a way smaller threat than Elathain or Tammael so kill her as the last of the Idoneth!
Ben: The next fighter on the chopping block should be the man, the myth, the best life form, crab! Duinclaw actually hits for 2 damage, making him very threatening and a good target to try to kill now.
Michael: The terror of the shores himself (my good friend Ceph is terror of the deeps), Duinclaw is a very important target who functions similar to the Spinefin with two major changes. A) he doesn’t lose to Trapped Cache. B) he can be quite damaging. This makes him a target but not priority as he is very difficult to kill along with being a not very tempting target in general. Before going to Xandire’s, if you want more info on killing or playing Soulraid I have an article about them right here!
Ben: Spinefin should be the last to be attacked and killed, however make sure to use any ploy that could deal damage on the fish to get it off the board as quickly as possible.
Player of Soulraid Order: Spinefin –> Tammael –> Elathain –> Furiann –> Duinclaw
Player Against Soulraid Order: Elathain –> Tammael –> Furiann –> Duinclaw –> Spinefin
Xandire’s Truthseekers
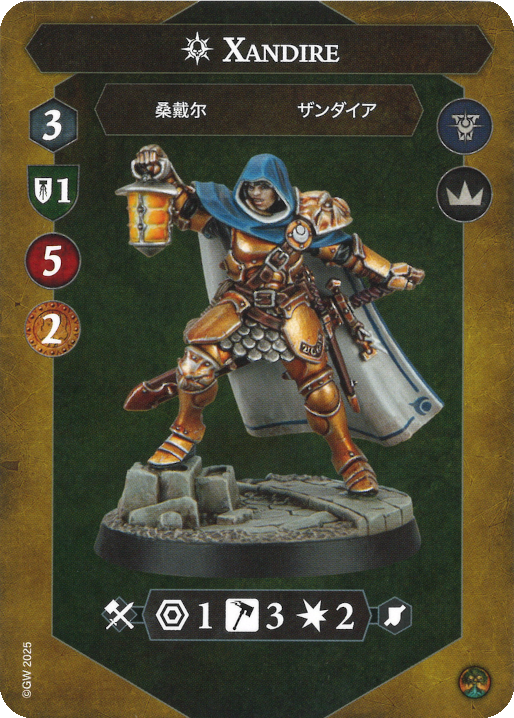

Michael: I would say kill Xandire first but she doesn’t give 3 bounty like I expected. Therefore, Dhoraz dies for the simple reason that he is INSANELY accurate and very damaging. (keep in mind I have never interacted with this warband yet, so take my notes with a grain of salt)
Ben: This warband is very interesting for this, as all the fighters have a one time effect when they die and inspire when any non-minion fighter is dead. In general Dhoraz should be the first to die, as he is the most threatening fighter, hitting for 3 damage, and inspires to become even more accurate, however the pushes from his death could be used to score multiple hold cards.
Michael: Xandire is arguably the last scary fighter left so she should die next. She is very accurate but does heal someone on death, so make sure to focus fire her and not do the devious damage spread strategy. Even as a shield warband, I would kill Xandire and her Cleave second because Dhoraz’s 3 hammers 3 damage is much scarier (imo).
Ben: The second fighter to die from this warband should be Xandire. She is the most threatening fighter left on the battlefield by far and her death trigger is not as good, as it is not healing a fighter that is very scary.
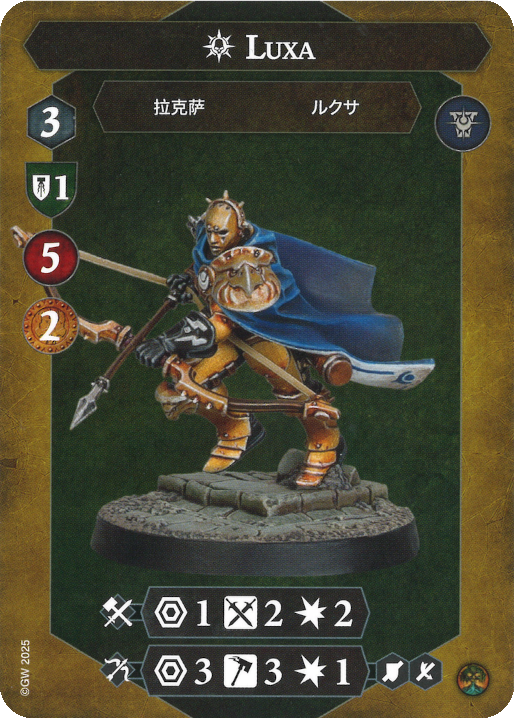
Michael: The third fighter here is probably Luxa. You do have to keep in mind her deathblow, but she is very tempting to kill due to her 2 bounty compared to Taros’ one.
Ben: The third fighter to die in this warband should usually be Luxa, as she still gives 2 bounty and is more accurate than Taros, however once again one must be careful, as the shot she fires when she dies is very accurate and could finish off a vulnerable fighter.
Michael: Taros is last as he is kind of a liability without native way to get charge token. In addition, he lost his Grievous from last edition making him only capable of doing one damage. On top of all this he is pretty evasive and only worth one bounty! Even with the Taros ‘buff’ I still feel he is least priority.
Ben: The last fighter to kill in this warband is Taros, as he mostly just stands there and sometimes gives the warband supports. In fact, like the Venomites in Jaws of Itzl, often this fighter will be forced to charge to charge out the Truthseekers player.
General Order: Dhoraz –> Xandire –> Luxa –> Taros
The Shadeborn
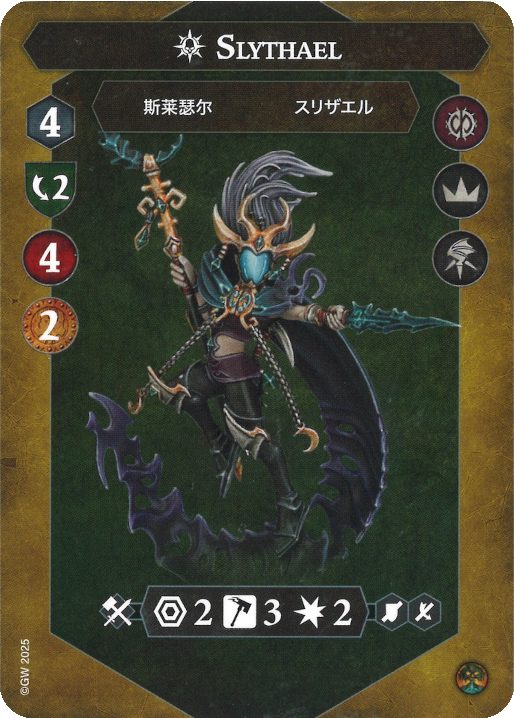
Michael: The Shadeborn seem like they have a case of Dread Pageant-itis where their leader is the only competent fighter. In reality they are all decent but I would still focus Slythael first. He is too much of a threat to get left unchecked, as unlike other ‘big guys’ he is not only Range 2 but also has a teleport and gets really annoying to kill in late game with stuff like Utter Conviction coming out.
Ben: Slythael is the obvious first target, as her attack might be the most accurate attack in the game, while also being range 2. She is also worth 2 bounty, so try to kill her as quickly as possible.
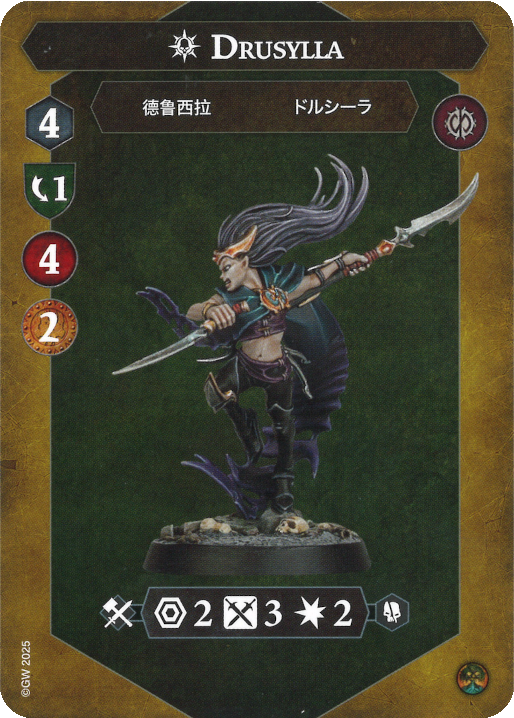
Michael: Drusylla has to be next. She does 3 damage inspired but only ever remains on 1 Dodge making her quite an easy kill for a hefty reward of two bounty.
Ben: Drusylla should be the next to go, as her guaranteed 3 damage is scary while being quite easy to kill for her 2 glory.
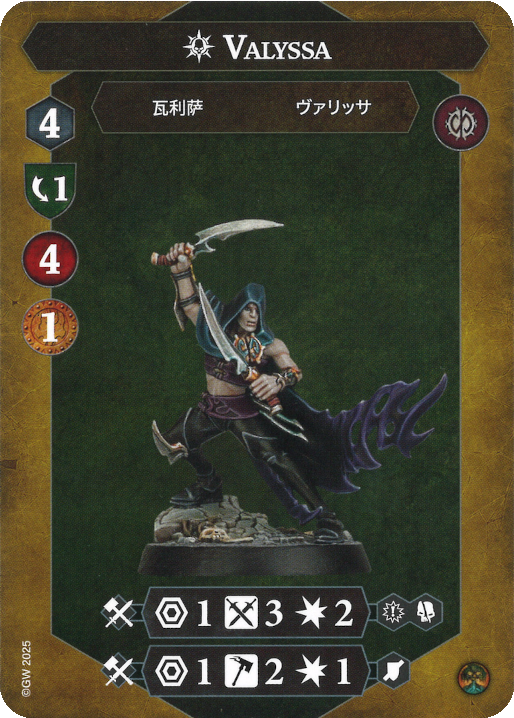
Michael: Desite Valyssa’s 3 damage I do feel like Sylarc is the priority here because of his two bounty – it’s glory that wins games, not dead fighters. Sylarc can potentially also go to three damage through Grievous upgrades making him just as if not more threatening with his better accuracy, all of which works to justify his death.
Ben: Valyssa should be the next target, as her crit grievous, even though not guaranteed, can be very scary when it happens. She is only worth 1 bounty, but 3 damage is scary enough to get her off the board.
Michael: Finally, Valyssa is last as despite doing 2.5 damage when inspired, she is only worth one bounty on top of being pretty inaccurate. This all makes her highly unfavorable to target. Her cleave can be problematic in some matchups, so keep this in mind!
Ben: Sylarc is unfortunately not only disregarded by the Shadeborn, but also last to kill, as he is simply the least accurate fighter that does 2 damage in the warband.
General Order: Slythael –> Drusylla –> Sylarc –> Valyssa
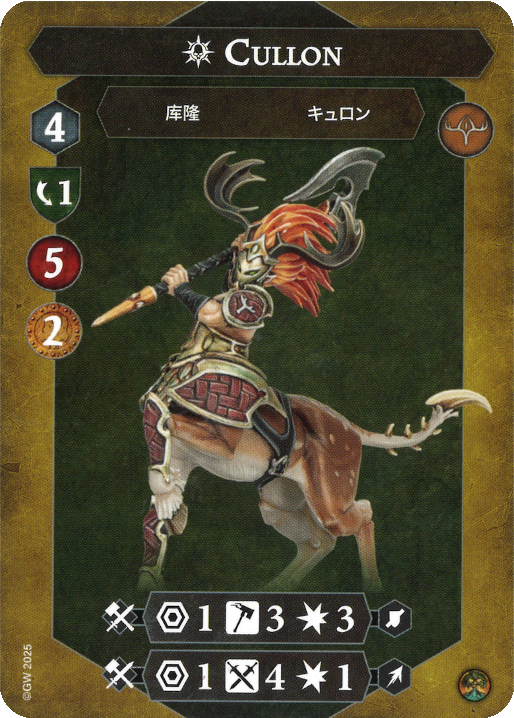
Kurnoth’s Heralds
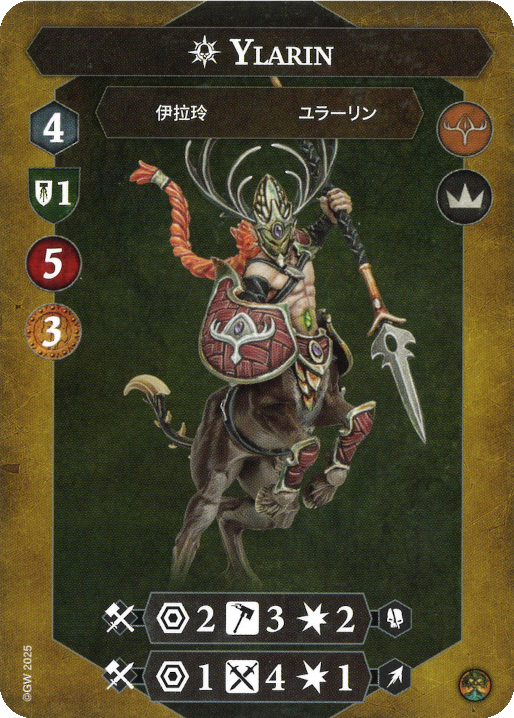

Michael: Ok, so despite having TWO guys with three damage I do think Ylarin HAS to die first. His Range 2 as well as insane Utter Conviction scaling make him a must-kill in early game. I wish you luck if he inspires, cause you will definitely need it against this definition of a glass cannon.
Ben: Generally Ylarin should be the first target, as Ylarin is worth 3 bounty, while also inspiring to a 3 damage attack that is even at range 2. He is also scarier than Cullon uninspired, so target him first.
Michael: Cullon is second to die for the simple fact that he can do more than 1 damage. Yes, that ‘more than one damage’ is 3 damage. This makes him even more appealing to kill. The reason he isn’t at Ylarin’s place is due to his 2 bounty relative to 3 as well as his Save being on Dodges rather than Shields.
Ben: Cullon should be the next target, as he actually deals 3 damage instead of the solid 1 damage (or once per game 2 damage) ranged attack while even being more accurate due to cleave. He is also easier to kill, giving him all the criteria for a good target.
Michael: Lenwythe is cool and all but she isn’t really a big threat outside of one double shot per game especially when you look at the other two fighters in the warband. This makes her the least priority target! She is also the hardest to kill natively due to her two save when inspired.
Ben: The last target should be Lenwythe, as she is not as threatening as the others and due to the rescent buff actually defends on 2 dice, making her very unappealing to kill.
General Order: Ylarin –> Cullon –> Lenwythe
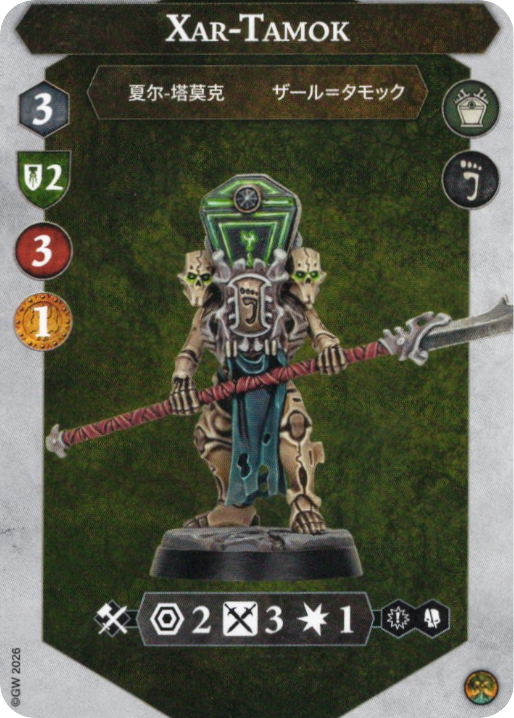
Thanatek’s Tithe
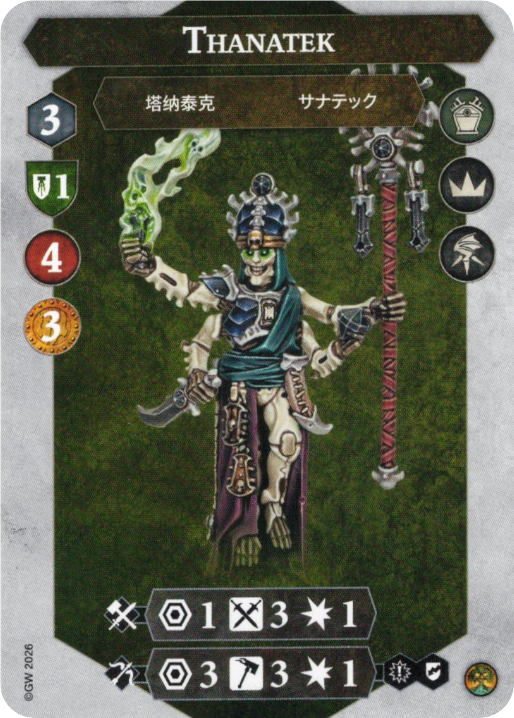
Michael: The new kids on the block have two kill orders. One, kill big guy, and one don’t kill big guy. But for variety’s sake we will call it kill leader and kill retainer. For kill leader, Thanatek has to die first. He is crucial to the warband’s cadaver generation with his push on top of being easy to kill and having a pretty hefty reward. In kill retainer order, as one might guess the retainers die first. Both of them, cause they are identical. Also if they die your haunch generation becomes actually 0.
Ben: The first target should probably be the leader (a very common trait when facing death warbands), as he is worth 3 bounty and being quite easy to kill. Don’t even be worried about any counterattack occurring, as the fighters deal on average 0.5 damage per activation.
Michael: The second kill in both orders is the opposite of whoever died in the first one. As stated before, Retainers make cadaver generation possible making them priority targets, while Thanatek does have a very high bounty on top of being relatively easy to kill and being vital to most warband mechanics.
Ben: The second targets should probably be the Retainers, however only if you can actually hit them. They do defend on 2 shields, so if you can’t get through that attack whichever one of the Mortis Reapers is more important to your warband.
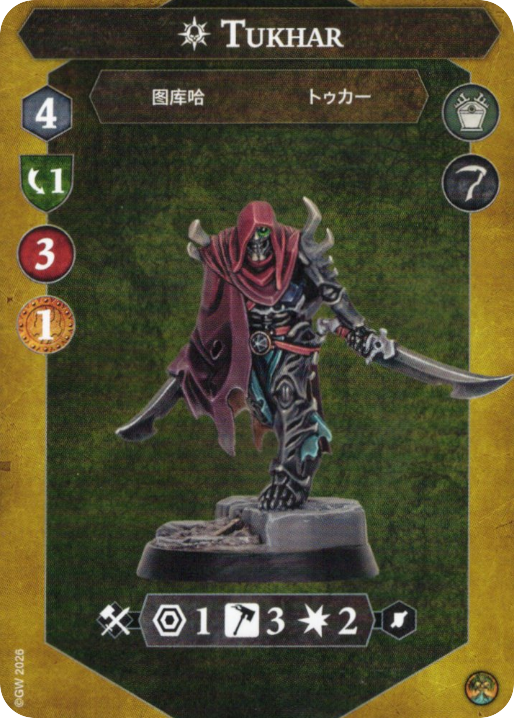
Michael: Fourth, kill whoever one of the Mortis Reapers affects your warband more. If you defend more on shields, kill Tukhar. If you have more dodges, kill Sekhmor. Quite simple, really.
Ben: The next targets should either be the last Mortis Reaper if the Retainers are still alive or the Mortis Reaper that has the runemark that hurts your warband the most if the Retainers are already dead.
Michael: Finally, kill the last Mortis Reaper. Or kill the one who came back. Odds are they might try to get a Raise off but who knows.
Ben: The last targets are either the Retainers if they are still alive or the last Mortis Reaper if they are not.
Kill Leader: Thanatek –> Retainers –> Tukhar –> Sekhmor
Kill Retainers: Retainers –> Thanatek –> Tukhar –> Sekhmor
Michael: And that’s it for today’s article! If you enjoyed this article then great, we also do happen to have the rest of the warbands explained with their Kill Priority in the following link. Feel free to check it out. In the event of wanting to chat about Underworlds or having feedback on the article please join the Staggerers Discord server (it’s very cool) and say hi to us – we are very happy to have anyone! With that said, thanks a lot for reading, and I hope to see you again soon 🙂
