March 26th, 2026
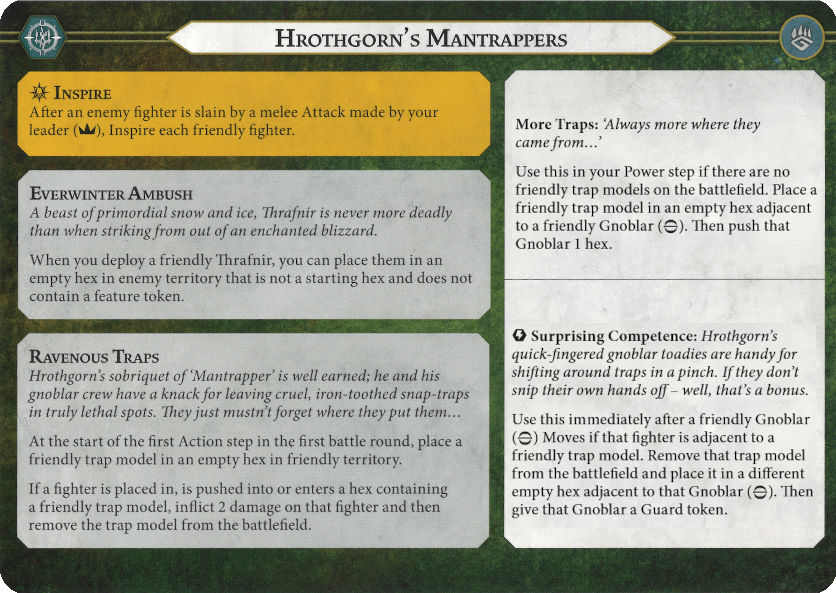
Quint: It’s Spring! And who is better to celebrate the end of winter with than the one and only doggo that lives in a magical blizzard? Thrafnir is our goodest boy, and in this deck guide I’ll give my take on Hrothgorn’s Mantrappers with Emberstone Sentinels and Nexus of Power.
What is Thirst (for power) Traps?
The goal of this deck is to maximize shenanigans. The new and improved Mantrappers have so much potential for silly stuff, and the best way to do that (and still maybe win your games) was to pair it with Nexus of Power and Emberstone Sentinels. The gameplan is pretty simple, with a nice hold objective package. However, we will need to pull some weird manoeuvres to pull this strategy off. The main one is to always try to get guard on the Gnoblars. Since we can now get “free” guard through the trap, we can get some pretty difficult objectives. The many weird pushes allow us to try and get into the best of positions at all times.
The Deck

Here is the deck!

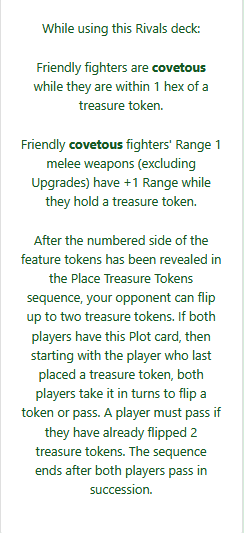
Aggressive Defender – This is one of the best surges in ES, and made even easier by Nexus of Power! Because of the additional range whilst on a token, you can score this with any fighter at range 2! Make sure to place your fighters in such a way that they can access 3 tokens, so that you don’t brick this card by having two tokens flipped and unable to reach any others.
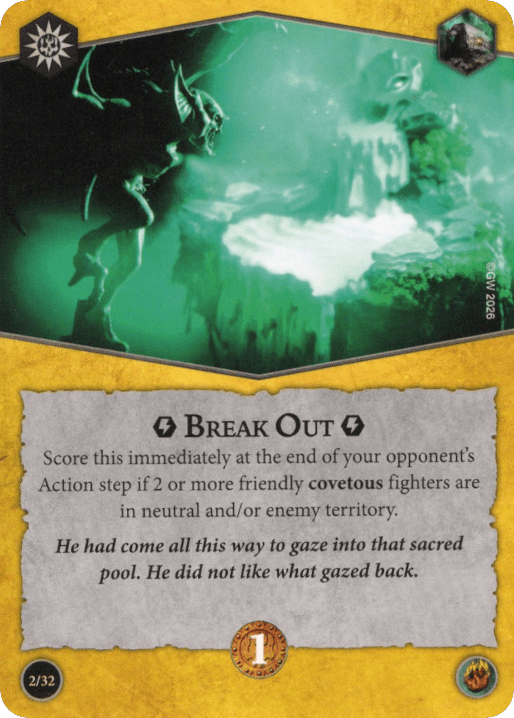
Break Out – Our first card (of many) that triggers after our opponent’s Action step. Try to give a guard token to the covetous fighters that need to survive (and not be driven back) to score this. Also note that the treasure tokens don’t have to be in neutral/enemy territory, but can be in friendly, as long as your covetous fighters are within one hex and in neutral it’s fine!
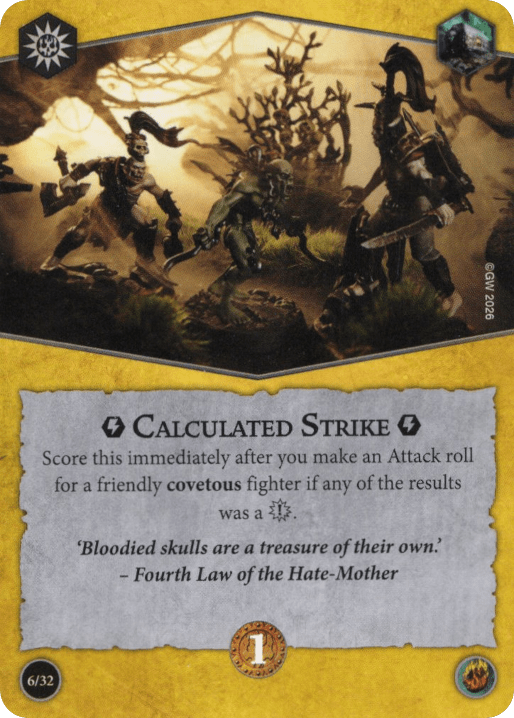
Calculated Strike – Temu Critical Effort fits nicely into the playstyle. You should only be making attacks if you’re covetous anyway, so this works really nicely, and will score sooner or later in almost every game.
Stand Firm – A bit of a weird card to score, but with NP, it can be easier: Since feature tokens are flipped at the start of the game due to the plot card, you might be staggered AND on a treasure after a single delve instead of two. A stagger hex can also help with this.
Sally Forth – A great and simple objective. The additional range from Nexus of Power gives us more opportunities to charge onto tokens.
Claimed – Remember that the fighters can be within one hex of the same token! Otherwise a surge that fits into your hold plan well.
Audacity – Moving onto the endphases, we have a card that desperately needs an FAQ. But, assuming the attacking fighter doesn’t have to be alive or covetous anymore, it’s a fine objective, scorable with Thrafnir or Hrothgorn. It doesn’t have to be a melee attack, and you can, once again, use your additional range from Nexus of Power.
Hold Treasure Token 3 or 4 – I’ve heard a local player say that they are running this card over the hold 1/2 card, because this one doesn’t have an alternate artwork, so people don’t expect it. Aside from this weird logic, this card is a hold classic and you should always try and move towards tokens 3/4, even if this card is not in your discard.
Iron Grasp – Another standard hold card. Easily scorable in own territory, or in enemy if the board flips. You can always delve tokens to make the amount of treasures easier to manage, which also helps for Stand Firm! It’s also not a bad idea to put a trap onto the delved treasure, so it disincentivises opponents from denying your Iron Grasp.
Supremacy – The pinnacle of hold and our restricted card. Score it with one of your big boys and a gnoblar, or with all three gnoblars! No explanation needed really.
Skin of Their Teeth – A fun hold objective that is really easy for this warband: You can place the trap next to Luggit and Thwak, on a feature token, utilizing the push to push them into it. This damages them, but leaves them alive, and allows you to push someone else again, even in the same powerstep!
Lone Wolves – The card that will require some shenanigans. Place a trap onto a token and dance around it, and place Hrothgorn closeby so nobody dares attack you. Don’t overthink it though, discard this card if it’s not working or if you have a lot of hold cards in your hand.
In general, it’s a pretty standard Hold Objective package. We have some nice and solid classics alongside some weird new cards. Hrothgorn excels at getting guarded fighters on tokens, so use that to your advantage! People generally don’t want to attack the 2 dodge gnoblar that is on guard and in cover…


Sidestep – Simple and efficient. Push to make attacks without charging, get on a token without wasting a turn, move a gnoblar to get a trap in a great position etc. The best card in the game, always.
Pilfer – Simply a worse sidestep. Still amazing.
By the Numbers – Simple card draw that synergises with the gameplan. Don’t greed it and take two cards if you can, then push your hand advantage

The Extra Mile – A weird card that is probably only good with this warband. You can move next to the trap, replace it, then push onto the token. That means that two gnoblars can get guard from the same trap on two different treasure tokens. You can also use it to setup a trap driveback in one activation, although it might be more situational.
Settle In – More guard!
Move at the Opening – One of the best cards in this deck in my opinion. Especially since you can use it to setup more trap drivebacks.
Defiance – Extra dice good. Makes Calculated Strike easier. Effective.
Confusion – THE BANE OF MY EXISTENCE. Great card that can absolutely ruin someone’s day.
Shoulder Throw – Arguably the most useless card in Emberstone Sentinels. However, it is really funny when it works and you throw the unsuspecting enemy into the trap. Just use it whenever you get the opportunity, you won’t get it again…
Organised Efforts – This card can be used in soooo many ways. You can charge onto a treasure token with your high value fighters, than swap them with a gnoblar to make your surges more scorable, because (again), who is attacking the two dodge on guard in cover gnoblar? You can use it at the start of the round to get a Hrotgorn without charge tokens on a treasure token with extra range to attack the entire round etc.
We have a lot of the standard consistent ploys in this deck, but have found space to get in a little bit of whimsy. It’s important to try and use the fun tricks to actually score your objectives and get enemies in the trap. This warband really falls apart when you don’t get the free pushes from the trap consistently.
Agile – Starting our upgrades we have a simple statboost. Rerolls in defense are always nice and help you get more saves, and more Standfasts.
Brute Momentum – This card was made to be paired with Sally Forth. Charge Hrothgorn onto a token in turn 3/4 and give him Brute Momentum and watch as nobody can displace him.
Duellist – This card is great normally, but once again even better with Nexus of Power! One of its best uses is to have it in round three and chase your opponents with your best fighter without committing to a charge. With Nexus you have even more range to do so! It’s also another way to get a guard on a gnoblar and also get them on a token, similar to The Extra Mile.
Great Fortitude – An allround great card. Give your fighters extra health. If you use it on Quiv or Bushwakka, you can push them into the trap instantly to get a 2 hex push on demand (you can always do this with Luggit and Thwak).
Great Speed – Uninspired, your Gnoblars are pretty slow. This card allows you to reach all of the tokens.
Great Strength – The final of the Great trio, for a mostly melee warband this card just allows you to get access to more damage, and, let’s be honest, this warband really needs it.
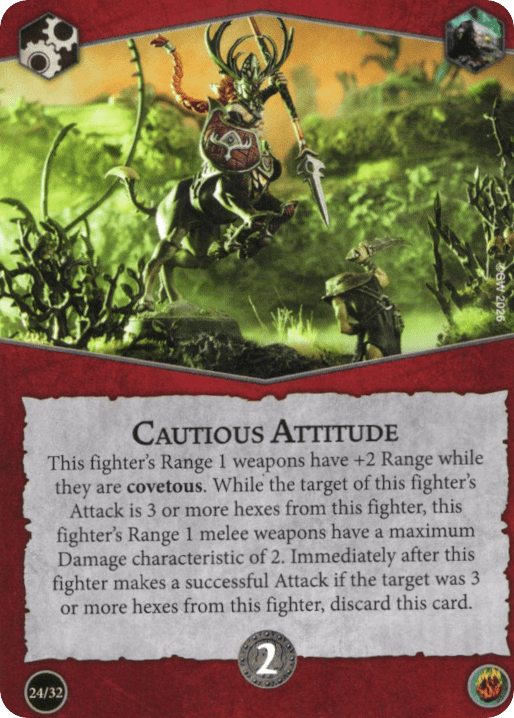
Cautious Attitude – This card goes absolutely bonkers. Hrothgorn attacking at range 4 to snipe an enemy and inspire your warband? Thrafnir reaching a total of 9 effective range, being able to snipe anybody on the board? Sign me up!
Keen Eye – Same as for Great Strength, this warband doesn’t lack in bad attacks, so improving them isn’t a bad idea.
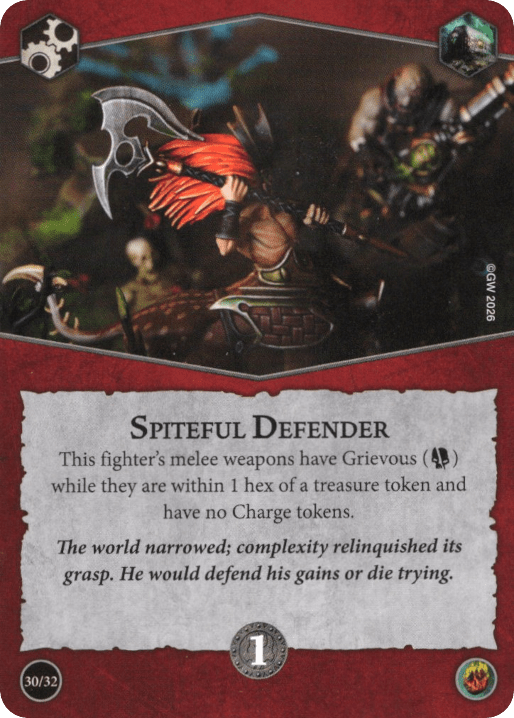
Spiteful Defender – With the additional range from Cautious Attitude and the plot card, this card triggers a lot more than you think. You’ll also find yourself moving the gnoblars without charging a lot, so you can spend your “bad” Grievous card on them instead of Great Strength.
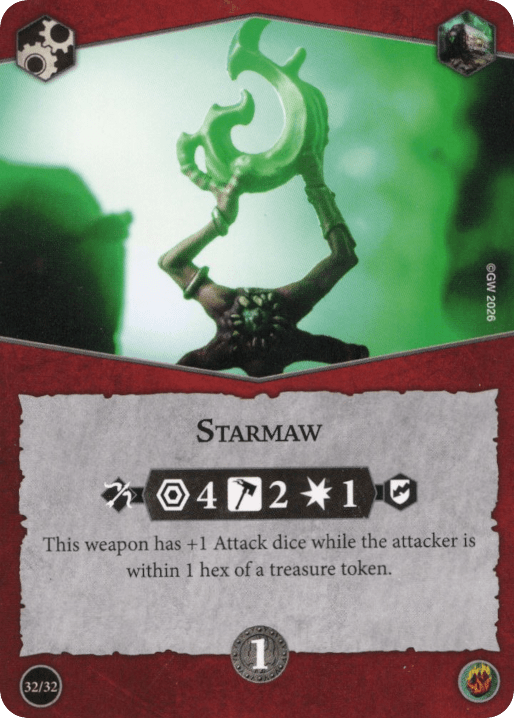
Starmaw – In my opinion the best weapon upgrade in the game. The most range, crazy accurate and it can Stagger, for the low price of only one glory… Put this on your gnoblars and watch them snipe and ping for days.
Sadly, we have to use most of our upgrades on straight stat boosts, since we have to upgrade the abysmal stats this warband has. Thankfully, we can throw in a nice Cautious Attitude now and then to suprise our opponents, but besides that we don’t really have anything special here.
Deck Overview and Tips
The main goal of this deck is to occupy treasure tokens. Use the many pushes and tricks in the warscroll and deck to get there and stay there. Don’t be afraid to position the trap onto a token so enemies can’t get to it, or use it to block the access to your key fighters.
All of the boards are fine for this warband. Take the side that allows you to deploy far back, but it can work on everything.
The most important part of Hrothgorn’s Mantrappers is triggering the trap. Both for the damage, but also for it’s insane utility. Free guard tokens are absolutely insane, but the push is even better! It’s often worth it to charge or move through the trap with a Gnoblar (Luggit and Thwak) or a safe fighter to get a Gnoblar onto a token. Also, reminder that the trap placement and push doesn’t have a once per powerstep restriction, meaning you can push a 3 health Gnoblar into the trap and push them or another one again in the same turn!
Don’t deploy Thrafnir forward. They are so vulnerable from the start, so use them as a threat and a hold piece. They have enough move to missile anyone later in the game, so don’t worry about doing it at the start, because you don’t have enough damage to kill important pieces, so your most accurate fighter needs to be kept safe.
Try to inspire as soon as possible, but don’t greed it. The inspire is extremely important for this warband, but also pretty difficult. It all relies on a hard-hitting 2 hammers attack, that (in my experience) always misses when you need it. In addition, you can’t push targets into the trap to trigger it (common GW what are we doing here?), so try and get the kill on an overextended piece around the end of round one/start of round two. Be reactive and keep your leader around as a threat. He’s pretty fast and goes to two block, so once he’s inspired, you’ll be pretty safe.
Place your own Aqua Guaranis a hex away from all of your treasure tokens. That way, you can attack the enemy fighter on them with your range two Covetous attacks, since you don’t need to stand there yourself. Try and force your opponent to place their Aqua next to a Treasure, so you’re Covetous whilst claiming it. This might be difficult though…
Ideal Game
Your opening hand should contain Claimed, Aggressive Defender and another objective that’s easy first round. For power cards, you want to mulligan for at least one of Sidestep, Pilfer or Move at the Opening. This allows you to get some tempo on your opponent. Also look for a Brute Momentum or Settle In to force a treasure token.
In R1, your goal should be to get gnoblars onto treasure tokens with guard. Claim your position and close down your territory. Try and do a missile with Thrafnir or Hrothgorn in turn 3/4, if your surges call for it.
In R2, your goal should be to trade away some fighters and flip territories. Get Thrafnir and one or two Gnoblars on the tokens on the other side and you should be fine for the rest of the game. If Hrothgorn survived until now, try and get a kill with him to inspire, or trade him away by forcing enemy activations.
In R3, your goal is to spread out. Score the last of your objectives by being as far apart as possible, and not allowing your enemies to get close to multiple fighters at the same time.
Matchup Tips
Elites: In the elite matchup, you can actually deploy Thrafnir in enemy territory. Wait untill they have deployed everything, then place Thrafnir as deep in their territory and as far away from their other fighters as possible. This gives them a catch 22: They either run backwards, wasting one, two or maybe even three turns in their own territory, whilst their deck requires the opposite, or they give you a free treasure the entire game.
The main goal is to stay away from them. Elites have the glaring weakness that they only have three bodies. If you can use all of your tools to outmaneuver them, and maybe flip territories, you have a big advantage. Since a lot of your cards require you to be in enemy territory, but their cards require charges and attacks in enemy territory, you benefit more from the flip. Use Hrothgorn as bait here. If they try and kill him, place him as far back as possible, so they use 2 or 3 turns taking him out. The 3 bounty isn’t enough to swing the game their way, just try and get a swing out to maybe inspire, but it’s not that big a deal.
Midrange: Try to trade fighters. Your small guys are some of the worst fighters in the game, so trading them for other fighters is almost always worth it. Keep Thrafnir and Hrothgorn back as a threat and stick to your objectives. Don’t get greedy and try and swing for kills unless charging onto a treasure token.
Horde: Against these kinds of warbands, your trap kills most of the time. That means that ranged attacks and low damage attacks for driveback are worth it a lot of the time. Try and move fast and use your Trap as a deterrent to slow down the horde. You can force an inspire by getting an easy kill with Hrothgorn, and Thrafnir shines in this matchup, able to hunt down and oneshot most horde fighters.
Final Thoughts
I’ve played this deck a lot against local players, and it’s a lot of fun. The amount of tomfoolery you can pull is absolutely cinematic. I hope to one day have the confidence to take this deck to a tournament, but I definitely need more practice for that.
This deck might not be the most consistent, but it’s a good one to bring to your local event or game night, being a fun puzzle for both players!
In the end, this deck really depends on the territory flip, and if and when you manage to pull it off.
That’s all for the deck guide! I hope you consider giving the Mantrappers a try, as the warband is really fun. I do hope they get slight buff, especially in their uninspired stats, as they really lack in comparison to other similar warbands. If you want to discuss the deck, hop into the Staggerers Discord! With that, have a great day!
Michael: [quick epic editors note]: Thanks a lot for Quint for writing this article 🙂 he already did the outro so I won’t interfere but if you liked his writing or epic deck, check out his other article here: Playing Jaws the way the Starpriests intended. With that, hope you enjoyed and hope to see you again soon 🙂
