Michael: Hi! First of all, sorry for the very long article time in between our last article. It’s exam season for (most of) us and unfortunately that does not bode well for Underworlds-ing. Now enough of the excuses, remember the Nemesis Card Combos series we started back in February? We finally have Part 2 (out of three, due sometime in November) out!
In this article, we will do the combo potential between the default 4 decks Emberguard as turns out doing all the decks at the same time will be a little long. In addition, we won’t discuss combos that don’t benefit the deck’s gameplan in some way or another (denial being a good example). For example, a Lure of Battle + Hidden Paths combo sounds super cool, but it doesn’t really help BA/ES!
Note on Nexus of Power: It won’t be included in this article at all due to not having enough times to a) study the deck and b) create epic combos. It will all be in the next iteration of this article!


BA/ES
Michael: Lure of Battle + Confusion: Basically you use Lure of Battle to pull an enemy onto a token, and then switch yourself. A very costly combo but it can have a very huge payoff. Outside of this, there isn’t too much combos!
BA/PnP
Duellist + Swift Step: I used this a lot in my Elathain Worldsraid deck, and boy despite being a simple combo is it effective. The ability to push yourself two hexes on a charge is absolutely huge!
Trapped Cache + Fields of Blood: Trapped Cache makes Fields of Blood very easy to score in Round 1, where it is the hardest.
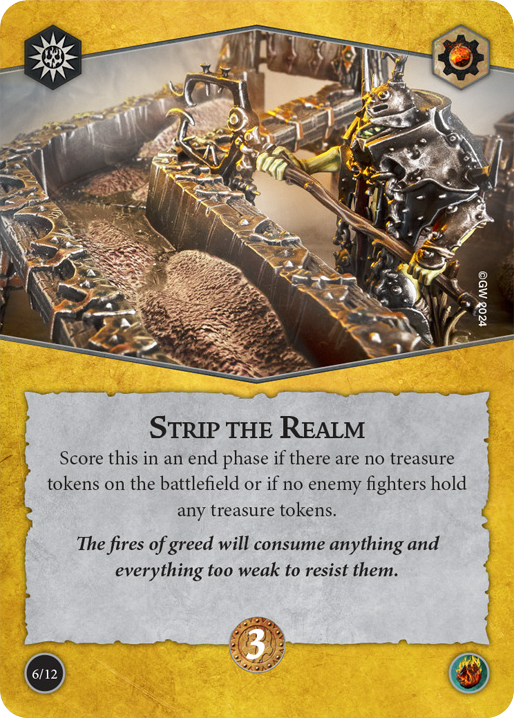
Lure of Battle + Strip the Realm: Arguably the best way in the game to force Strip the Realm, you simply pull an enemy off of a token in the last power step for an easy 3 glory.
BA/CtC
Improvised Attack + BA Surges: Improvised Attack is OP in this pairing, as it can be used to score literally every single one of BA’s surges. Thus, Improvised Attack is basically a 13th activation – we all know that is quite strong!
The Perfect Cut + Sharpened Points: Countdown already has an Ensnare but it lacks a Cleave generator, which makes The Perfect Cut super easy to score.
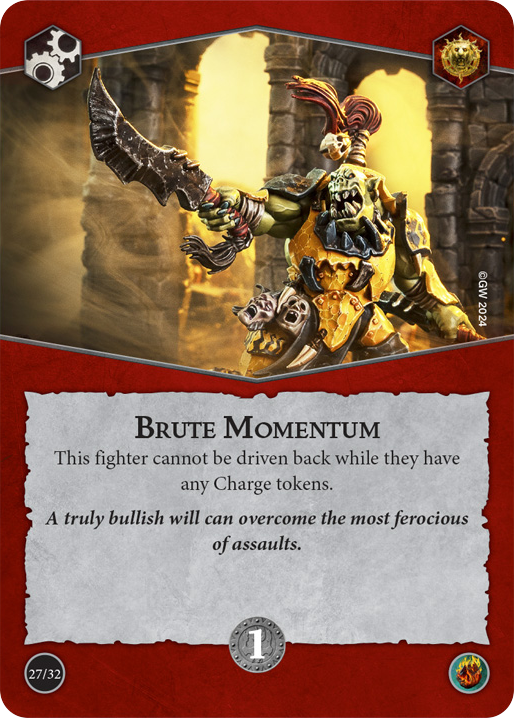
Shocking Assault + Shields Up: The main issue with Shocking Assault is getting driven back, and BA conveniently has one of the best anti-drivebacks in the game. Play both for a free glory point.
Ben: Hidden Aid + Savage Blow: You get both supports as successes for doing literally nothing, almost guaranteeing you succeed your important attack.
BA/WnR
Michael: Scream of Anger + Living on the Edge: Get a second charge ON TOP of getting 2 Glory? Sign me up! We will ignore how you are also one shot to half of your own power cards…
Lure of Battle + Stay Close: Another case of Lure of Battle being used to set up a positional objective. Pull an enemy out of an edge hex for an easy two glory.
Hidden Aid + Henchman: Guarantee one success every single time you attack an adjacent enemy, as Hidden Aid makes singles count as successes while Hidden Aid gives you a free single every attack!
BA/RF
Scream of Anger + Blades of Wrath: This combo was inspired by Filthy Kasual, but basically you can use Scream of Anger (or Push Through!) to kill your own fighter with Blades of Wrath and ping a bunch of unwary enemies who thought you couldn’t charge anymore. Not the best of combos but surely fun and can be super effective!
Scream of Anger + Lost Legacy: This is mostly a worse version of the combo above, however using Scream of Anger to kill a friendly fighter equipped with a valuable upgrade and getting it back with lost legacy can swing a game (Sometimes in the enemies favor if they have good counter play though)
BA/EotK
Scream of Anger + Trial of the Tempered: This combo is the basis for The Dark Horse deck, you get a second way to temper yourself on top of Dark Horse, which makes Trial stupidly easy. On top of that you get a free second charge!
Lure of Battle + Pesky Nuisance: More a-Lure-ing stuff, you can pull an enemy into your Pesky Nuisance fighter to force an enemy to kill them before they can do anything else. Or at least before they charge away.
Ben: Commanding Stride + Spiteful Traps: Push your leader 3 hexes closer to your target and then lock them down with Spiteful Traps.
BA/RR
Michael: Scream of Anger + Intoxicate with Rage/Angered Focus: Both of the Realmstone cards require no move or charge tokens, and BA very nicely has a card that reads ‘get rid of your charge tokens’ allowing you to play either of the above ploys even after charging!
Determined Effort + All Realmstone objectives: All of the accuracy cards found in BA are good to make raiding more likely, but determined effort specifically allows you to increase the dice rolled to score A Sure Bet and increase the chance for a crit for Critical Risk.
BA/RS
Hidden Aid + Aggressive Ambusher: Become accuracy incarnated with these two upgrades giving you Cleave, Ensnare, and perma Flanked. No need for any extra fighters!
Overwhelming Presence + Lure of Battle: The Strip the Realm clone combo, must I say more? Other than make sure all of you are enraged 🙂
Scream of Anger + What Pain?: What Pain? allows you to heal the damage that might make playing Scream dangerous, while also healing a second fighter in the process. You also get to charge again, which would give you your two rage tokens back for the end phase.
BA/DS
Hidden Aid + DS Surges: A lot of DS surges need the target to be Flanked, and BA provides an extra way to do so in the form of Hidden Aid allowing for greater consistency.
Hidden Aid + Out of Nowhere: Another case where Hidden Aid becomes a guaranteed success with no extra setup!
Lure of Battle + Closed Down: Lure of Battle strikes again with forced ways to get an enemy into a necessary position. In this case you also need to move on the treasure to score the card, but sometimes getting the enemy off is the hardest part.
BA/HG
Denial + No Trespassers: Denial as a whole works great in this deck because it literally reads ‘come invade me’ but No Trespassers is great for combo as you can very easily punish any and all invaders using BA’s killing power.
Denial + Mind Your Step: Kick an enemy out of your territory for an easy glory!
Lure of Battle + Pinned!: You can pull an enemy closer to an edge hex to make the territory to avoid Pinned much much smaller.

ES/PnP
Canny Sapper + Confusion: The combo of all time, you can place Confusion then teleport to ANYWHERE (ALMOST) on the board and switch around. This can potentially yield 6 glory if you manage to switch an enemy off a treasure and get on it yourself for Strip the Realm and Supremacy!
Crumbling Mine + Iron Grasp: You can fake being unable to score Iron Grasp only to do a cheeky flip of a token to suddenly hold every token in a territory!
Broken Prospects + Switch Things Up: A super fun combo where you can steal an opponent’s treasure token that they held at the start of a round to delve it without much issue.
Shoulder Throw + Swift Step: This combo allows you to basically overrun a fighter on a treasure that has a guard token while leaving the targeted fighter 2 hexes away as well.
ES/CtC
Switch Things Up + Uneven Contest: Kind of a natural combo but you can make Uneven Contest a lot easier if you have easy access to any odd numbered token.
Ben: Confusion + Set Explosives: The obvious combo, but Confusion allows you to go onto a token your opponent is standing on to score Set Explosives (and probably other Emberstone EPs).
ES/WnR
Michael: Fiery Temper + Unassailable: This really works for any hold card but especially for Unassailable. You basically just use Fiery Temper to become immune to drive backs and most importantly pushes like Lure of Battle for some free scoring!
ES/RF
Quint: Savage Sprinter + Hidden Paths: This works best for warbands that get move actions for free (like Zikkit’s Tunnelpack, Zarbag’s Gitz, Hexbane’s Hunters etc.). You move the fighter into an edge hex, then teleport them into enemy territory to easily score a surge!
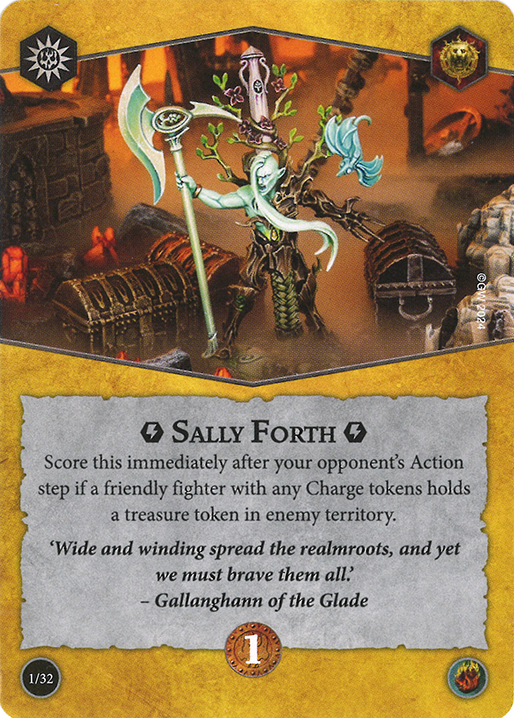
Michael: Sally Forth + Braced: This was included in the last article but I do have to highlight it again because Sally Forth does come in both decks.
Living Bludgeon + Settle In: The above combo also stems into this one because we can use Settle In from ES to get a Guard token and also score Living Bludgeon at the same time!
ES/EotK
Hidden Paths + Risky Position: You can make your position a lot less risky by teleporting into enemy territory at the very last second. Or, you can back out after scoring it!
ES/RR
Manipulated Fate + Unassailable: Your opponent might think an attack would kill you, or worst case, drive you back. Manipulated Fate says no!
Confusion/Sidestep + Angered Focus: You can use one of the listed ES cards to get onto a token for free and Raid for holding. Not an effective use but certainly a use for the card.
ES/RS
United in Anger +The Extra Mile: With Enrage being reworked, you can now enrage two fighters before you charge and then get adjacent to a token for Extra Mile, then push BOTH Enraged fighters onto a token for some easy scoring before you get driven back next turn.
Stubborn to the Bone + Sally Forth: You basically get a second, better, Brute Momentum when you charge onto a token for Sally Forth and have Stubborn to the Bone!
Just a comment – with the changes made to RS, I feel like it’s no longer a super-throw pick to play it with ES.
ES/DS
Battering Ram + Supremacy: You could literally but any objective here but it’s impossible to block a token against Battering Ram.
Confusion + Closed Down: If you know an enemy will charge off a token (say an RF player one off of Unrelenting Massacre), you can kinda force Closed Down by putting them onto the token first with Confusion.
ES/HG
Confusion + Drive Back Stuff: Pinned, Back Off, Hands Off, and Usurped can all be made a lot easier if you can put an enemy into a position they need to be with Confusion.
Keep Them At Bay + Aggressive Defender: If you are out of range to attack with a Range 1 attack, you can get a Range 2 attack with Keep Them at Bay and still score Aggressive Defender!
Paths Unknown + ‘Hold in Enemy’: Sally Forth, Step by Step, and Stand Firm are all really easy if the enemy isn’t allowed to attack you. Oh, look what Paths Unknown does (while you are Underdog)!

PnP/CtC
Violent Blast + Strip the Realm: The first of many ‘displace to score Strip’, this is one of the OG cards that lets you do that and is a big reason people don’t place tokens within one hex of staggers.
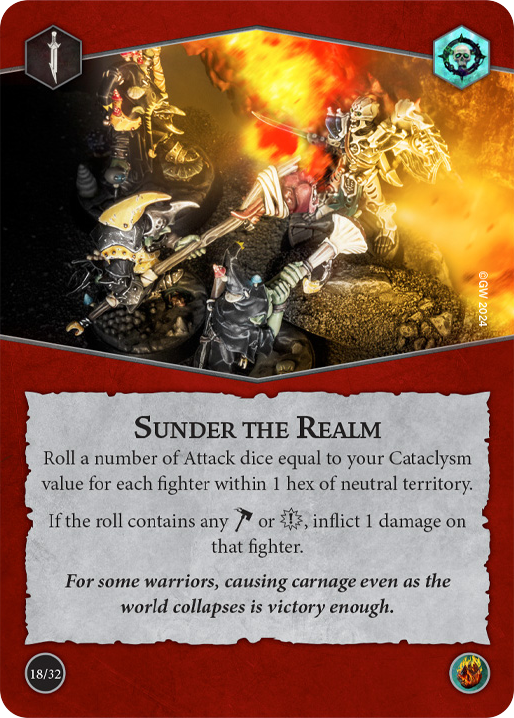
Sunder the Realm + Canny Sapper: Teleport out of danger right as you pop Sunder the Realm. This is a very cool and stylish maneuvers and guarantees at least two hits for style points.
Crumbling Mine + Uneven Contest: Flip an odd token to make Uneven Contest a lot easier!
Improvised Attack + Hostile Takeover: Hostile Takeover becomes ‘make one attack without charging’ by playing Improv. Attack as it’s always going to be a non-charge attack!
PnP/WnR
Barge + Strip the Realm: Also works with Confusion and Damned if you Do but either of these 3 cards can force a Strip the Realm for a devious 3 Glory!
Trapped Cache + Bloody and Bruised: One of my favorite cards in the game to score BnB, Trapped Cache really makes the surge super easy.
Ben: Wary Tread + Lost in the Depths: You have 2 fighters that are still adjacent in the last power step, push 1 to still score Lost in the Depths.
PnP/RF
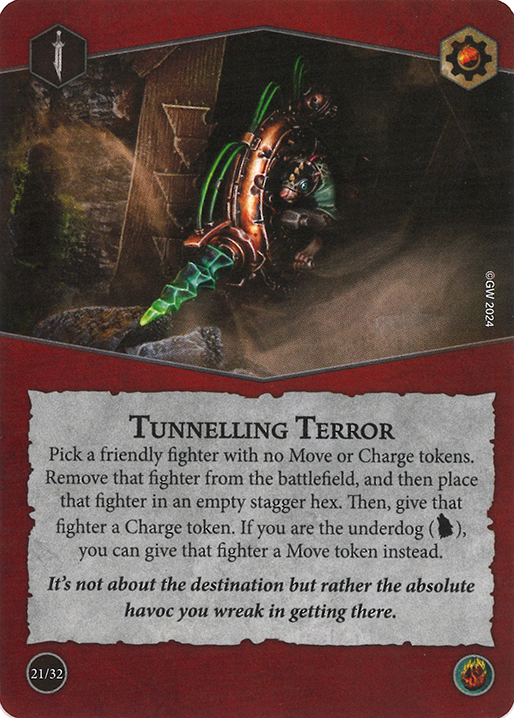
Michael: Tunnelling Terror + Bloody Momentum: Some insane synergy. Ever had those moments where you just couldn’t get a charge off? Well, Tunnelling Terror not only lets you get a charge token but also invade into enemy territory at the same time!
Trapped Cache + Aim for the Top: Same as Trapped Cache and Fields of Blood, but even better, as this card specifically focuses on enemy fighters. Turns out Aim for the Top is already trivial so it’s not necessarily needed but all good!
PnP/EotK
Canny Sapper + Hidden Traps: Ever wanted to do an aggressive Canny Sapper but were scared of getting punished? Well, now you can, as the enemy physically can’t charge you! Move tokens are very OP for this.
Trapped Cache + Calm before the Storm: Use Trapped Cache in order to ping the exact enemy fighter who is not adjacent to any other fighters to score Calm before the Storm.
PnP/RR
Crumbling Mine + Roused Violence: This is kind of cheating but since Roused Violence is basically Torn Landscape it only makes sense that the card that scores Torn Landscape also scores Roused Violence.
Pillage + Strip the Realm: So this isn’t confusing at all, but Pillage here is the card. Strip the Realm forces enemies to stand on treasures and Pillage punishes enemies for standing on treasures. Natural born synergy!
PnP/RS
Adrenaline Rush + Desolate Homeland: You can technically include any delve card here but Desolate usually requires 1-2 Delves so it has best synergy with Adrenaline Rush. Basically, you can Delve for the objective, and then remove your Stagger to get Save with no downside!
Brash Scout + Best Foot Forward: Maybe should have been in the RF section but basically Brash Scout gives you a reroll or two or three or four or five when in enemy territory, which is the same condition to hit an attack for Best Foot Forward, creating instant synergy!
PnP/DS
Another Swing + Hostile Takeover: You can potentially score Hostile Takeover in one turn with a good setup from Another Swing letting you make a second non-charge attack.
Battering Ram + Strip the Realm: One of the best ways to force Strip in the game, you simply attack an enemy while they are on a token and they can’t take it back without Overrun or Confusion!
Selfless Parry + Impossibly Quick: You can use Impossibly Quick ‘twice’ by using Selfless Parry and stealing the save of the fighter with Impossibly Quick. Then Impossibly Quick won’t get discarded!
PnP/HG
Mystical Misdirection + Broken Prospects: You can steal a token that an enemy is holding onto with their life to delve it for a free Broken Prospects. Obviously situational but do you really want to go drive back an Inspired United Wielder on guard?
Trapped Cache + Killing Blow: One can only be used on undamaged enemies and one only afffects damaged enemies. A literal match made in heaven for a +2 Damage.
CtC/WnR
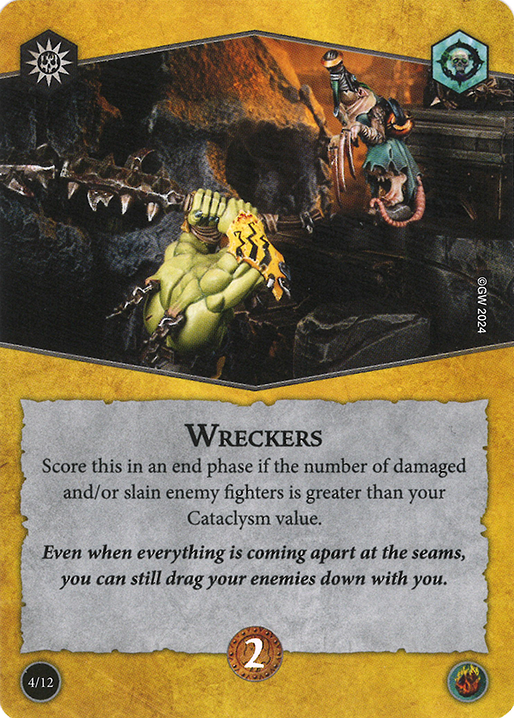
Wreckers + Fault Lines: One of the best ways to force Wreckers is through getting an undodgable ping on an enemy and Fault Lines is the (second) best way to do that in the game. Can’t skip it.
Burnt Out + Ploymaster: Ever had the case where you couldn’t play 3 Ploys? Well, Burnt Out lets you draw 2 or 3 cards to score it! (note to self – pray no one knows Focus exists)
Sundering Weapon + The Perfect Cut: Cleave + Roll no successes. Not much explanation required here.
Misfortune + Loaded for Bear: Misfortune lets you juggle the upgrade between fighters, which means you can score Loaded for Bear for a fighter having only 2 upgrades. On top of that it’s 0 glory!
CtC/RF
Improvised Attack + Catch Weapon: You can Catch Weapon yourself if you use an Improvised Attack (or any attack but still). Useful if you ran out of Braced and Headcase!
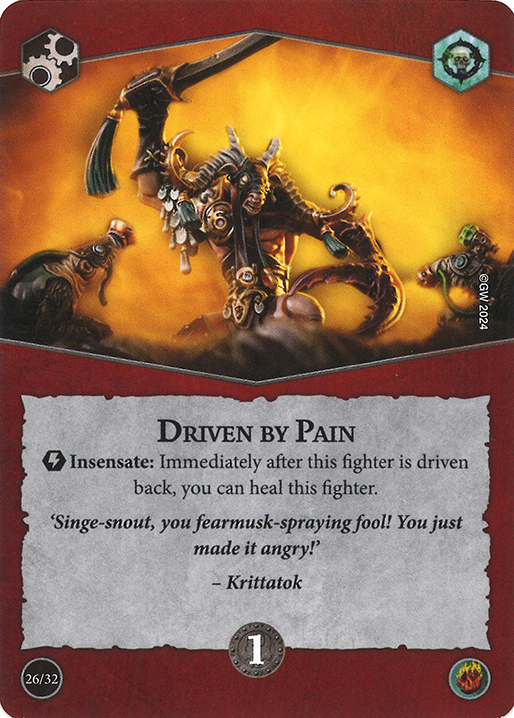
Sally Forth + Driven By Pain: Enemies already don’t really consider you a hold deck so they probably won’t drive you back while you have Driven by Pain, allowing for a free Sally Forth scoring.
CtC/EotK
Aggressive Defender + Improvised Attack: Ever been out of range for Aggressive Defender to attack from a token? Improvised Attack helps mitigate this! Just attack from a treasure with Improv Attack and boom – easy glory.
Counter-charge + Sneak into Position/Power in Numbers: Edge has TWO surges for being next to enemies (and one end phase about being away from them but ok) and CtC has the best way in the game to set that up. Namely, Counter-charge! Simply Countercharge and pray they miss the attack and driveback for an easy glory or two.
CtC/RR
Manipulated Fate + Shocking Assault: What better way to score Shocking Assault then becoming undrivebackable? Manipulated Fate does that as a surprise, so you can even keep the card if it wasn’t necessary!
Desperate Rage + Brightstone Vigour: Brightstone Vigour requires high damage attacks in order to function, with three damage all but guaranteeing the heal. Desperate Rage both gives you that attack and guarantees that you have damage to heal.
CtC/RS
Best Foot Forward + Improvised Attack: Missed your first attack for Best Foot Forward? Never fear, Improvised Attack is here for a follow up that can also score you the surge!
Overwhelming Presence + Violent Blast: A displacement tool to get enemies off tokens to score your card that reads ‘no one hold tokens’ is an old trick but very reliable.
CtC/DS
Improvised Attack + Tag Team: You can use Improvised Attack before charging to score Tag Team for some pretty easy glory.
Inevitable Outcome + Counter-charge: Similar to the EotK stuff, you Countercharge to score an easy card for 1 glory by having two adjacent fighters. It also unites for some nice Save buff!
Desperate Rage + Brother in Arms: As worded, you can borrow Desperate Rage and attack with it without actually taking damage. Even if I misinterpreted the rules text it’s still a strong combo to borrow someone’s Desperate Rage.
CtC/HG
Pinned + Improvised Attack: Saving the best for last, this combo lets you score Pinned out of sequence, which always comes as surprise to your opponent who believed that in their last activation they may finally be able to move safely. Nope!
Lead by Example + Improvised Attack: Yet another attack combo, you can score Lead by Example very easily if you just use Improv Attack as one of your two attacks.
And that’s actually it! A pretty boring article today, sorry about that, but nonetheless I hope you found it helpful! With that, thanks for reading. If you enjoyed the article or just want to chat with us, join the Staggerers team as well as a large community of Underworld-ers on the Staggerers Discord Server (which just hit 100 members!), and I hope to see you again soon! 🙂
